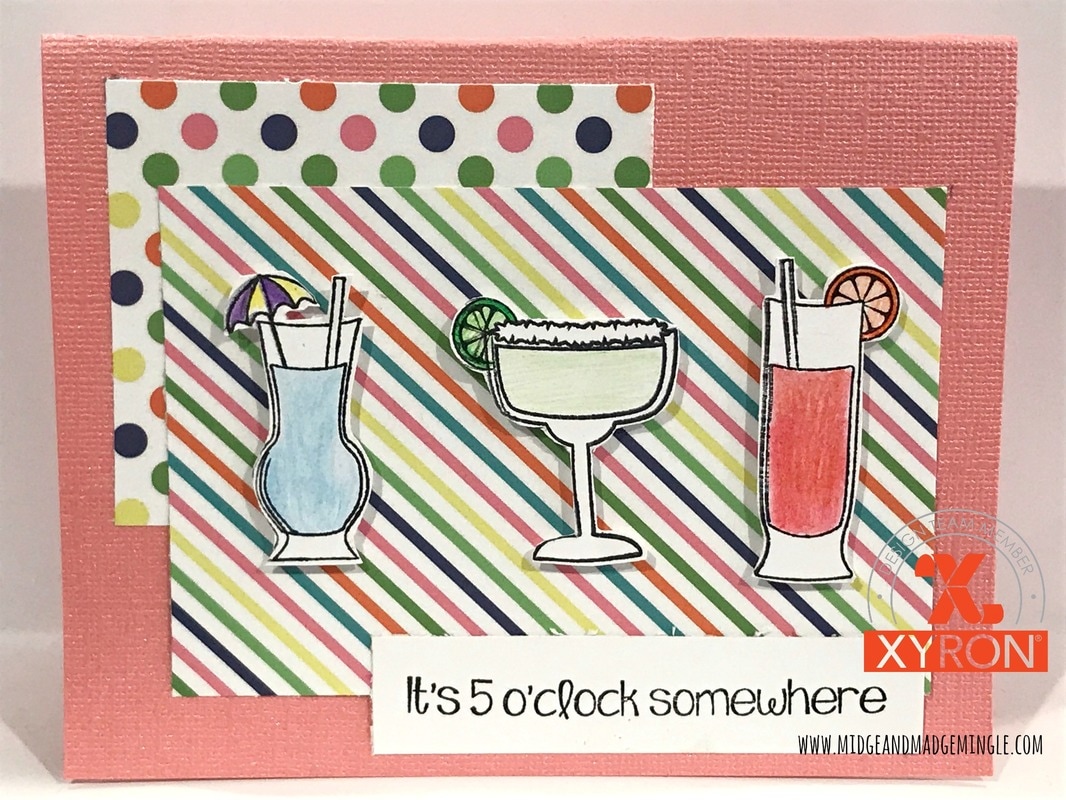
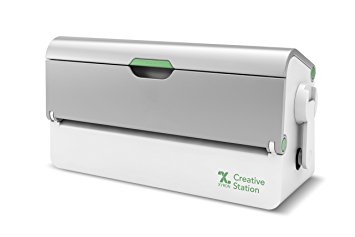
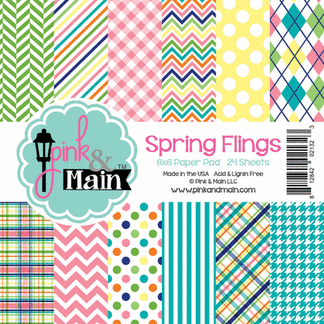
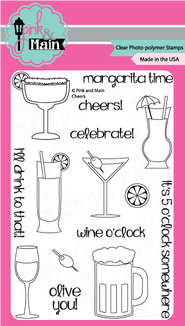
It's a party withXyron and Pink & Main this week!! We have a fantastic idea for your next GNO! Grab the Pink & Main Spring Flings 6x6 Paper stack along with the Cheers stamp set. Pull out your Xryon Creative Station with the Laminate Refill and the Laminate and Adhesive refill. You are now all set to create this fun party! Watch video below (recorded live) and we will show you how.
Here are the products that you will need to create this fun GNO party!!
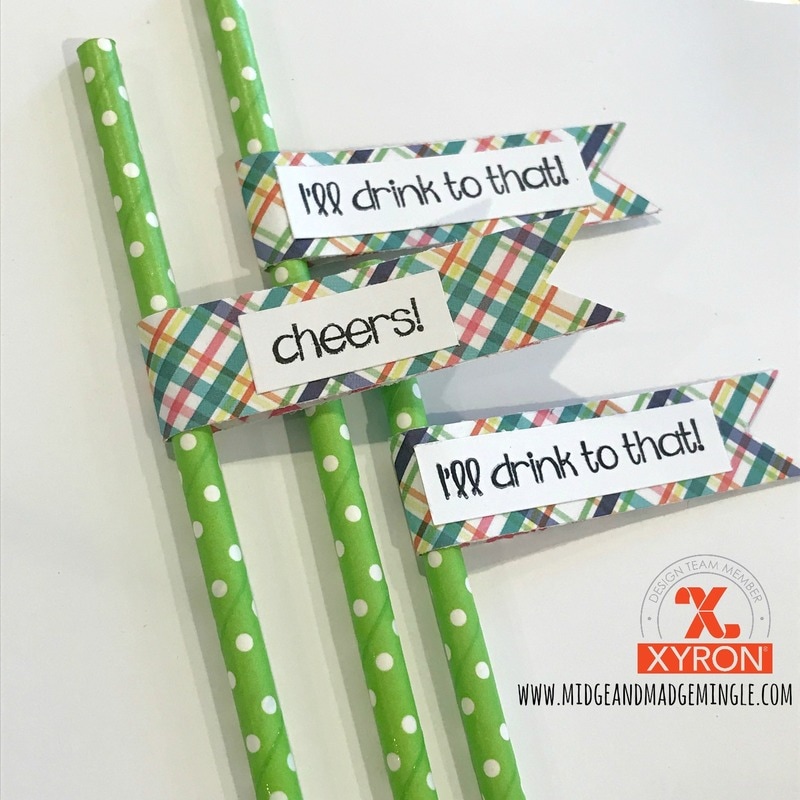
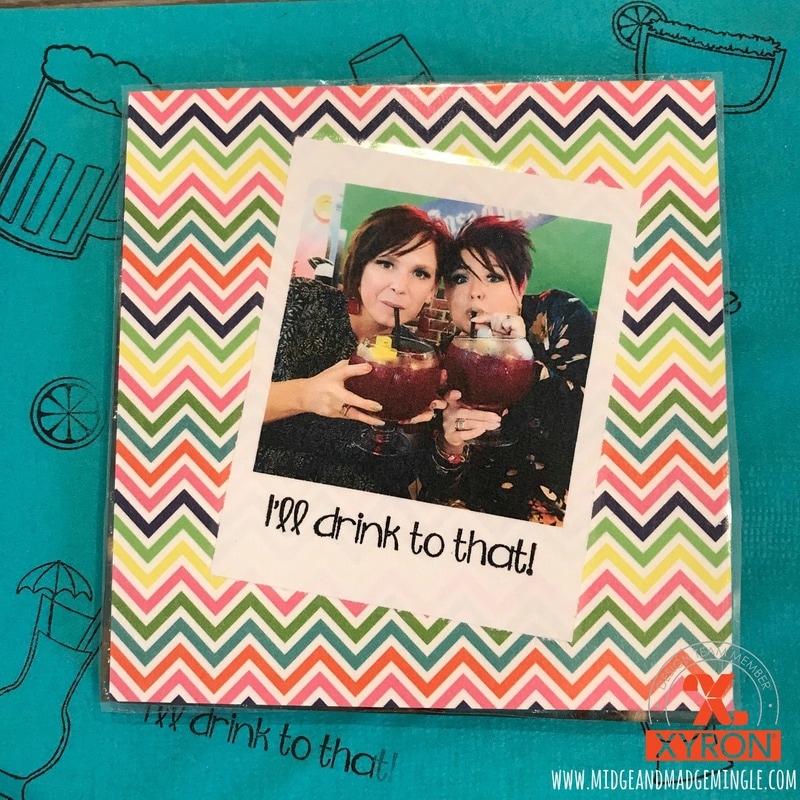
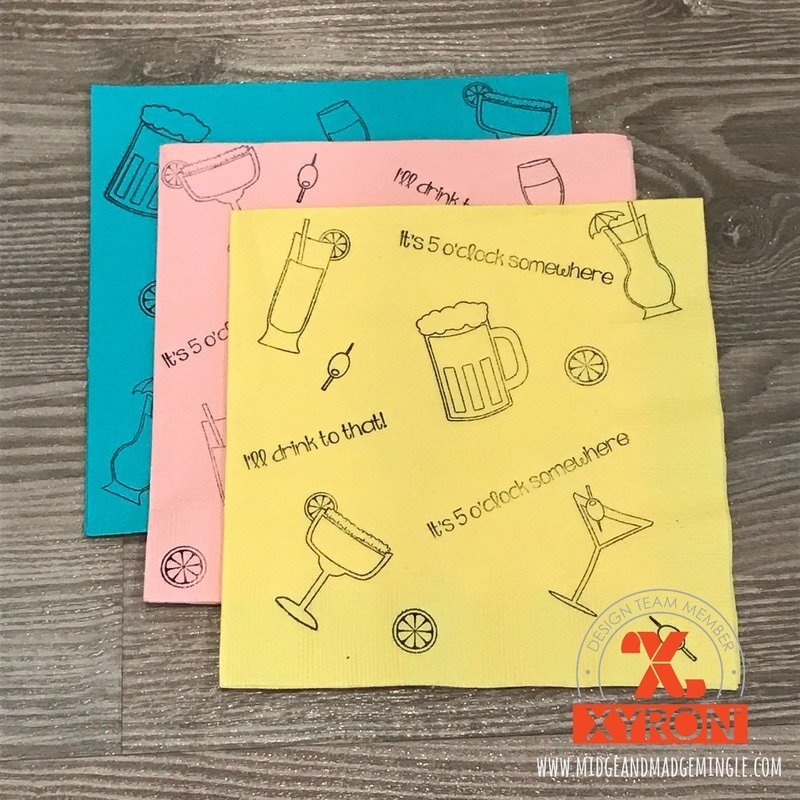
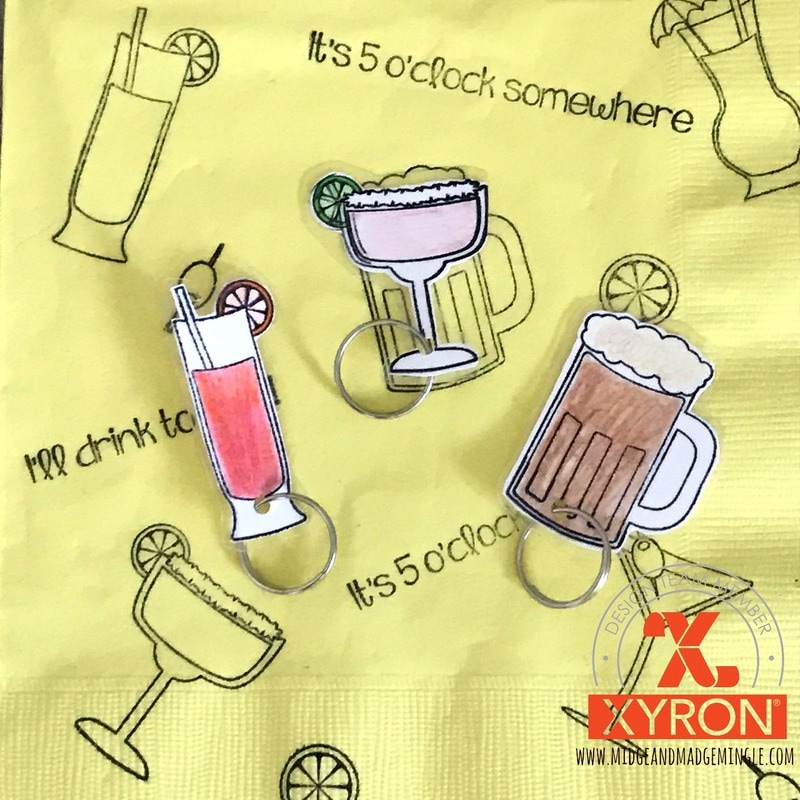
Here are the close ups of our projects! We hope that you like them. Let us know if you have any questions!!!
This is a sponsored post with Xyron and Pink & Main. All opinions and ideas are our own.
0 Comments
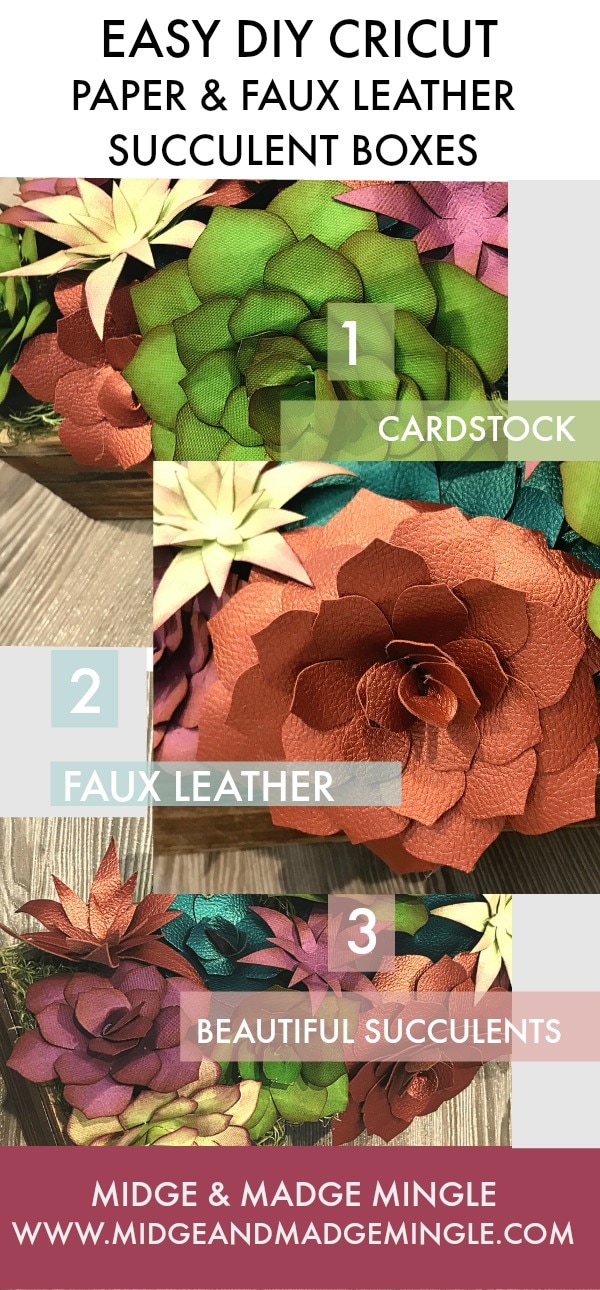
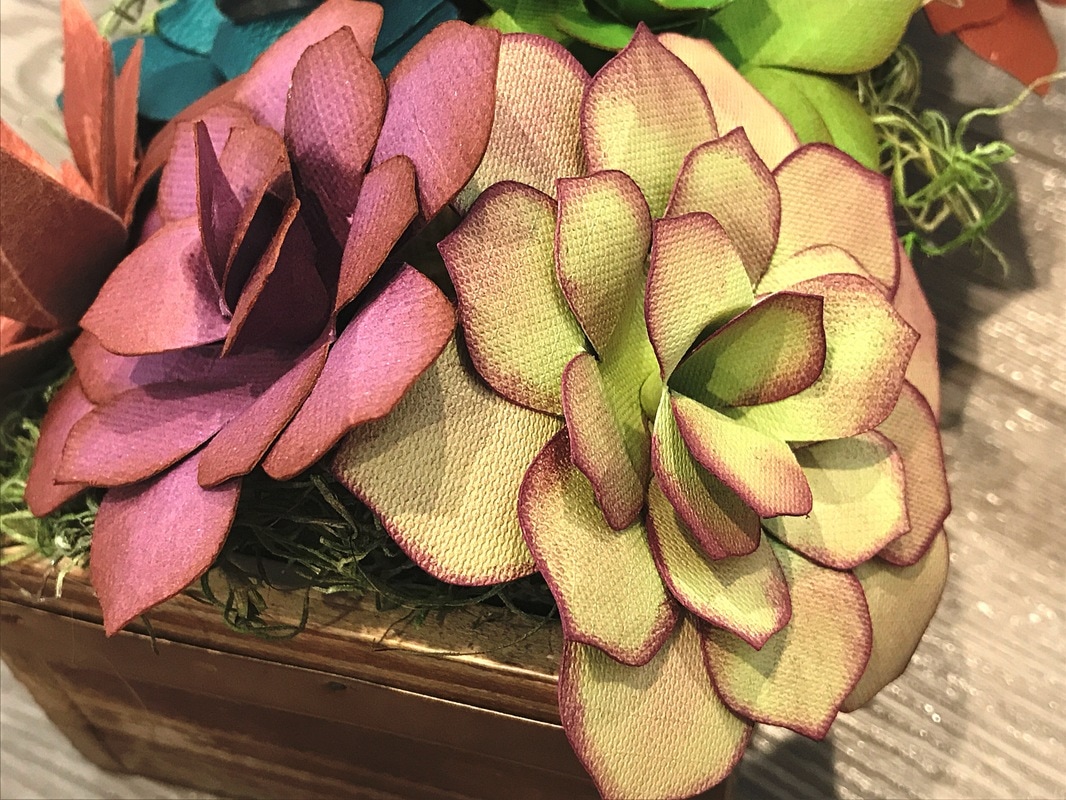
,We are so excited about today's project! Succulents! Yes, you heard us right we said succulents! We all know that they are one of the latest trends. You see them everywhere now. And believe us when we tell you that they are also one of the hottest trends for wedding decor! Madge's daughter recently married, and we created these fun succulent centerpieces for the wedding celebration that will be happening next week.
Cricut has made it easy, so easy in fact that there is a "Make it Now" project in Cricut Design space that we used and tweaked it just a little to make it into this fabulous Succulent Centerpiece. You are only going to need a few items. *Cricut Cardstock (in the colors of your choice) *Cricut Explore Air 2 Machine *Cricut Faux Leather *Cricut Scoring Stylus *Adhesive *Distress ink (brown or purple) *wooden box *optional- rocks and moss Below it the "HOW TO" video. In this video Madge shows you how to create this project in Cricut Design Space and Midge shows you how to put the project together! What are you waiting for? Go grab your favorite beverage, kick up your feet and watch this fun tutorial! Here is the "Make it Now" Link
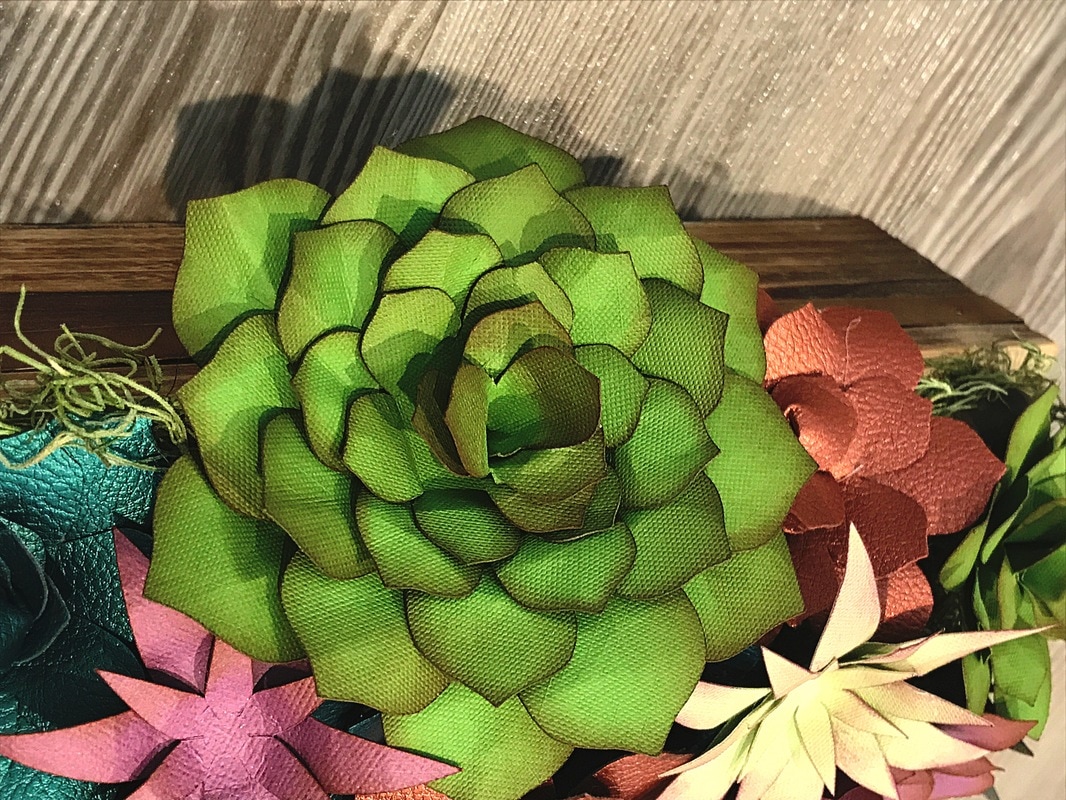
So, what did you think? Are you ready to run out and create your own succulent planter box? Oh, sad you need the supplies to get started? Click HERE to get your supplies. Below we have some close up photos of these fun boxes. Please be sure to leave a comment, also don't hesitate to ask if you have any questions!
You can see in these two photos how much of a difference that using a little ink around the tips of the succulents adds. Remember if you take the time to add the little things, your projects will come to life! Looking like real succulents.
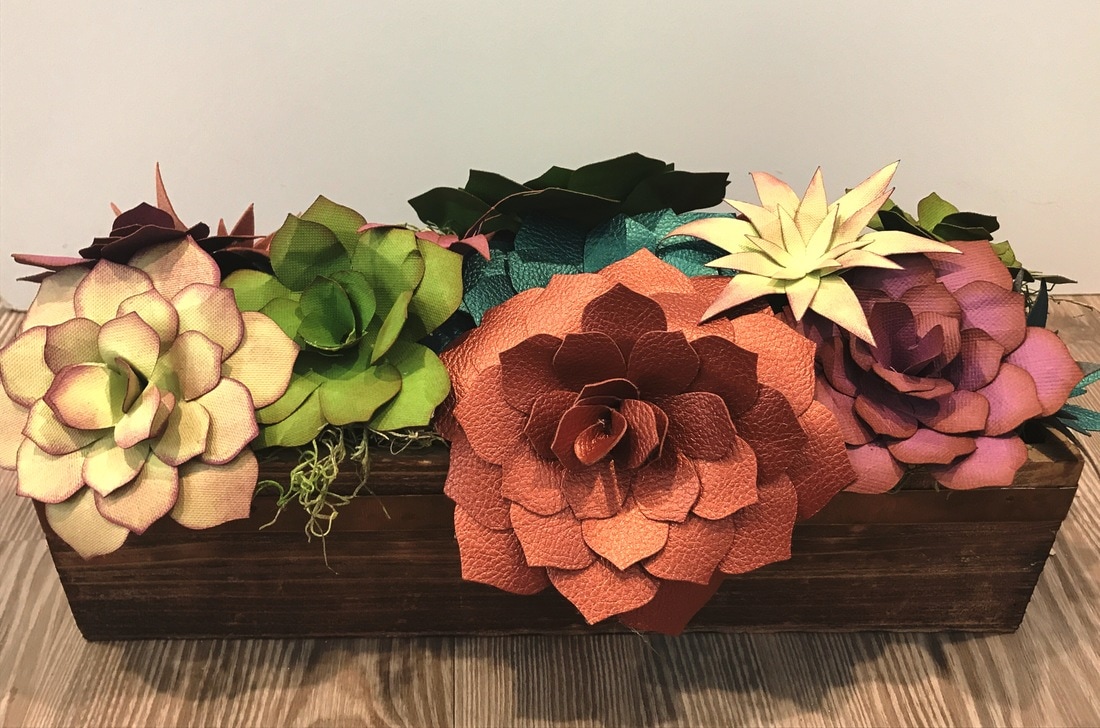
We hope that you enjoyed this fun project! Be sure to grab yourself some Faux Leather and cut some succulents on your Cricut Explore Air 2 Machine today!
This is a sponsored conversation written by me on behalf of Cricut. The opinions and text are all mine. 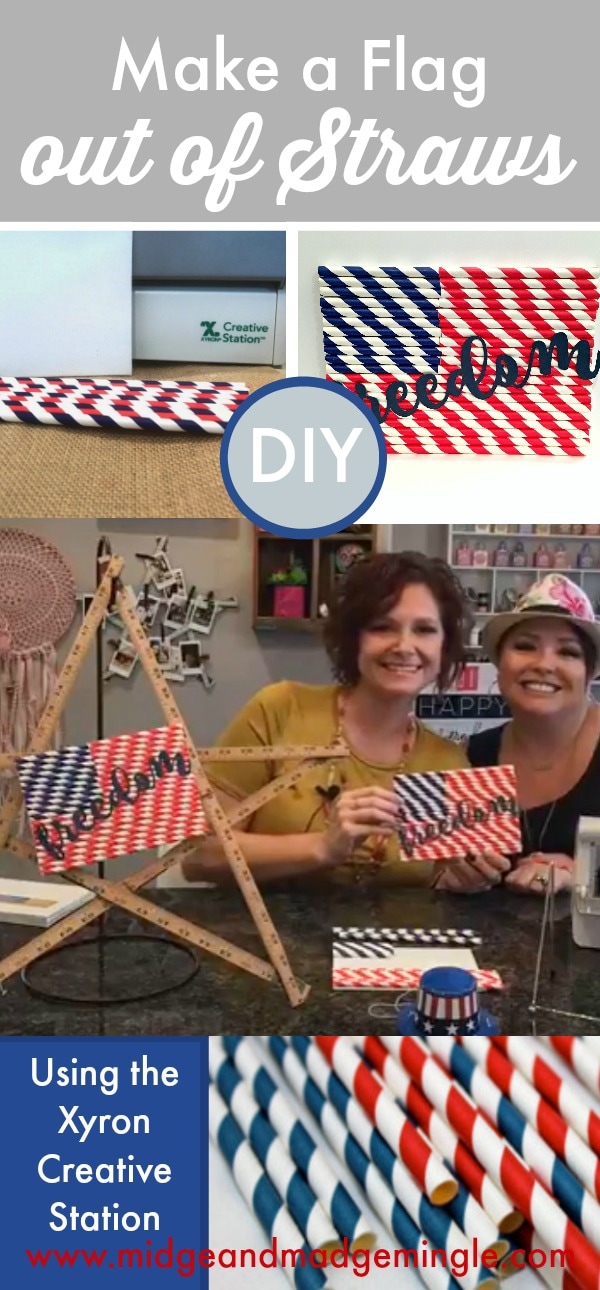
Today it is all about Summer and Celebrating Independence Day! We created this super fun flag using Dollar Store Straws (red and blue) a 5x7 Canvas, Scissors, and the Xyron Creative Station! Yes it is just that easy friends! Check out our video (pre-recorded Live) below and watch how easy it is to make this fun flags.
What did you guys think? Super fun and easy right? There are so many different uses for these cute flags. Name cards at that family BBQ, a fun Kid Craft to do with your kids, grandkids, nieces and nephews! The perfect Home decor piece for your home.
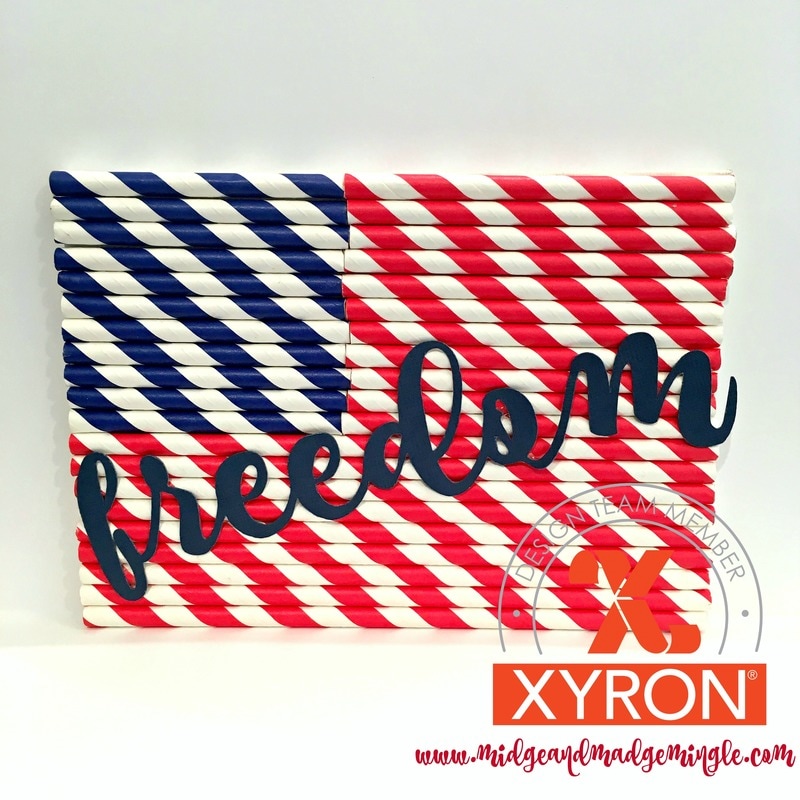
(Quick instructions on how many straws and what size to cut the straws if you are using a 5x7 flat canvas
* Blue Straws- Qty- 11 cut at 3" * Red Straws- Qty- 11 cut at 4" * Red Straws- Qty- 9 cut at 7" We created the Freedom Cut out on our Cricut using Pic Monkey (font Coffee Break) and uploading our image into design space. You can get the image here and upload it into design space. We then cut it 4x6 and cut it out of blue cardstock. We then used the Xyron Creative Station to attach the freedom on the front of the flag. We hope that you liked today's project using the Xyron Creative Station. This is a sponsored post, all opinions and ideas are our own. |

Midge & MadgeTwo Best Friends doing what they love and loving what they do. Learn more about us in the About Us tab above.  

Archives
October 2019
Categories
|
 RSS Feed
