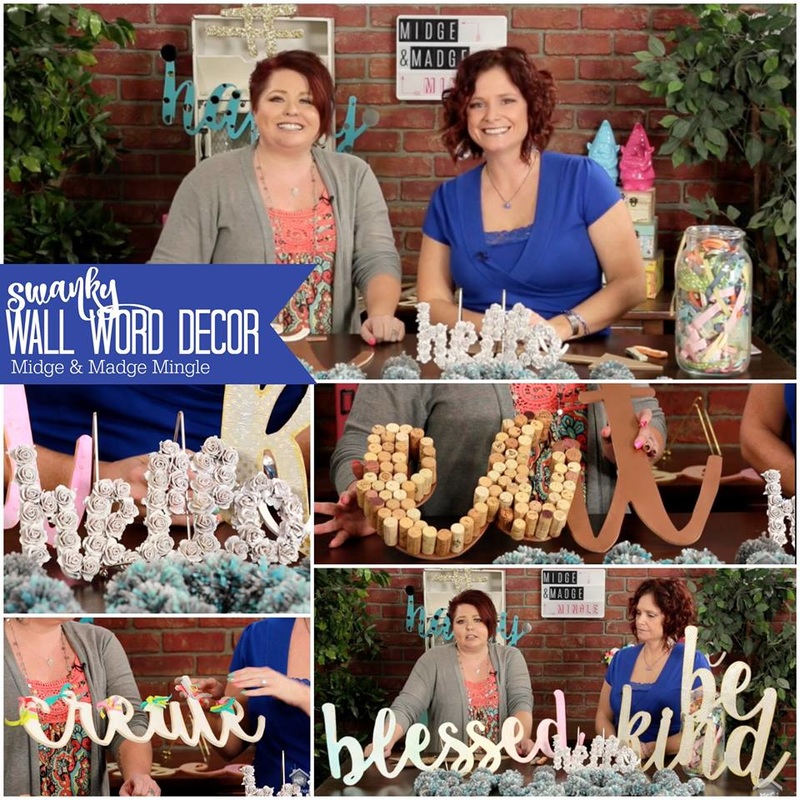
 Impressions Shop has a variety of hip wall words, sayings, and symbols. Join us as we share a few unique ways to dress up your “Impressions”. But first we want to give a big shout out towww.impressionsshop.com for providing us with their wood products to play with. Go over and order some for yourself today! Before we dig deep into each and every project (WARNING: this is a long post with many pictures) be sure to watch our mingle below! Let's get started with a little instruction on each of these fabulous words, arrows and hashtag! 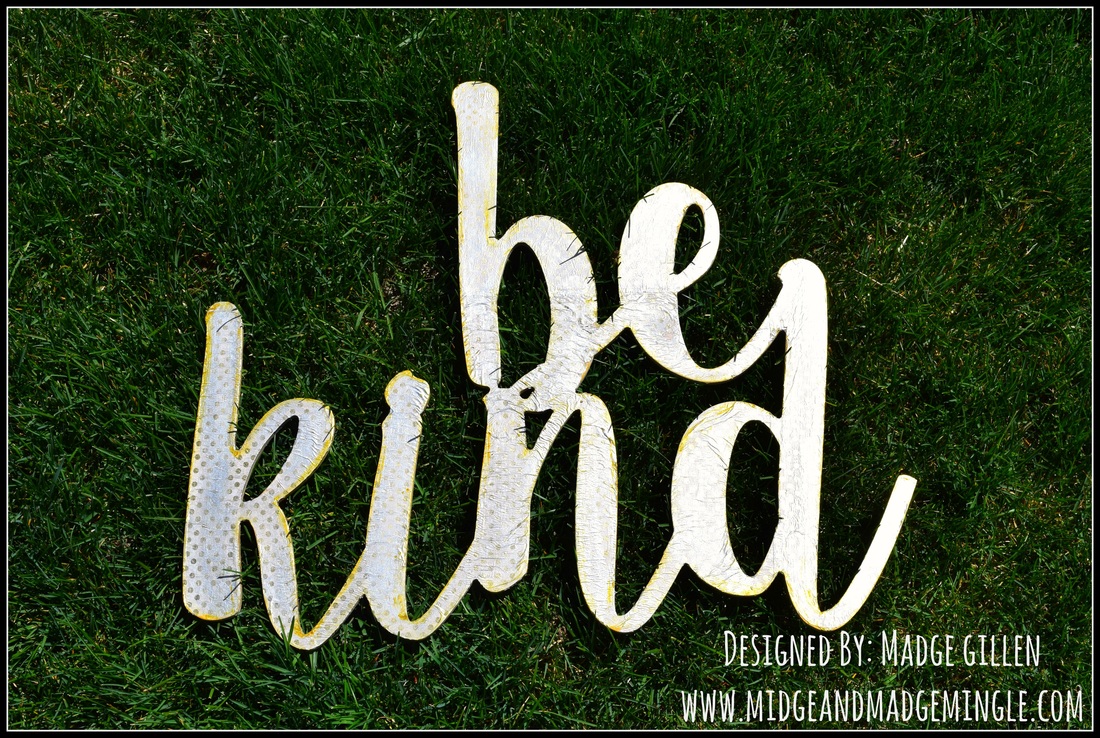 Tissue Paper- You will need tissue paper, Mod Podge and a paint brush, and some Tim Holtz Distress Paint (I used Gold) Start with a full sheet of Tissue paper (if you want to keep the pattern) and start at one end of the word and paint with the Mod Podge and laying the tissue paper down smoothing it out as you go. When you run out of tissue paper just align the tissue paper and start again. Allow it to dry and take a craft knife to cut off the excess tissue paper. Add your paint and Bam! Your word is ready to be hung. - Madge 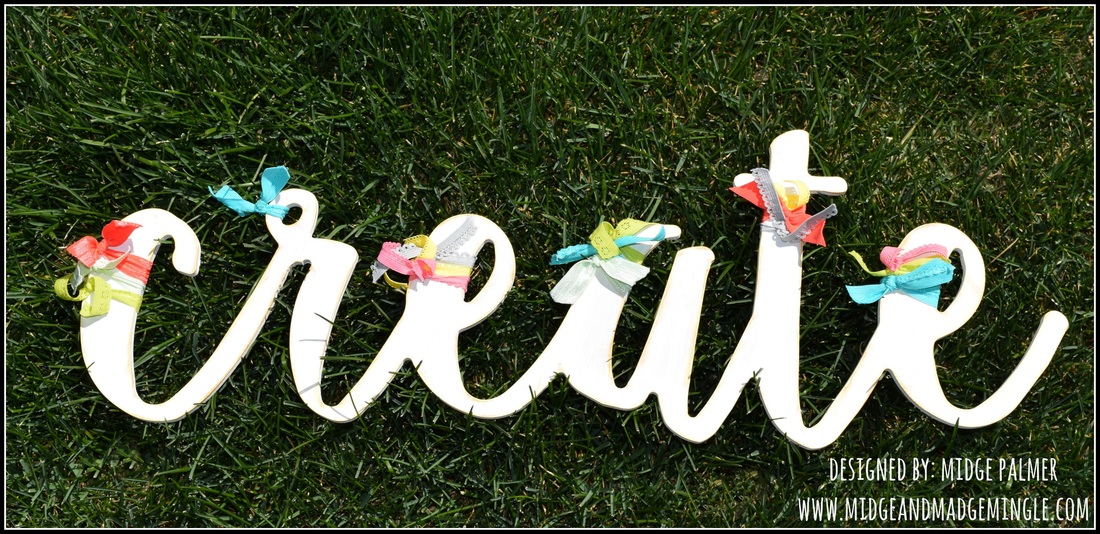 Create- Midge- used acrylic paint and a sponge brush to cover wood. She did a light coat and wanted to leave brush strokes to give a more aged look. When paint was dry, she used distress ink to darken/age all the edges of the word. After that she cut strips of different colors of elastic (you could use ribbon, fabric or whatever you want.) and tied it in knots around the letters at different intervals. You could add as much or as little as you like. This one is so simple but has a really fun look! 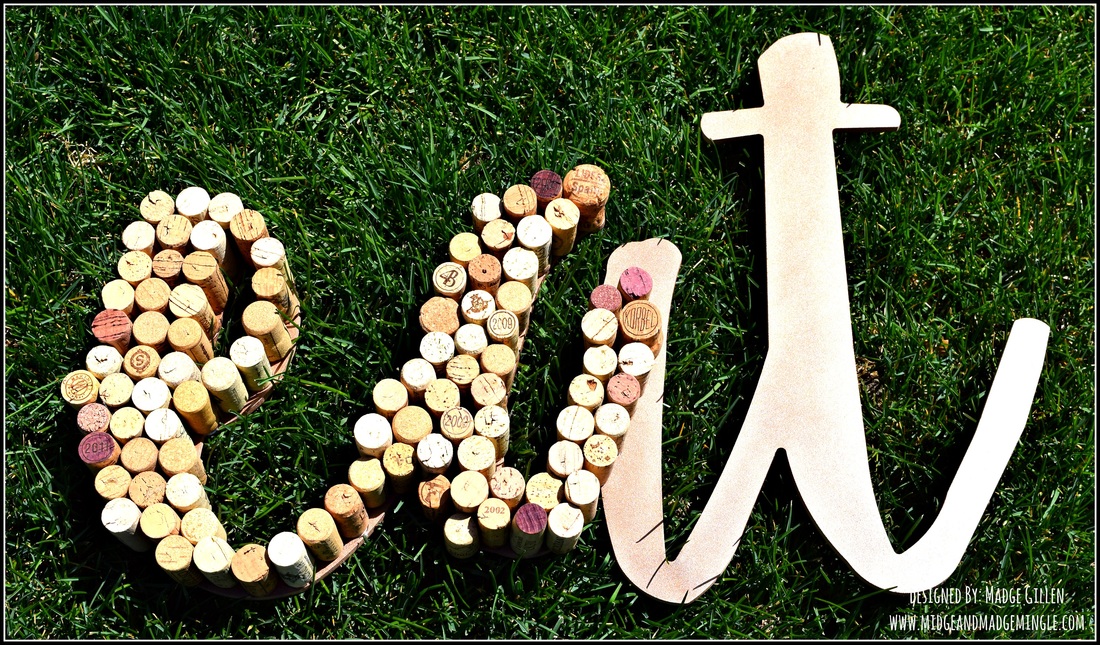 Corkscrews- Spray paint your word first. (This helps when you have little holes where the corks touch to show that this isd a completed word. This technique takes a lot more corks than you realize. I ordered mine from Amazon, however, if you are a wine drinker than save your corks! (LOL) I plugged in my hot glue gun and glued them to my letters. - Madge 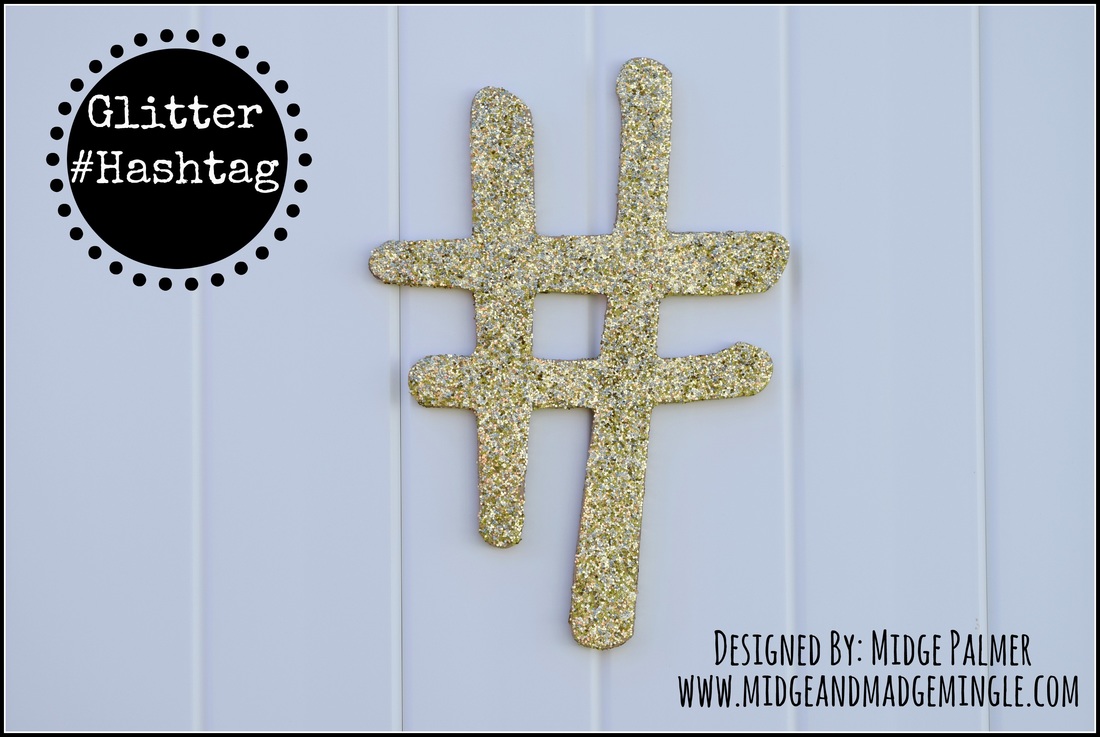 Glittered Hashtag- Using a sponge brush, paint a fairly heavy coat of Mod Podge, Decoupage, Glitter Glue, or whatever is your favorite glitter adhesive, over entire piece. Then, generously cover with glitter. Apply pressure to set glitter. When dry, shake off excess glitter and spray with clear lacquer. -Midge 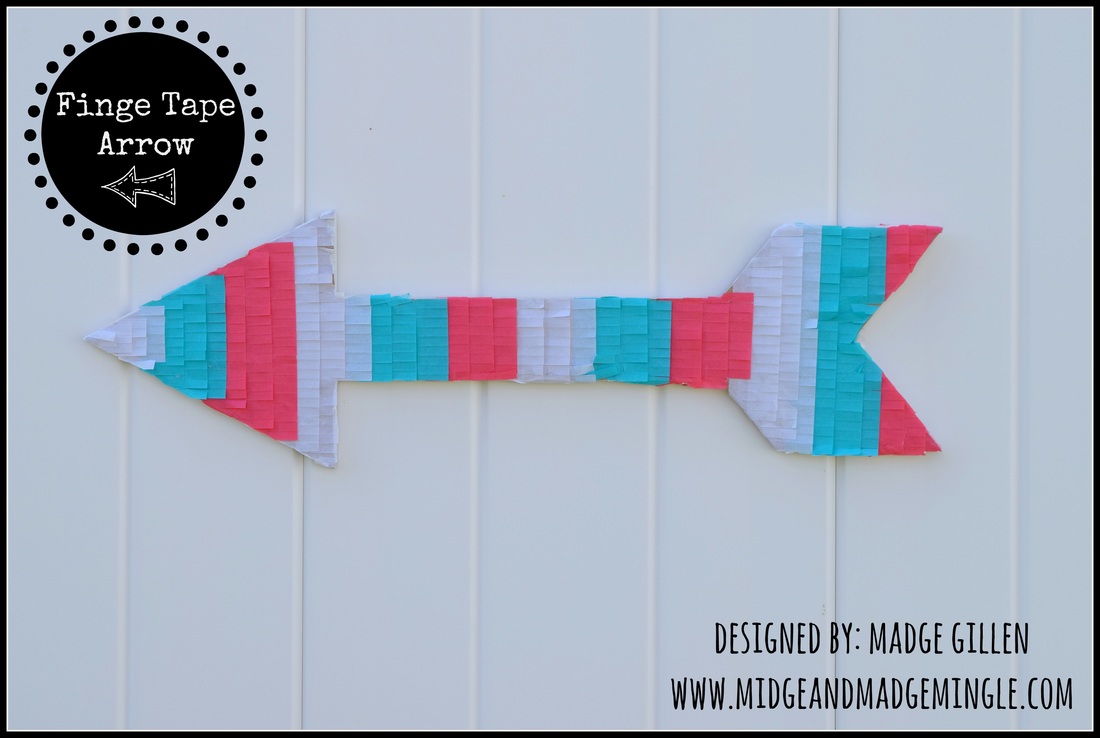 Fringe Tape- This is a super fun technique. I painted my arrow first with white acrylic paint. I then took my fringe tape (I got it from We R Memory Keepers) I used three different colors and layered them as I went. The fringe tape is self adhering. - Madge 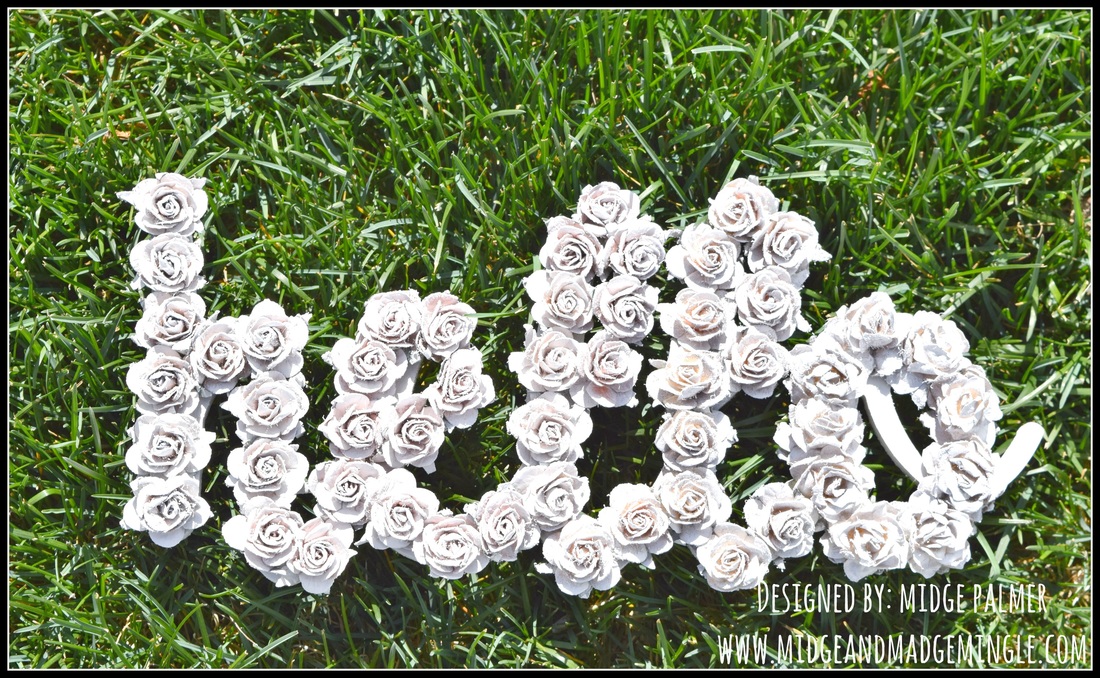 Hello...can you hear me? LOL--This little word was super simple. I found some paper flowers from my craft stash and glued them to the word. (I didn’t have enough to do all the same color, so I used what I had.) After they were glued on, I sprayed a light coat of brown spray paint over the entire thing. When that was dry, I did a heavy coat of white spray paint, making sure to get the edges of the wood. That’s it! - Midge 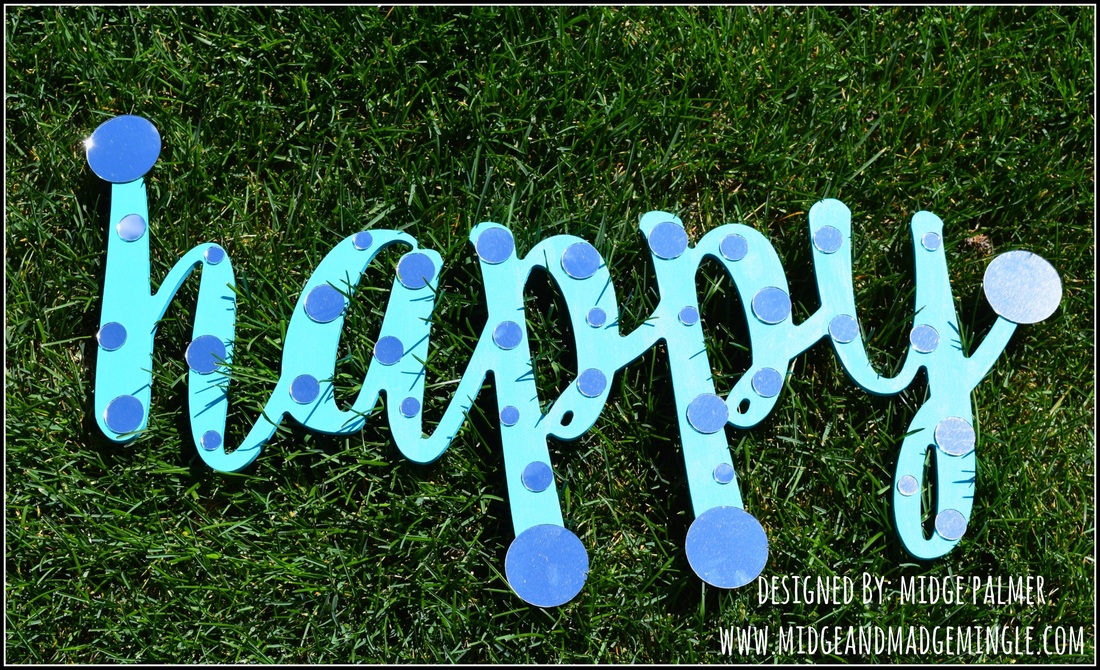 Happy- 2 steps to “Happy” 1-Paint the word (of course I chose something in the turquoise family) 2-Hot glue different sized mirror circles all of the word! (They can be found at about any craft store.) Easy Peasy right!!! I’m sure there are lots of ways to polka dot your words, but this is one of my faves!!! - Midge 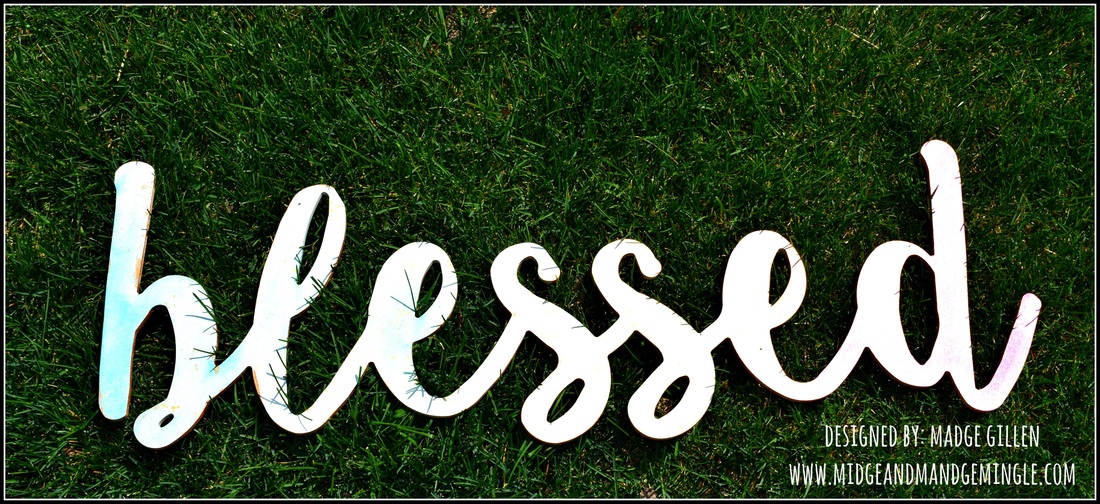 Blessed- I painted this with gesso and allowed it to dry. I then took my watercolors and created this fun watercolor technique. The more water the more the watercolor effect, the less water the less watercolor effect. After it was dry, I painted the edges with some bronze acrylic paint. - Madge 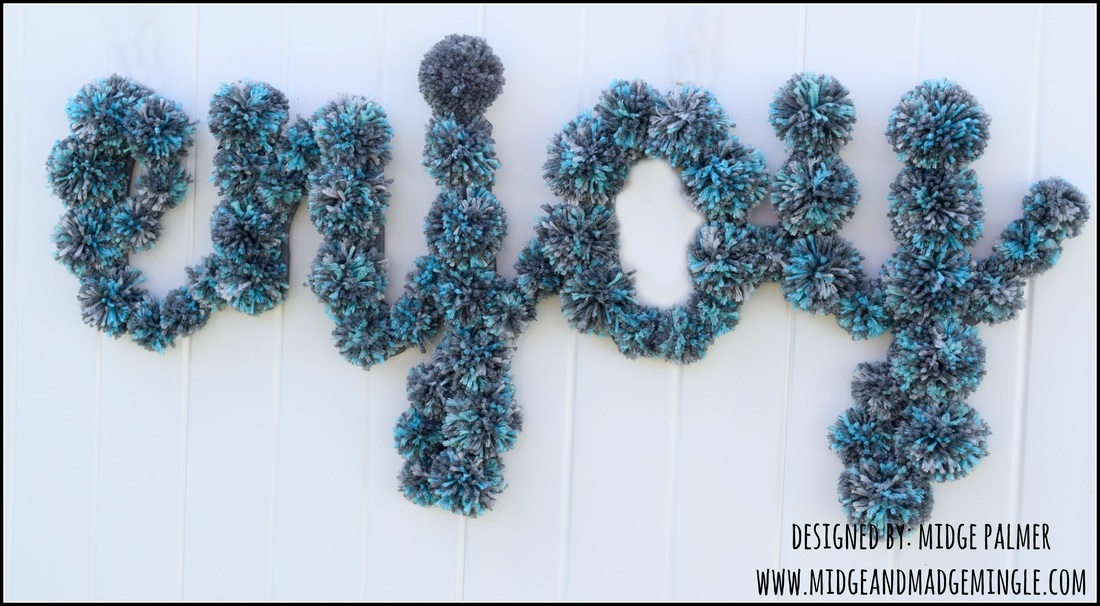 Enjoy- For this word, I simply painted the entire thing with gray spray paint. Using the We R Memory Keepers pompom makers, I made LOADS of pompoms! I used the large and small sized pompom makers. For each pompom I used both variegated and solid gray yarn. I arranged the pompoms on top of the painted “enjoy” how I wanted them and simply hot glued them on. Wah-Lah! - Midge 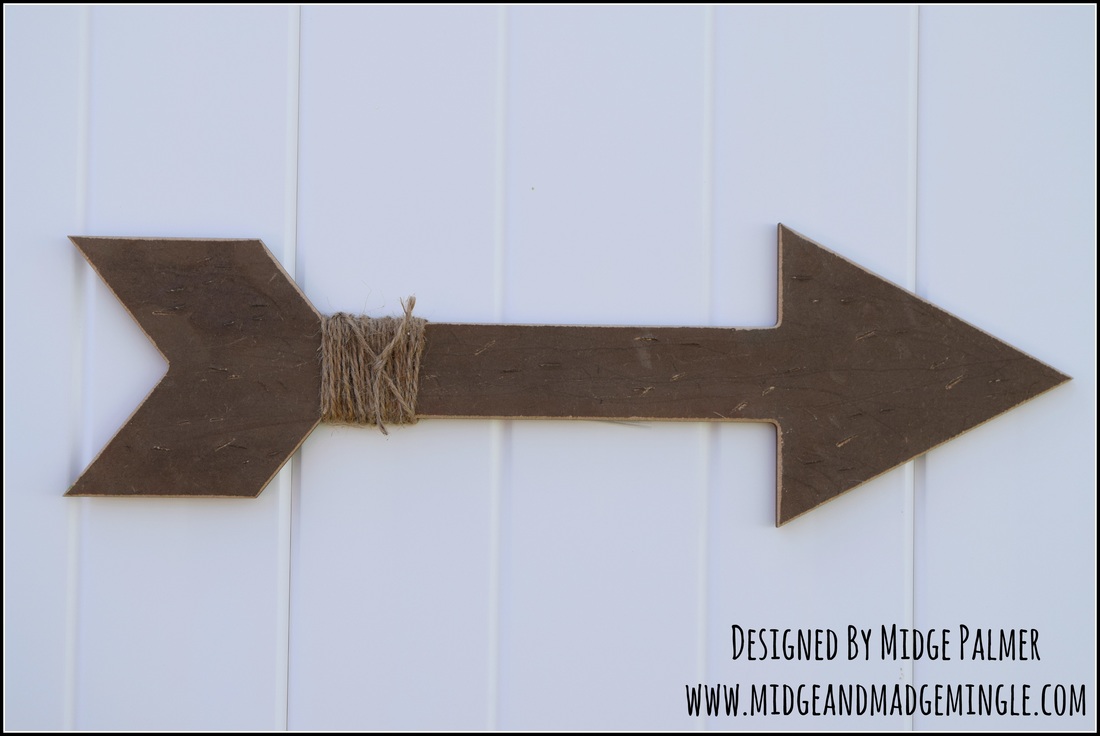 Old Fashioned Stained Arrow- Beat it! Hit the arrow multiple times with a hammer, pliers, rocks, whatever gets the aggression out! Using scissors, I also scratched long lines into the wood. (I wish I would have done more of these) Then Using your favorite stain, (I used a mixture of white vinegar and steel wool, which gives the wood an aged look) cover wood. Allow to dry and embellish to your hearts content. I wanted to keep it simple, so I just wrapped a little jute around the base and tied a knot. - Midge GIVEAWAY TIME!!!!!!
Go our our Pinterest page Midge and Madge Mingle, follow us and Re-pin your favorite project from the show to be entered to win a $25 gift card to Impressions Shop! Be sure to check out all of our adventures at #midgeandmadgeadventures
1 Comment
Rhonda Ratliff
5/3/2016 04:19:29 pm
I repinned my favs.... although, I love them all!!! ;) Leave a Reply. |

Midge & MadgeTwo Best Friends doing what they love and loving what they do. Learn more about us in the About Us tab above.  

Archives
October 2019
Categories
|
 RSS Feed
