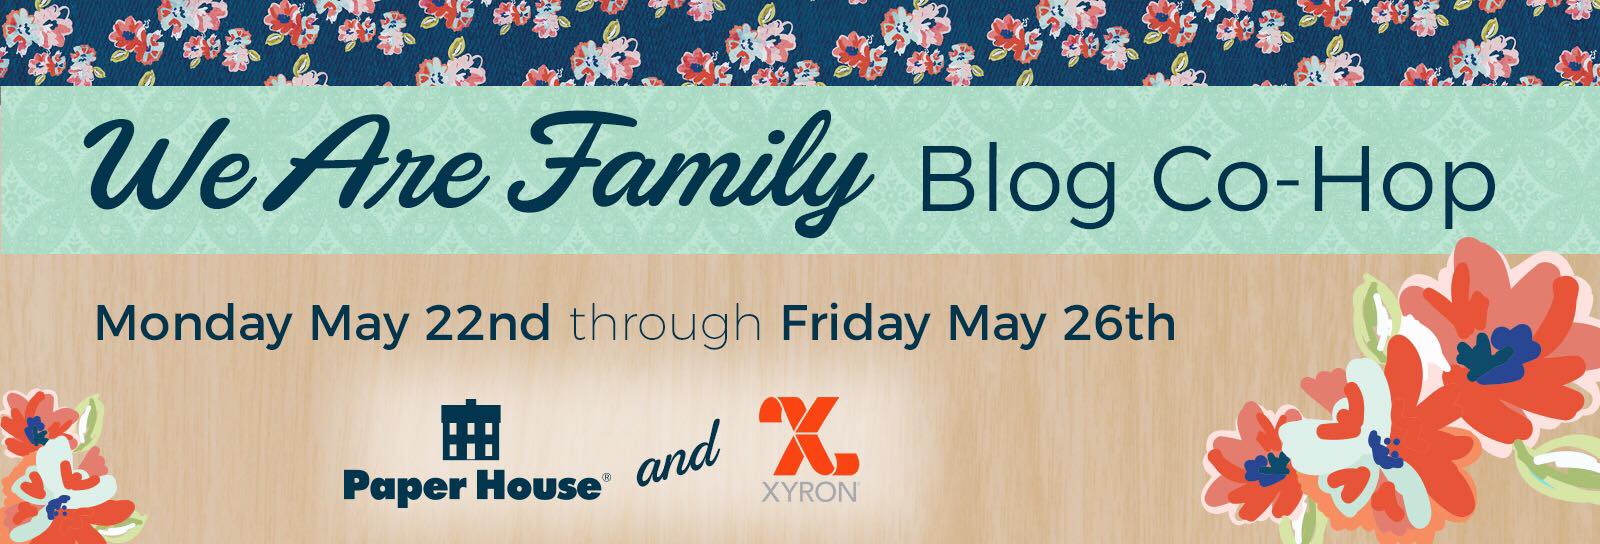
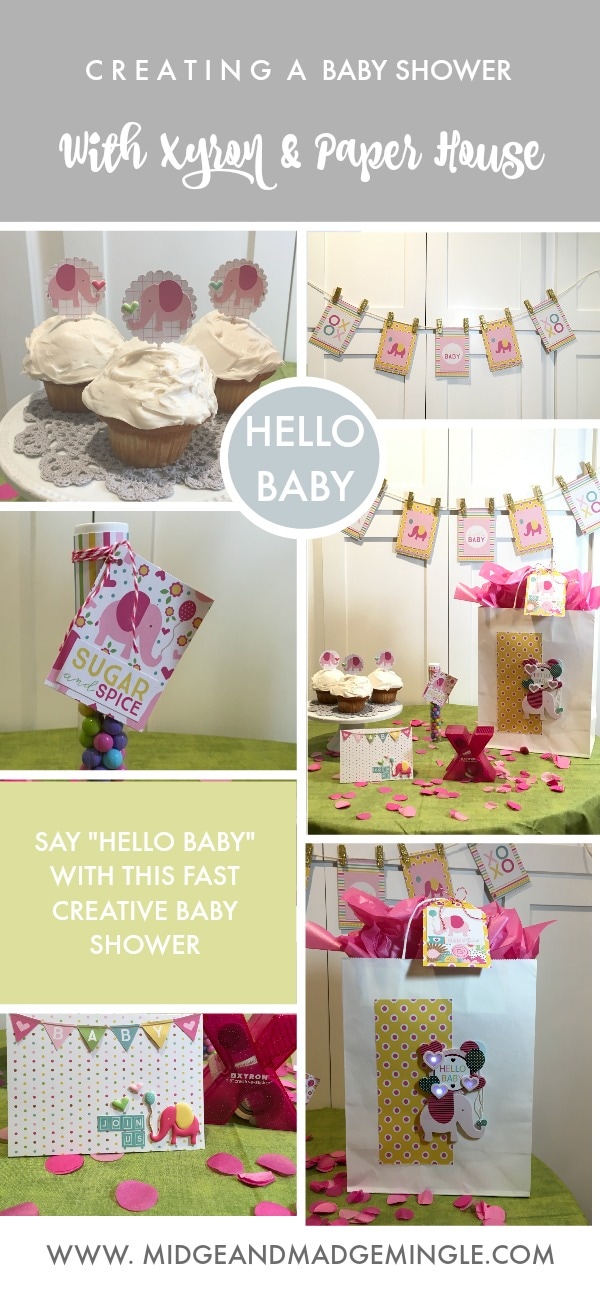
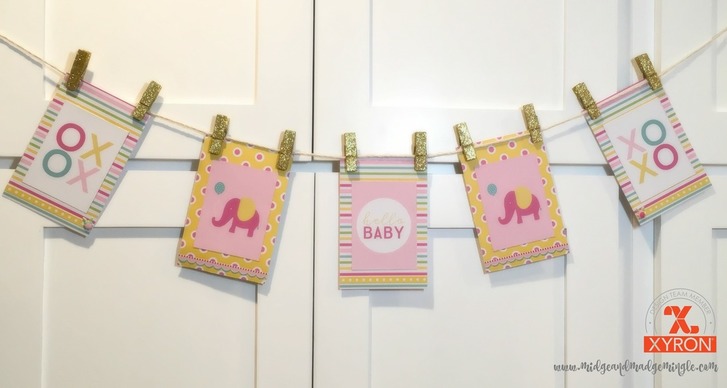
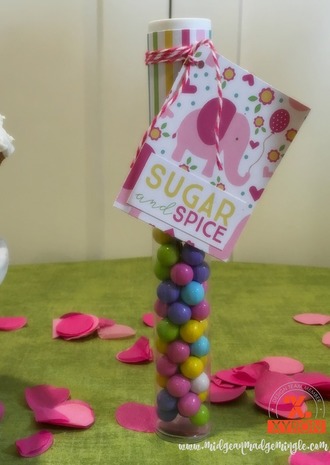
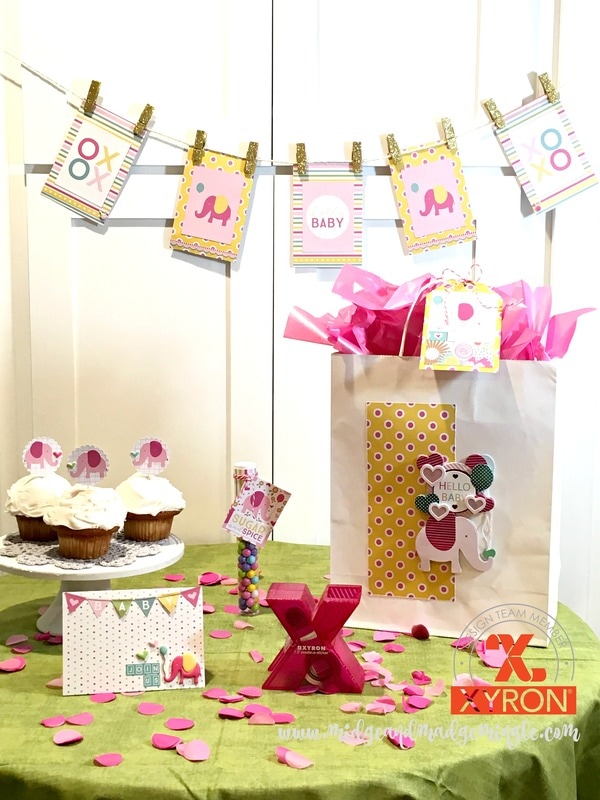
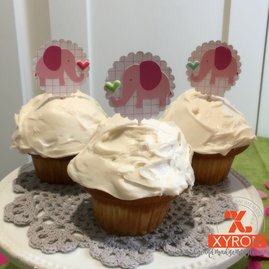
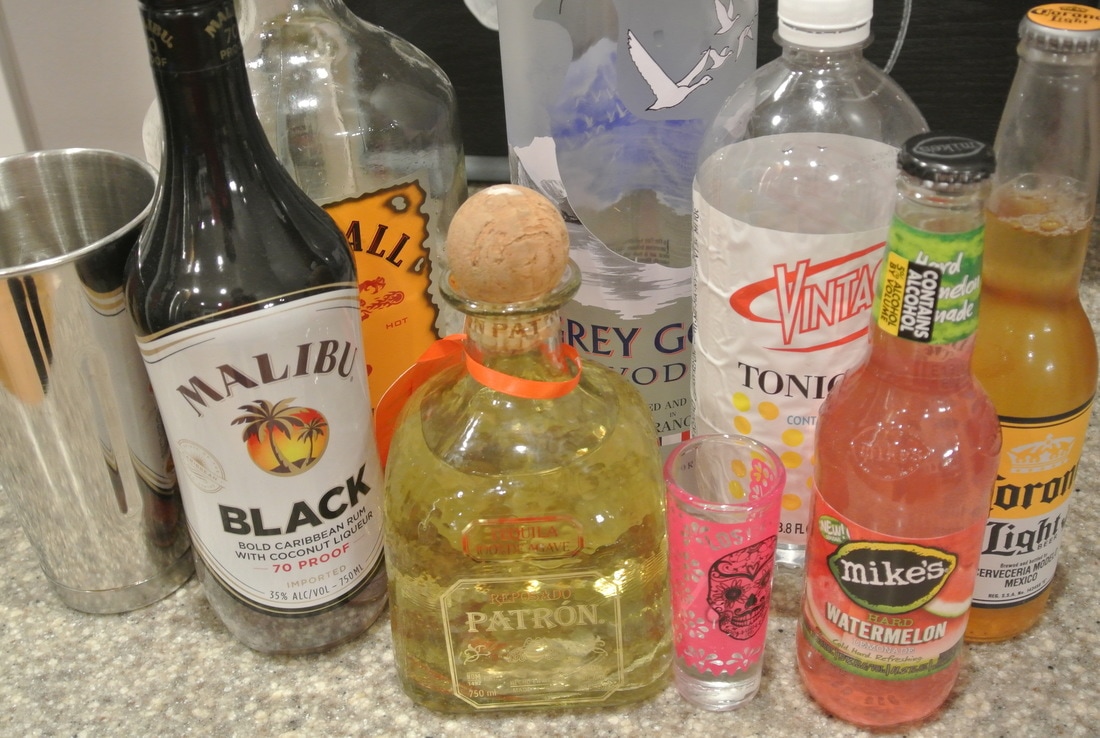
We are super excited about this fun "We are Family" Blog Co-Hop with Paper House and Xyron. We created a whole baby shower using the Paper House Hello Baby Collection, along with the Xyron Mega Runner, Xyron 1.5 Create a Sticker Maker, and the Create a Sticker Max 5". Here is a sneak peak of the fun shower that we created. Be sure to check out our LIVE FB Mingle at 11:00am MST to get instructions and see the full party! Video will be posted here after Live Broadcast.
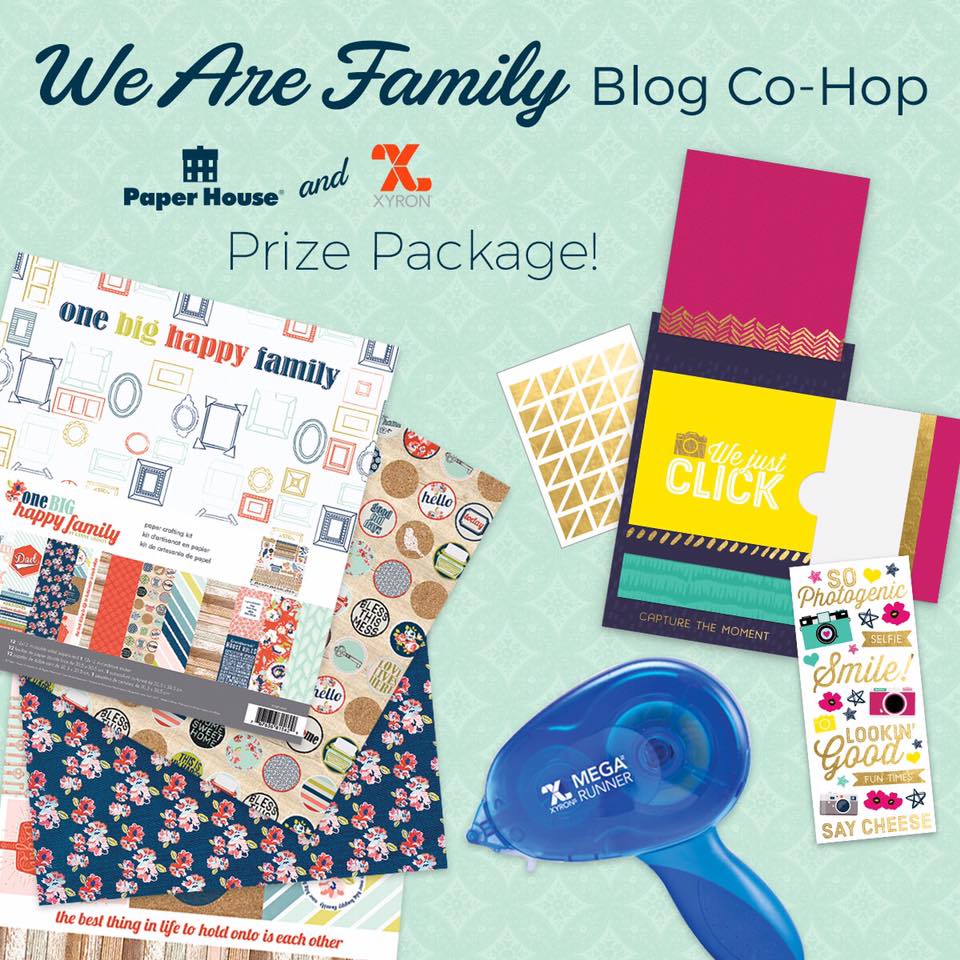
What about a Giveaway??? Xyron is giving away a prize pack on their Facebook page and Paper House has one on their blog! Check ouy XyronHERE and Paper House HERE
This is a sponsored post with Xyron and Paper House. All opinions and ideas are our own.
0 Comments
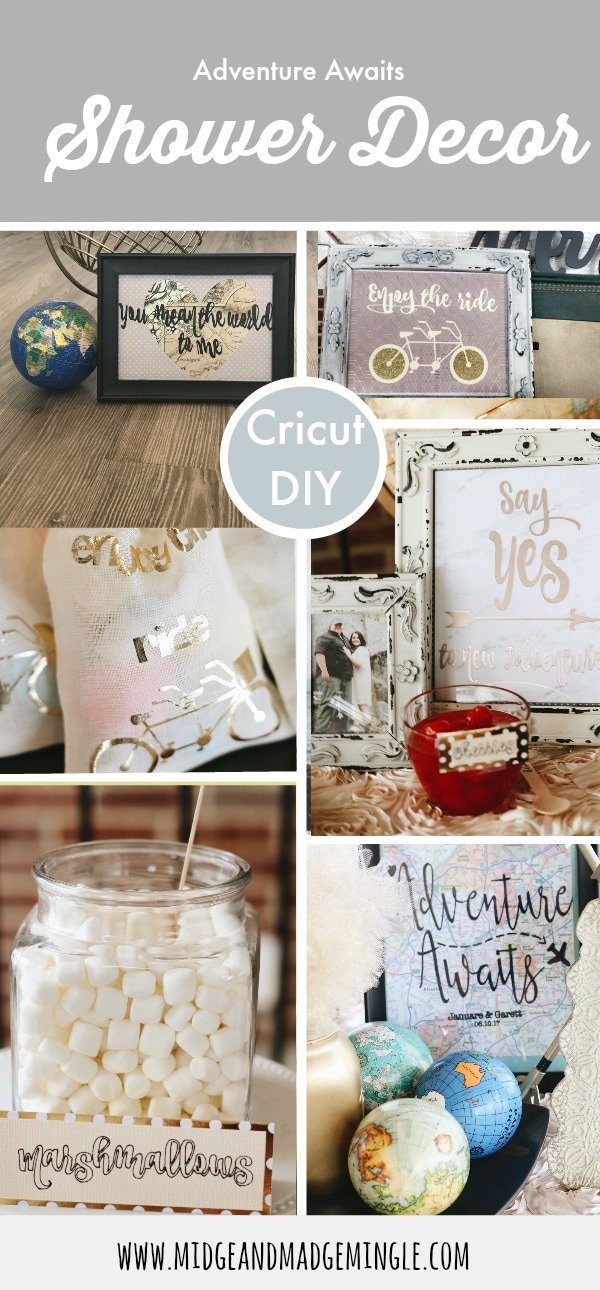
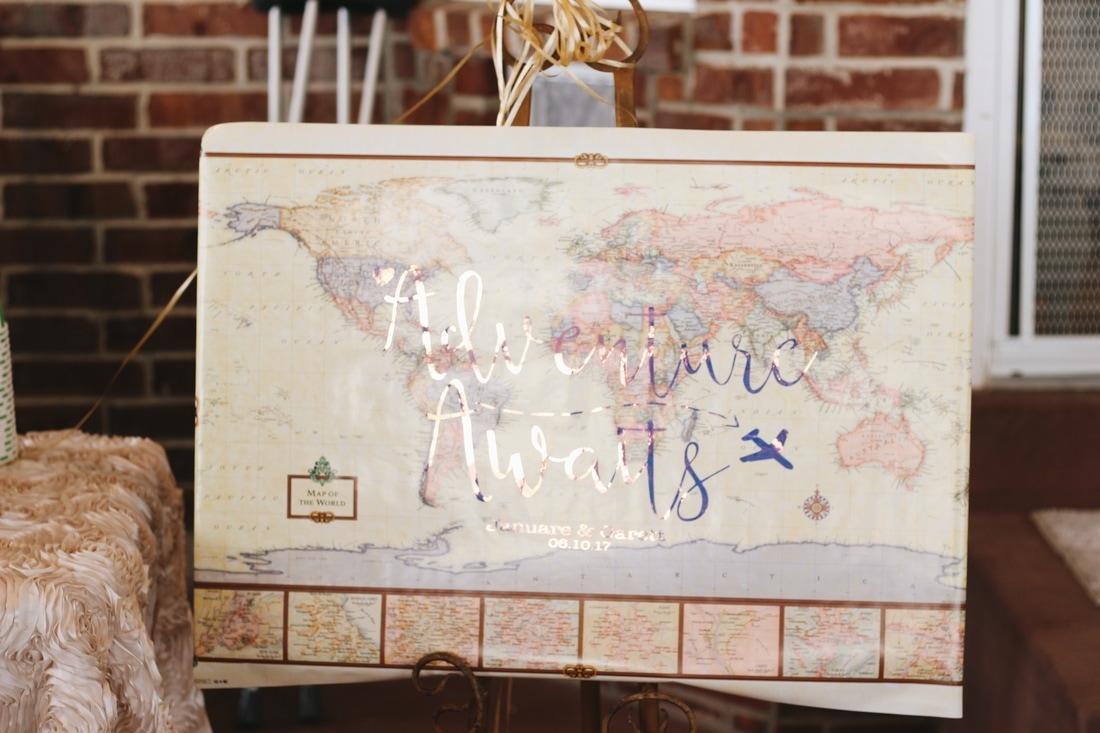
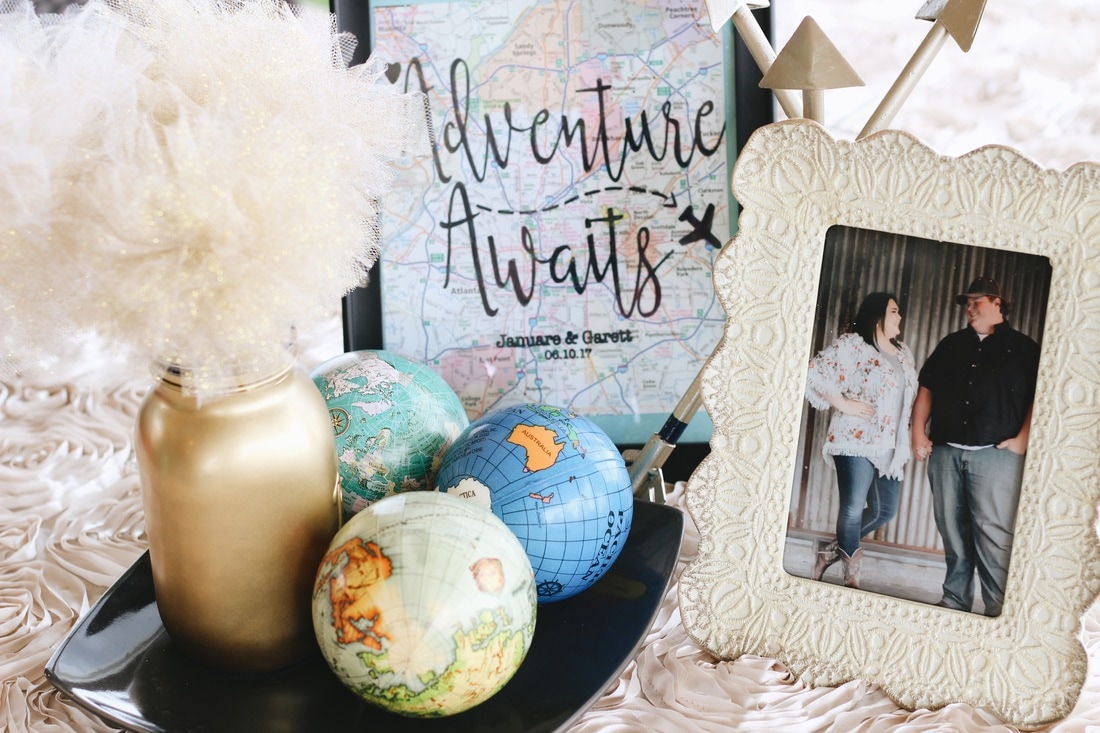
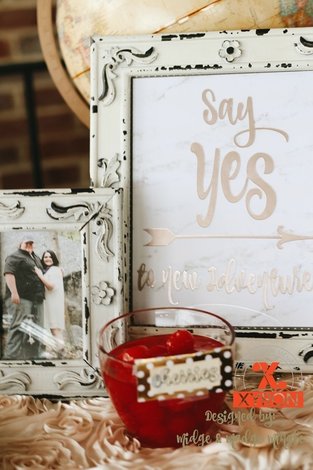
Adventure Awaits! We are so excited to share with you this fun Bridal Shower with the Theme: Adventure Awaits. Creating all of the fun decor pieces was easy when you use the Cricut Explore Air 2 and the Cricut Essential Tool set. We were able to use a variety of materials to create our one of a kind decorations. The Bride is Madge's daughter, the excitement on her face when she walked in to the shower was priceless. She was in Awe... with how beautifully everything came together. The guests were even taking pictures and asking how things were made. Of course the answer was always "it's easy with Cricut"! What tools do you need, and how do you use them? Watch our video below to see the Essential Tool set in action, along with close-ups of the projects.
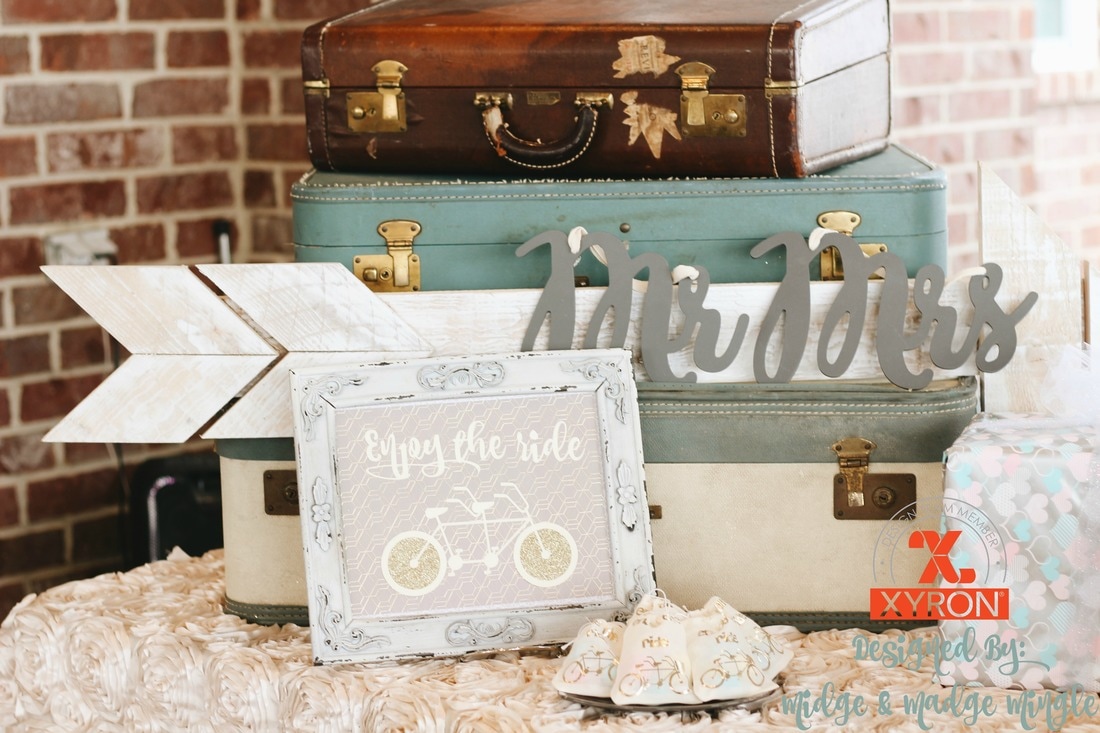
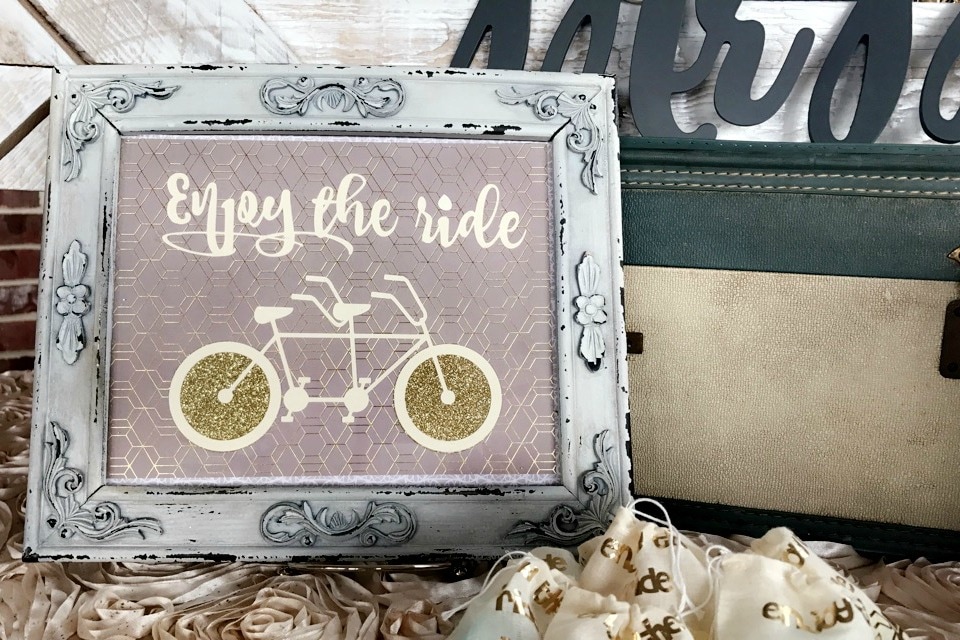
To welcome guests to the shower we purchased a map poster from Wal Mart, then used the NEW holographic vinyl in blue to add "Adventure Awaits". For "Enjoy the ride" we created our image in PicMonkey, then uploaded it to Cricut Design Space. We cut it from cream cardstock, glitter cardstock and mounted on a piece of pattern paper.
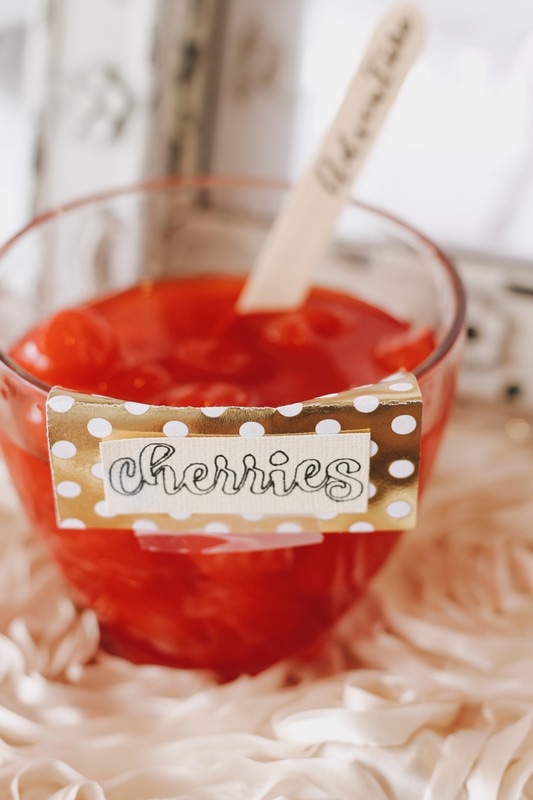
We had an ice cream bar. The Cricut pen came in handy to create our labels. The labels were also created in Pic Monkey and uploaded to Design Space. Where we edited from the cut feature to the write feature. We then inserted our Black 0.4 Tip, Black pen into our Cricut Machine and it worked it's magic!
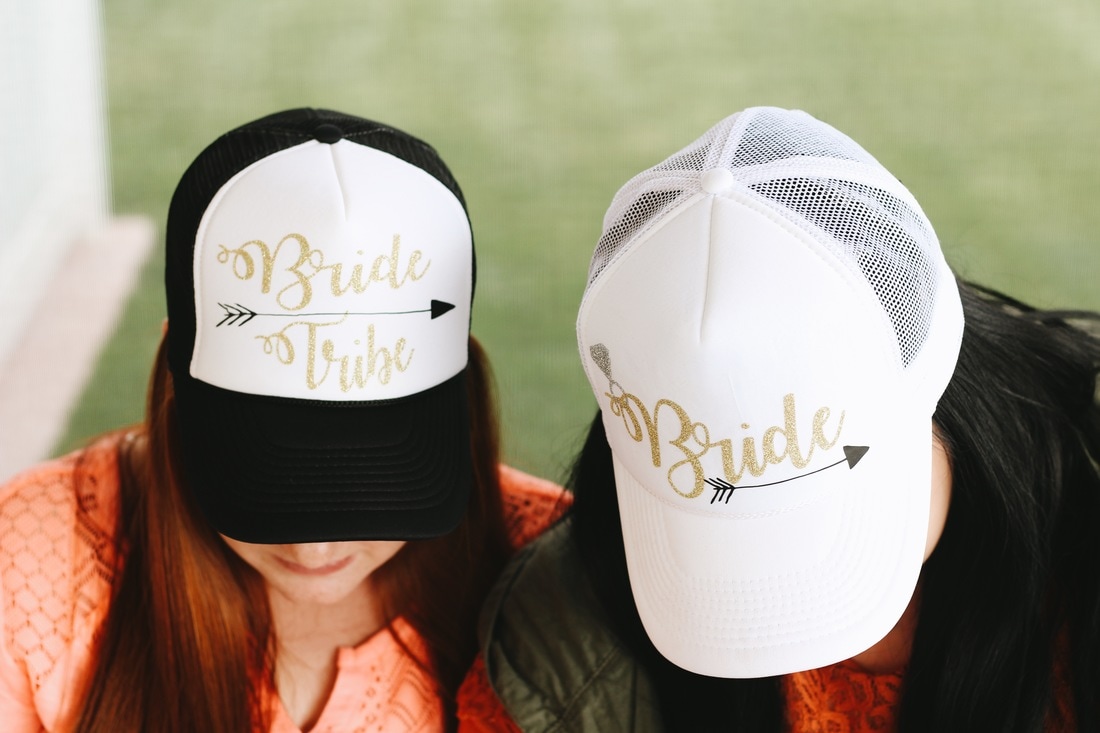
The Bridal party was excited to show off their new hats that were made with the iron on vinyl. Again, the "Adventure Awaits" sign was created using the black Cricut Pen.
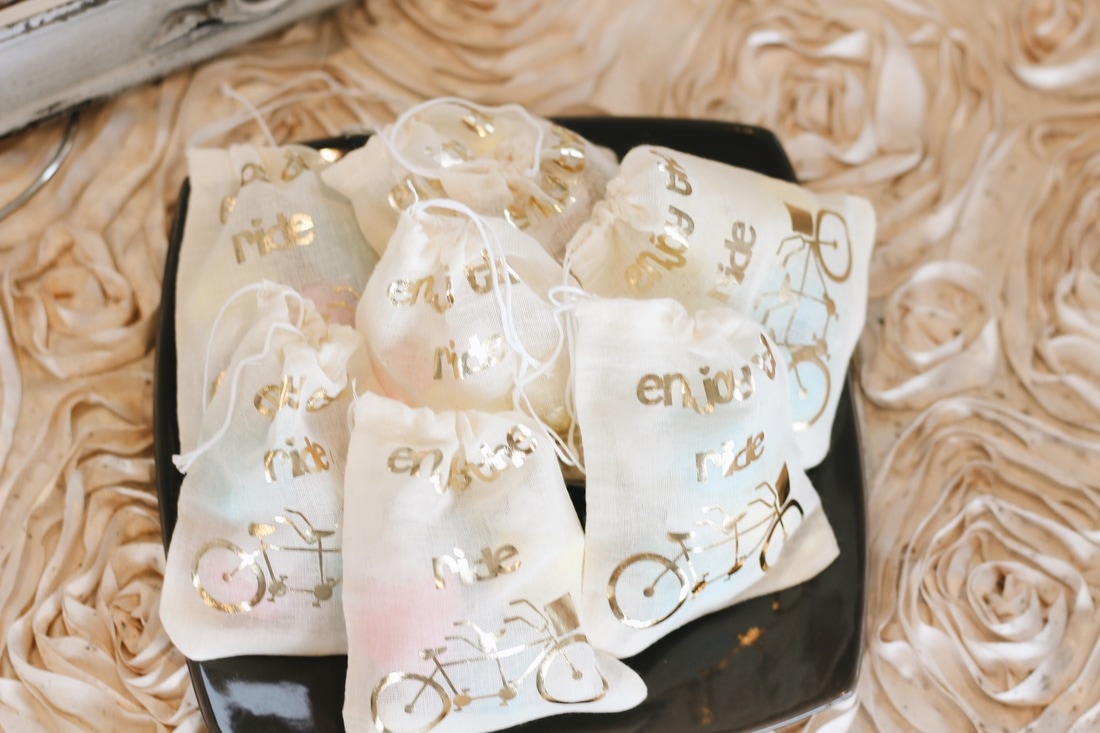
"Enjoy the ride" treat bags were also a hit! These little muslin bags were the talk of the party! People could not get over how cute they were. Using the Gold Foil Iron On, made it easy to make several of these in just a few minutes. Would you like to create your own "Enjoy the Ride" gift bags? Click HERE
This is a sponsored conversation written by me on behalf of Cricut. The opinions and text are all mine.
Creating unique one of a kind home decor pieces for your home is what we all want and love right? Watch this video that was recorded live showing you how you can create your own fun frames on a budget using Xyron and DCWV. We absolutely hands down love our Xyron Sticker Maker 1.5" and our Sticker Maker Max. Paired up with the Eclectic Chic Paper Pad and the Glitter Stacks from DCWV any home decor piece will turn out beautiful.
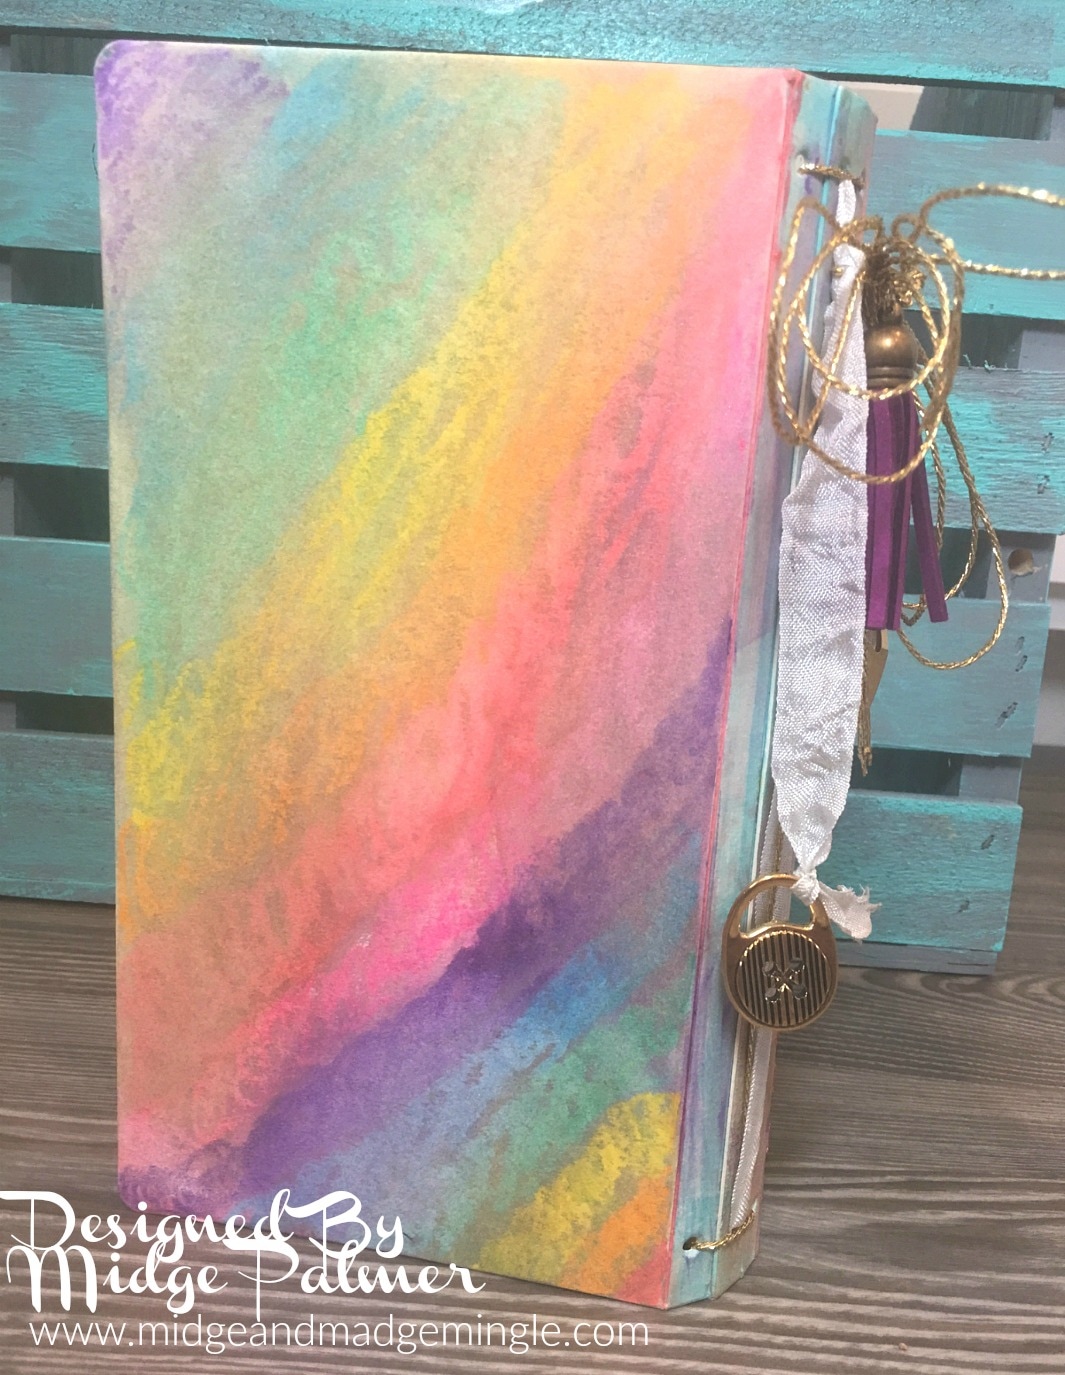
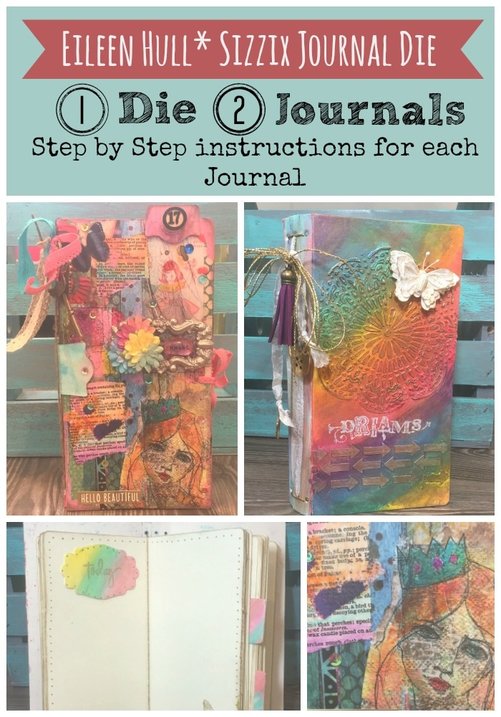 We are very excited to share with you the NEW Sizzix ScoreBoard Journal Die by Eileen Hull. We both created our own unique journals using the same die. We will share with you step by step instructions for both of these fun books! (This may be a long post, but so worth the yummy goodness that you are going to see! After each tutorial there will be a supply list, this way you can create one or both journals! You all get a BONUS today, TWO Journals ONE Post! Grab a cup of coffee, a Diet Coke or a glass of Wine. Kick your feet up and get ready to be inspired friends!! Midge's Journal- Dream My daughter often says, “Mom, I had the craziest dream last night!” Then she proceeds to give me all of the details that she can recall. I’ve always thought it would be fun to keep track of those dreams. This bright bohemian journal is just right for jotting down thoughts, ideas, and dreams. Many fun patterns can be created using your favorite stencil and some modeling paste. The vibrant colors add a touch of whimsy. 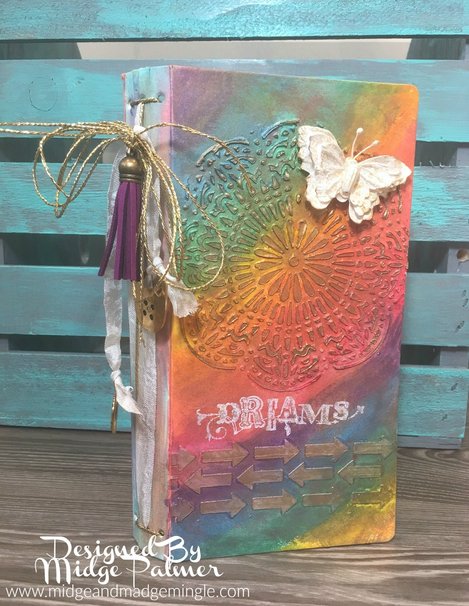
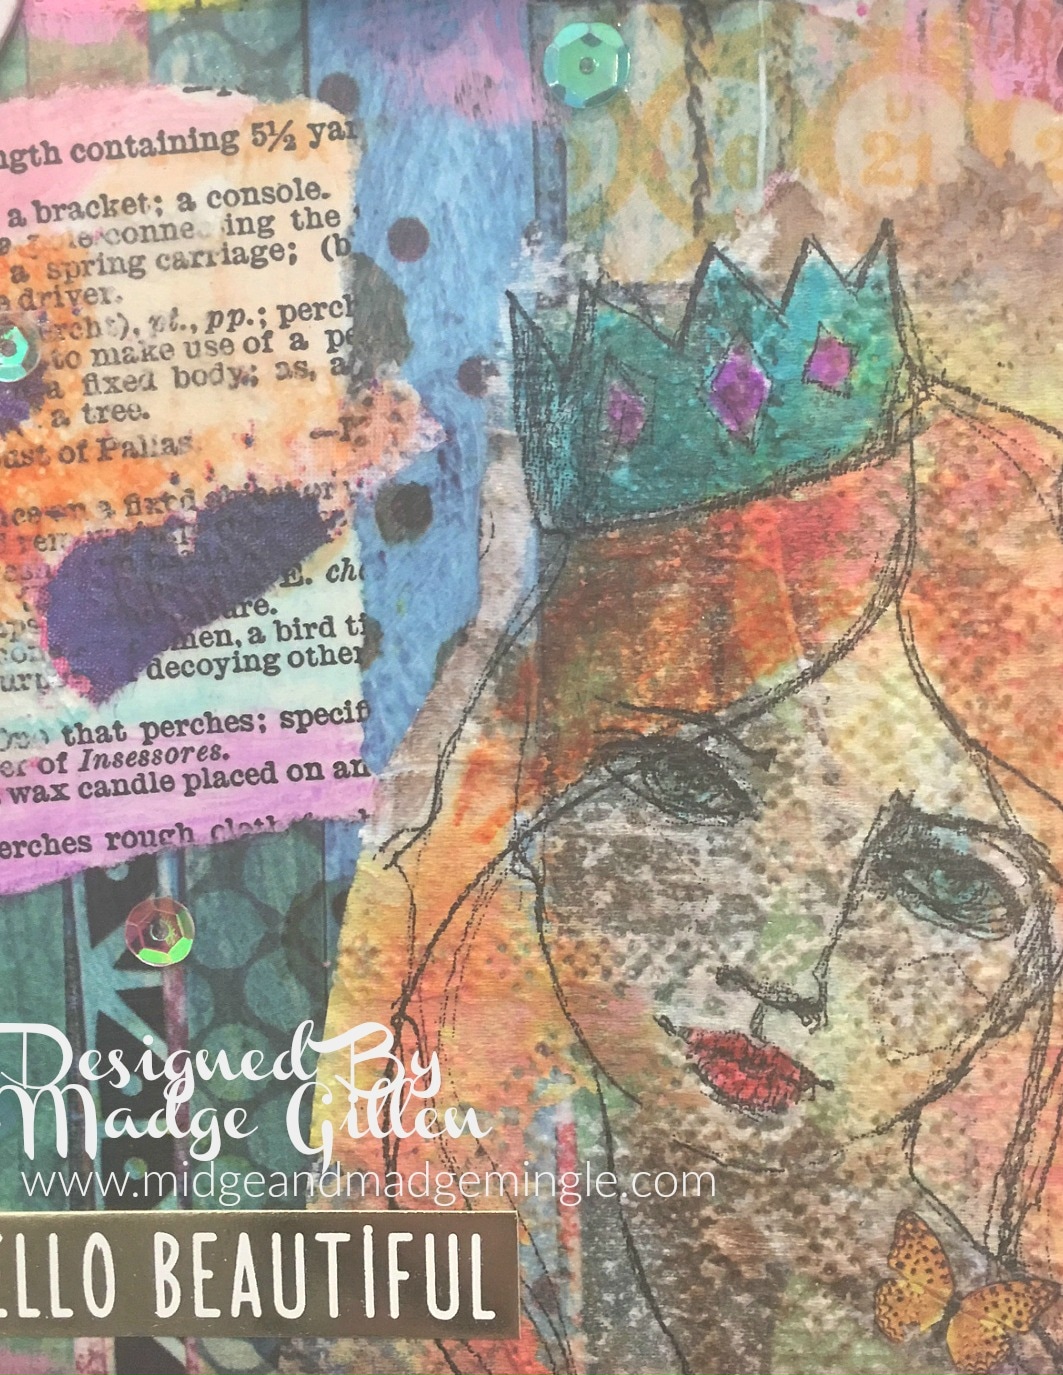
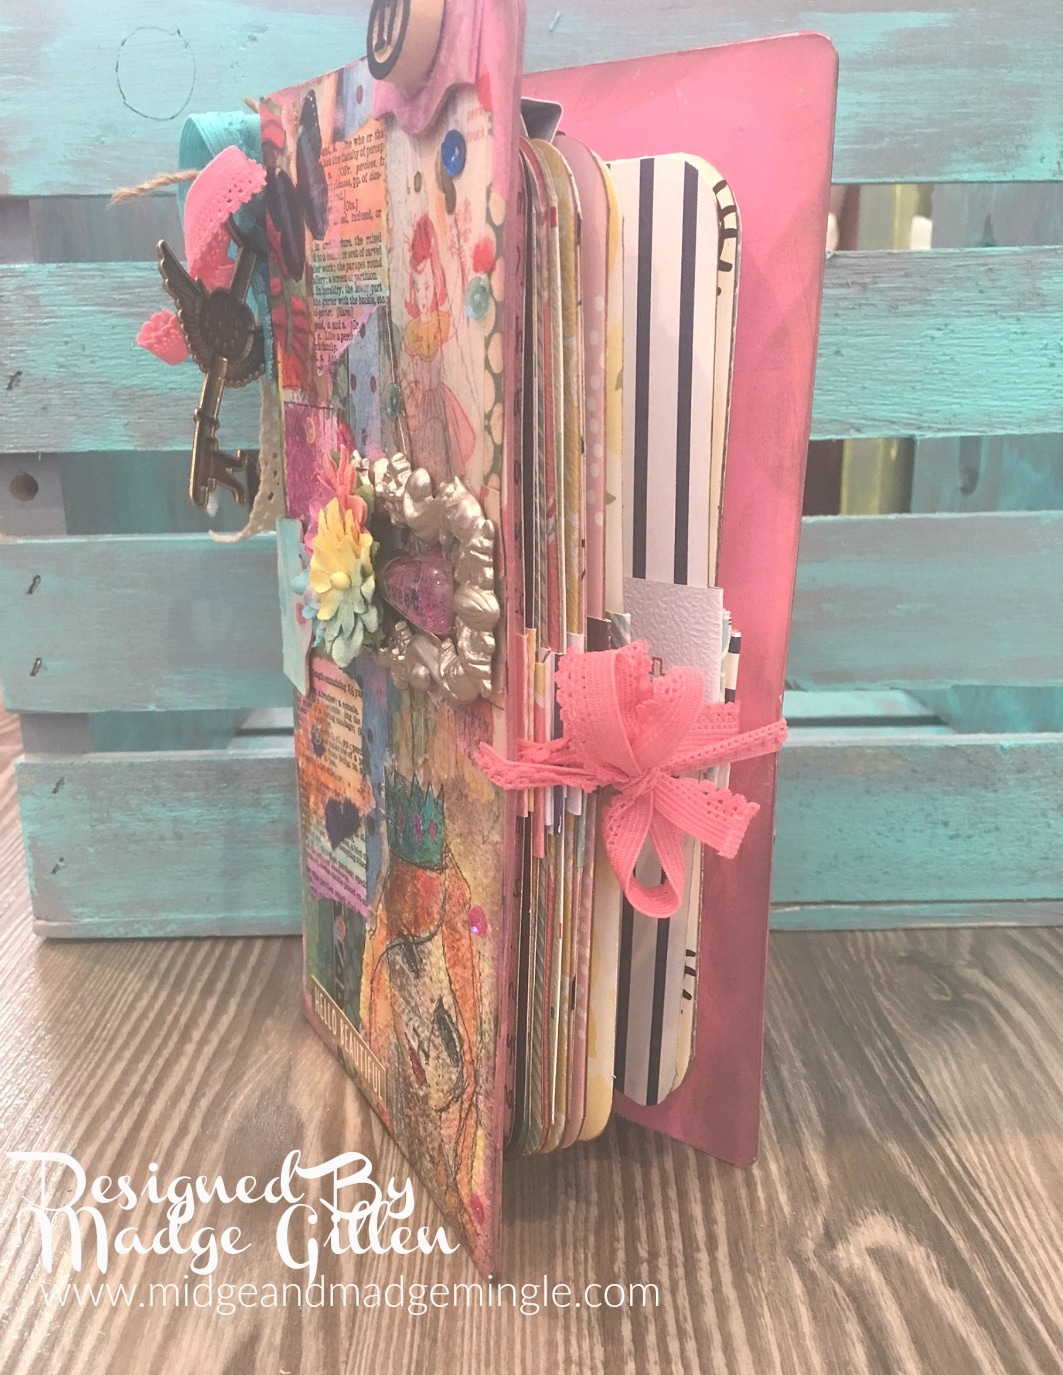
Supplies Needed- Teresa Collins ™ Modeling Paste Faber Castell Gelatos® Teresa Collins ™ Colorbox ®Gold ink CTMH White ink pad Heidi Swapp ™ Gold spray mist Recollections ™ Cream Cardstock Beacon Adhesives- Quick Grip White Ribbon- Generic Gold Cording- Generic Stencils- Generic Stamps- Generic Misc Embellishments Mistable embellishments Tools: (list 1 per line) Heat gun Paint brush 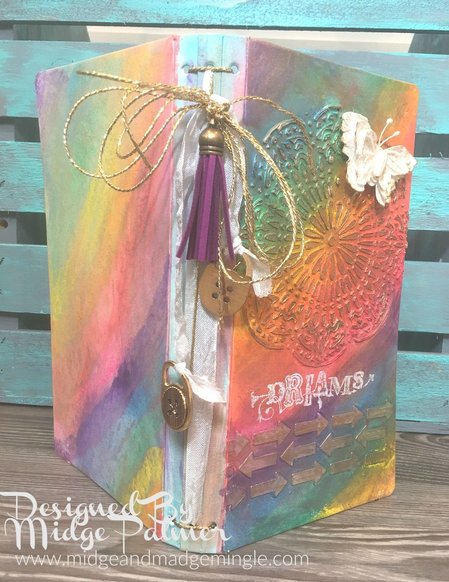 Madge's Journal- Hello Beautiful A colorful collage of some of my favorite things. Mod Podge is your friend when it comes to this funky junk journal. Vintage papers, tissues, stamps, and more come together and bring carefree charm to the cover. Jump in and create a mixed media masterpiece of your own today! 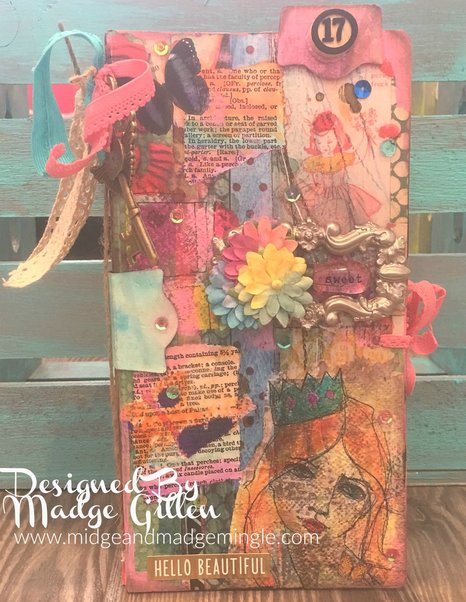 Instructions:
Supplies Needed- Clearsnap- ColorBox® INK Premium Dye Mini Inkpads- Aqua, Carrot, Mud Pie, Jelly, Poppy American Crafts- Jane Davenport Mixed Media- JD MM Rub-Ons Neutrals, JD MM Collage Paper, JD MM Paper Pad Fancy Pants- Pattern Paper Prima- Flowers Plaid- Mod Modge® Graphic 45- Butterfly Rub-ons DecoArt- Bubblegum Acrylic Paint Beacon Adhesives- Mixed Media Glue Tim Holtz ®- Wood Embellishment Metal Embellishments- Generic Ribbons and Fibers- Generic Sequins- Generic Dictionary Page- Generic Jute- Generic Elastic- Pink and Turquoise Generic Water- small cup Tools: (list 1 per line) Paper Trimmer Scissors Pencil Paintbrush Hole Punch Corner Rounder 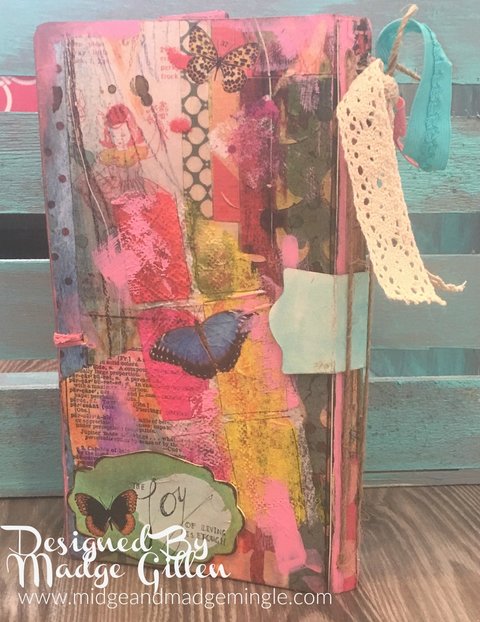 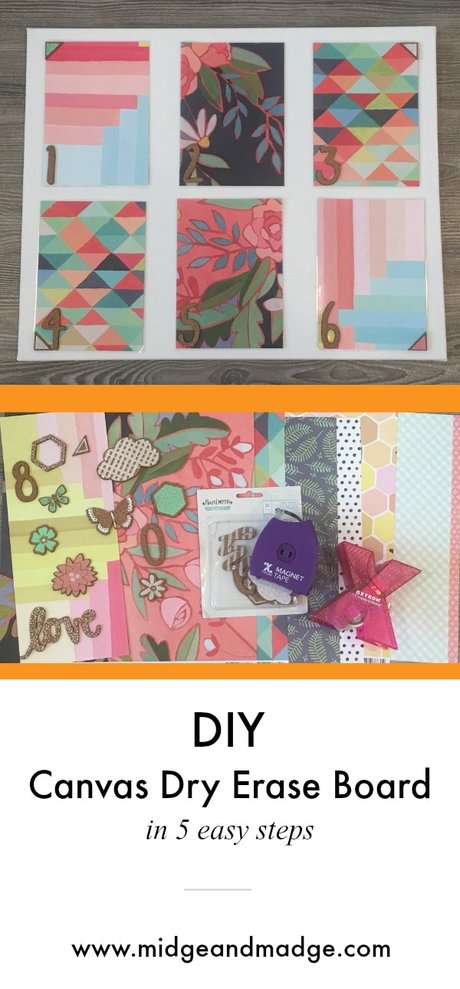
We are so excited to show you how to make your very own Dry Erase Board in 5 easy steps! Watch this fun tutorial (which was recorded LIVE from FB) and we will go through each step to create this unique and fun project.
Can you believe how easy that came together? Using a collection by 1Canoe2 and American Crafts products along with Xyron creates this darling Dry Erase Board. Here are some close-ups!
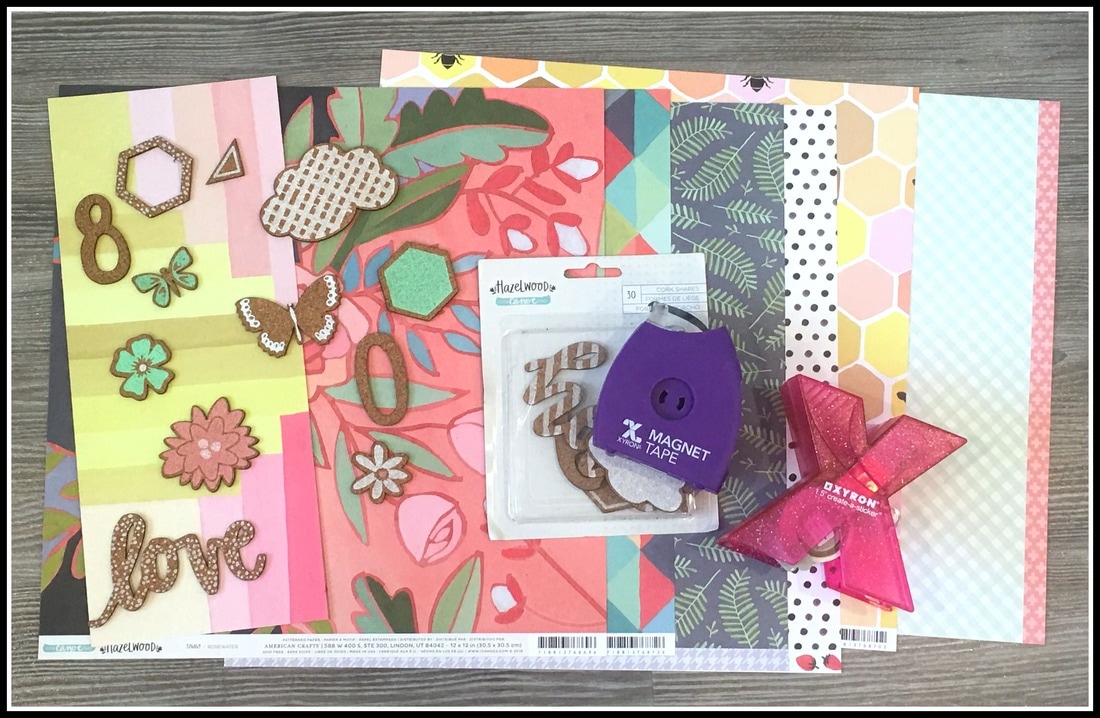
Supplies you will need:
16x20 White Canvas Pattern Paper- 1Canoe2 Embellishments- 1Canoe2 Magnet Tape- Xyron 1.5 Create a Sticker Maker- Xyron 
Disclosure- We were given products from 1Canoe2 and Xyron to create this post. All opinions and ideas are our own.
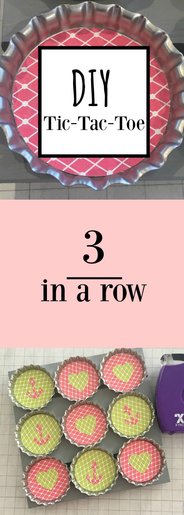 We are super excited to be teaming up with Maya Road this week! Today we have a fun tutorial to share with you. We will show you how to make your own Tic-Tac-Toe game and a cute Vintage Deer Bottlecap Magnet using Xyron Magnetic tape, Tape Runner, and Create a Sticker Max. Along with some fabulous products by Maya Road! The Bottlecaps, Wood Pallet, Paper Flowers, and the Resin Deer create these unique and fun projects!  We hope that you liked our tutorial! They were some pretty fun projects wouldn't you say? Here are a couple close ups! 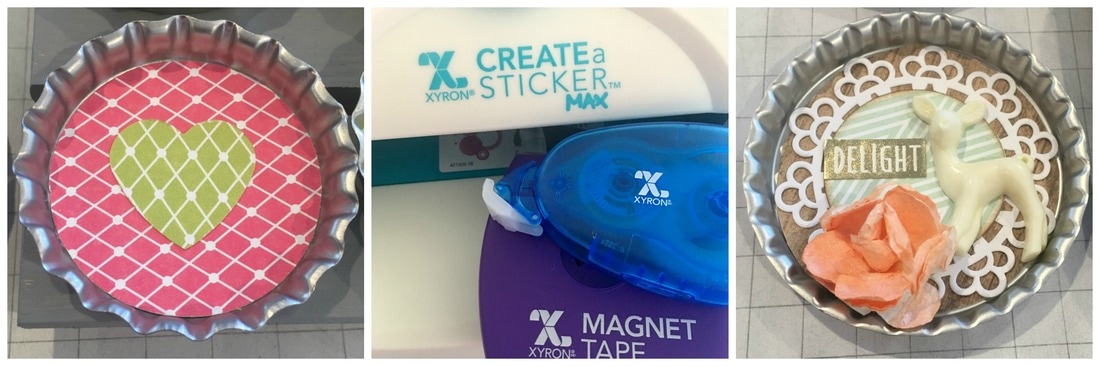 To create the Tic-Tac-Toe Board your will need the following supplies: 1- 2" Bottlecaps from Maya Road 2- 6x6 Wood Pallet from Maya Road 3-Create a Sticker MAX from Xyron 4-Tape Runner from Xyron 5-Magnetic Tape from Xyron 6-Paint (We used Grey) 7-Pattern Paper 8-2" Circle punch 9- Heart Punch 10-Anchor Punch 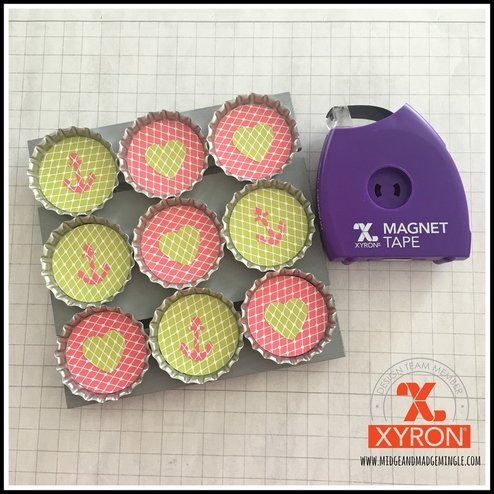 To Create the Deer Magnets you will need the following supplies: 1- 3" Bottlecaps from Maya Road 2- Cream Resin Deer from Maya Road 3- 1" White Paper Flowers from Maya Road 4- Magnet Tape from Xyron 5-Create a Sticker MAX from Xyron 6- Tape Runner from Xyron 7- Sprtiz 8- Pattern Paper 9- Small White Doile 10- 2" Circle Punch 11- Gold Word Stickers 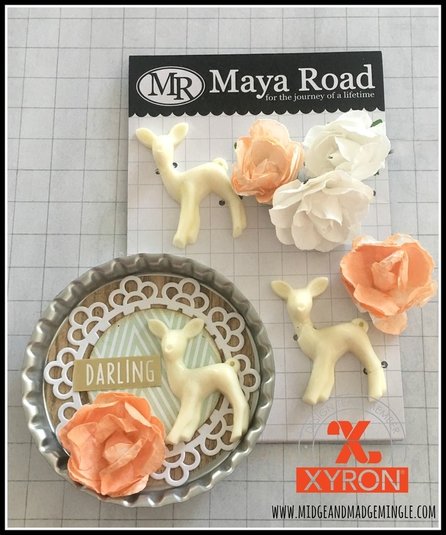 Xyron will be giving a are ALSO giving away a Xyron 1.5" Sticker Maker EVERY DAY- just leave a comment on any of the Maya Road projects Xyron shares on FB throughout the week. Click HERE to go to their FB Page. 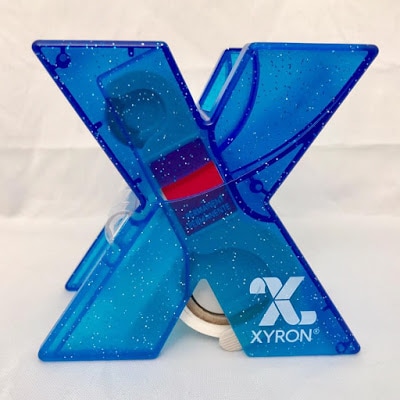 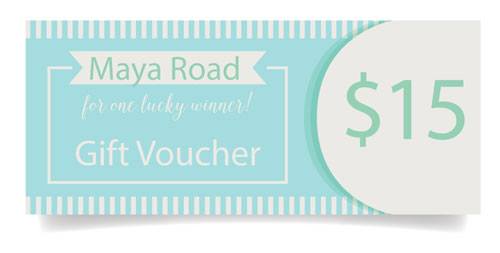 Leave a comment on any or all of the Maya Road Blog Swap Posts for a chance to win a $15 gift certificate to their online store!
Disclaimer Notice: We've received products/compensation as part of the Xyron Design Team. This project however, is 100% ours along with all opinions. 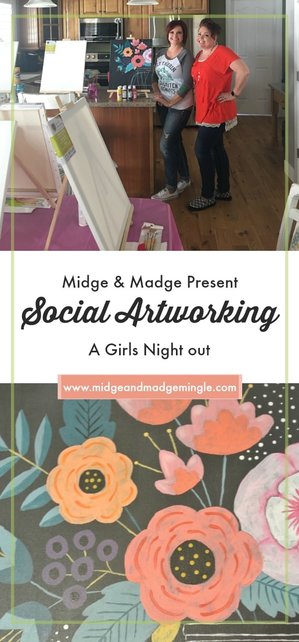
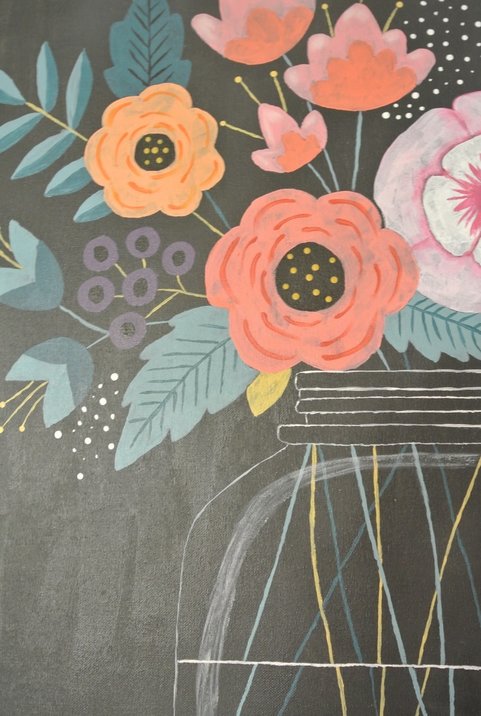
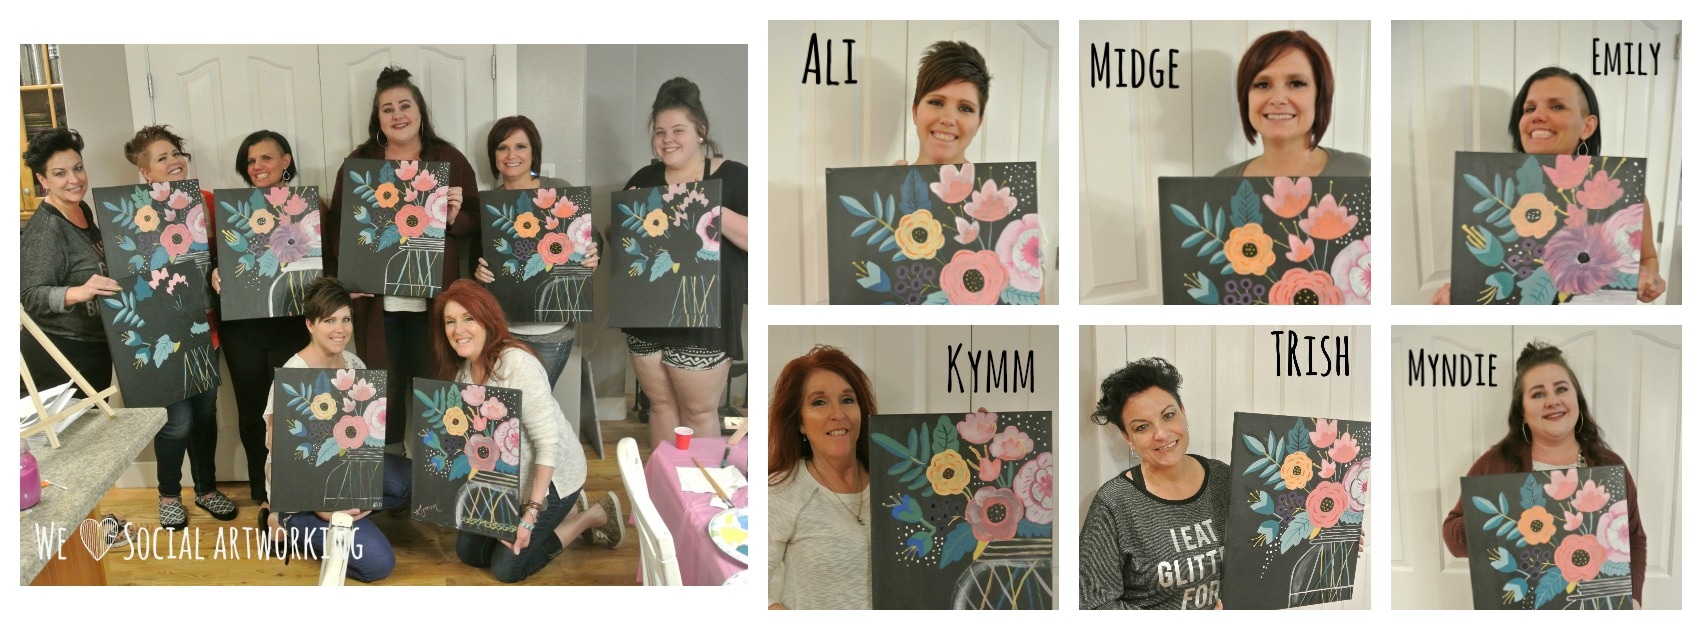
We are so excited to share with you our Social Artworking Party that we hosted! This "Girls Night Out" was a blast! When we received our box of goodies with the Canvases, Easels, Transfer Paper, Pattern Image, Paint, and Paintbrushes we were in Awe.... Everything was neatly packed and ready for us to host this fun party! First things first! We had to complete our painting so that we could teach the class! Midge immediately went to work following the step by step instructions that were included for us. Everything came together perfectly! Midge painted our example, so then we were ready to create an event on Facebook and invite our friends. We posted a picture of what we were painting so our guests knew what to expect. We had a great response and had our guests RSVP so we knew how many spots we needed.
The day was here and it was time to get things ready! We bought refreshments and supplied the "drinks" (yes, everyone drank responsibly) and set the tables with the supplies needed before our guests arrived.
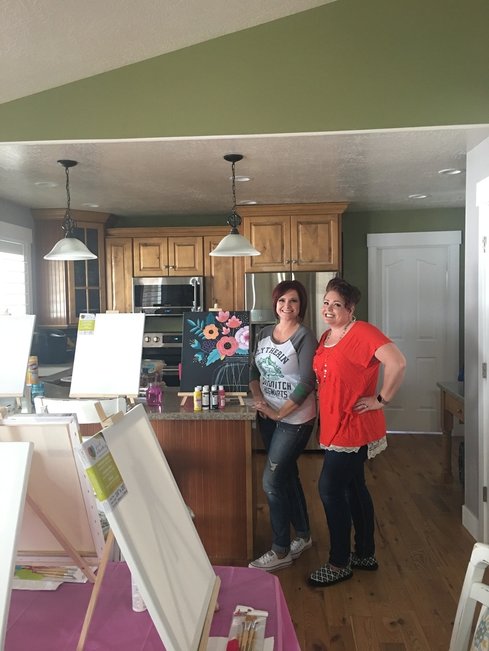
It was time for our guests to arrive! We created this fun video showing how our amazing Social Artworking "Girls Night" went! Be sure to watch the video for more details!
Are you ready to host your own Social Artworking Party? We would be happy to be your Social Artworking Consultants! Send us an email [email protected] and we will set up a time to chat! You can always click HERE to find a Consultant in your area. But wait! There is more. Do you want to be consultant and help others create beautiful pieces of art? Click HERE to find out more info on how to become a consultant!
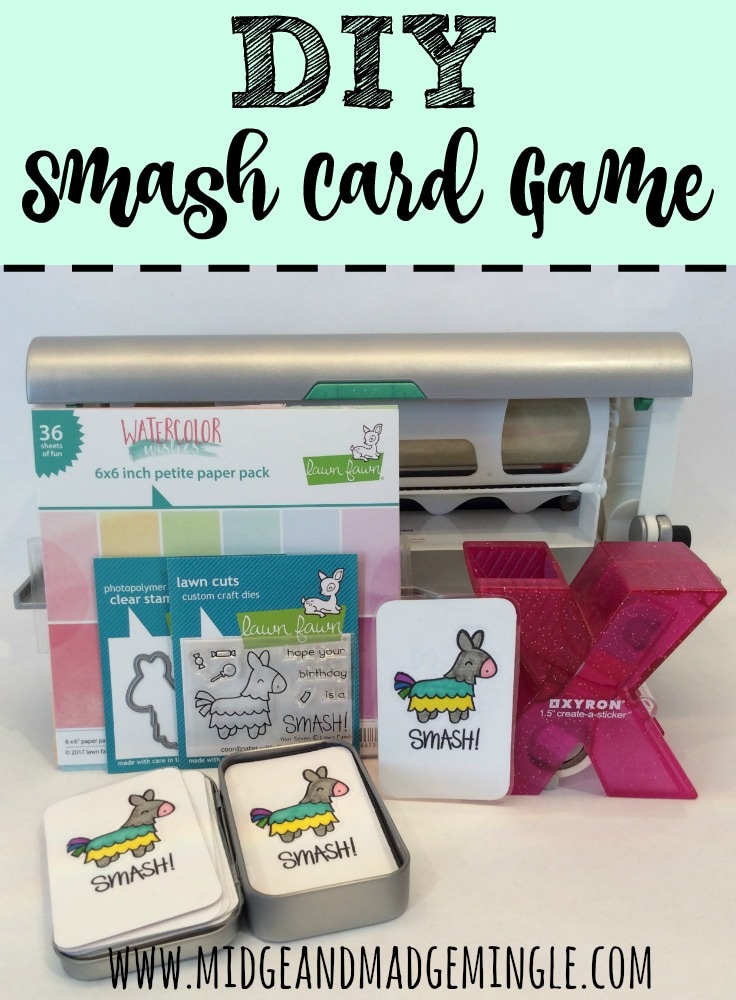
Do you like playing card games, but are sick of the same old games in the cupboard? We have the perfect solution for you! Create your own! We have created this fun card game using theLawn Fawn 6x6 paper pad Watercolors, Year 7 Stamp set and Coordinating Dies, along with the Xyron Creative Station using the double sided laminate and 1.5 Create-a-sticker maker. This game we call "Smash"! You only need a few supplies to create this fun game! What is it and how do you play you ask? Watch this video below to see not only how to make this game but how to play as well.
Giveaway Alert**** If you didn't catch it in our video, Xyron and Lawn Fawn are each giving away a $50.00 prize pack which includes a $25.00 Lawn Fawn Gift Card and a Xyron Mega Runner. To enter: WatchXyron FB page all week and comment on any or all of the Lawn Fawn projects posted there. And make sure to visit the Lawn Fawn FB page and blog.
Below you can see how easy it is to adapt the "Smash" game into a fun game of Memory! 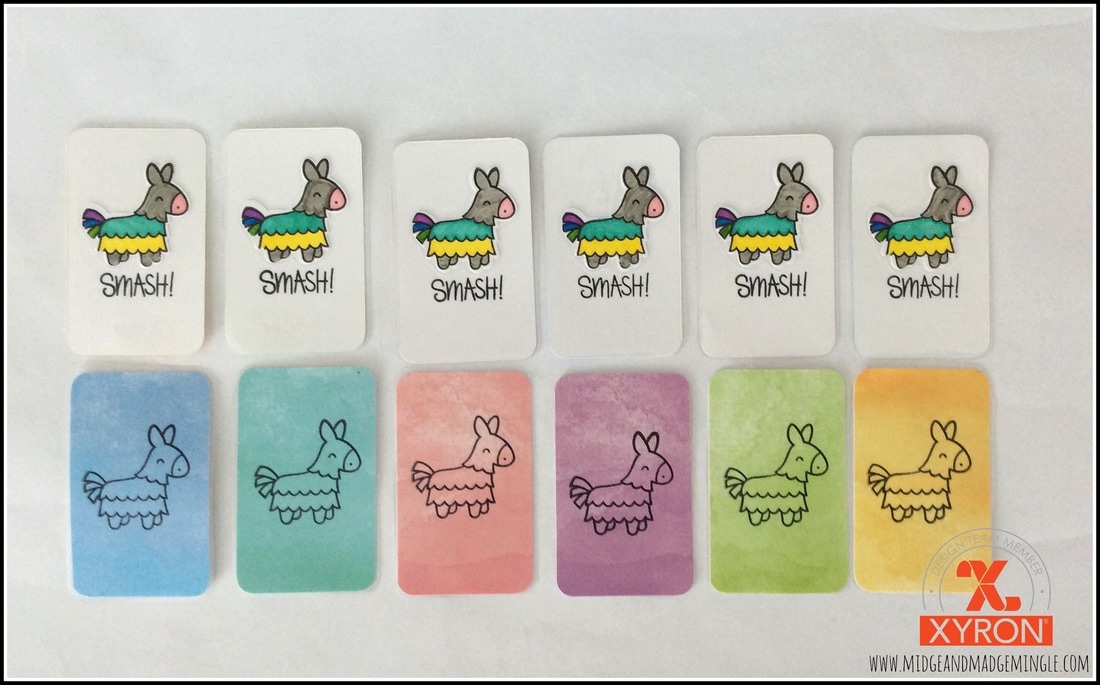
****Please Note we were given product to create this post. However, all thoughts, opinions, and project ideas are our own.
Interested in the supplies we used in this project? Most are listed below and some are affiliate links, which generates us a little commission (at not extra cost to you at all) when you click on the link and make a purchase. Affiliate and product disclosure can be found here. Supplies that you will need: Archival Black Ink Pad Acrylic Block Corner Rounder Ruler Paper Trimmer Sharpie Markers Scissors Die Cutting Machine White Yardstick Washi Tape
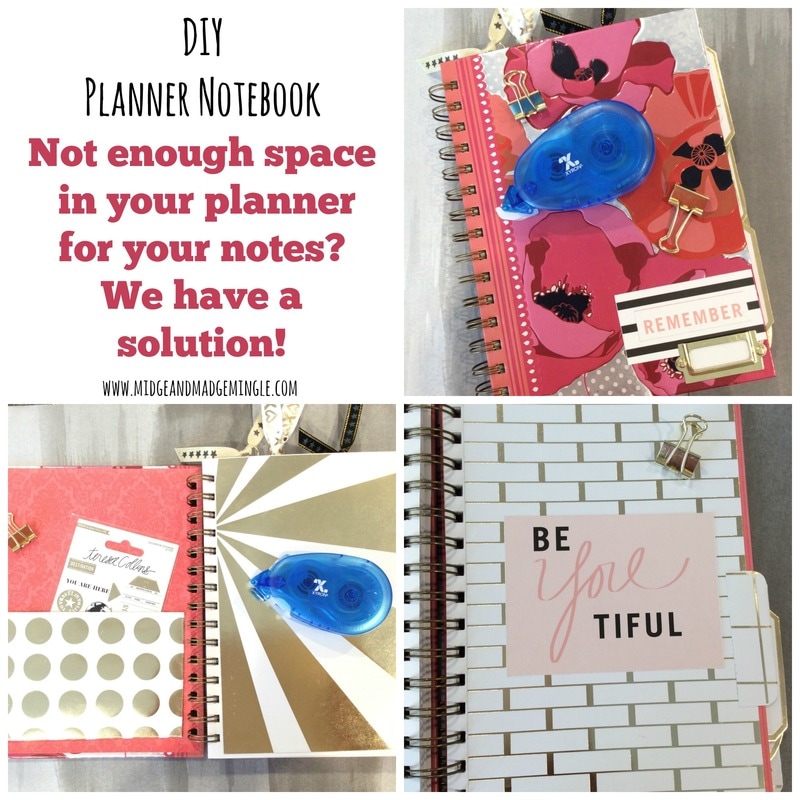
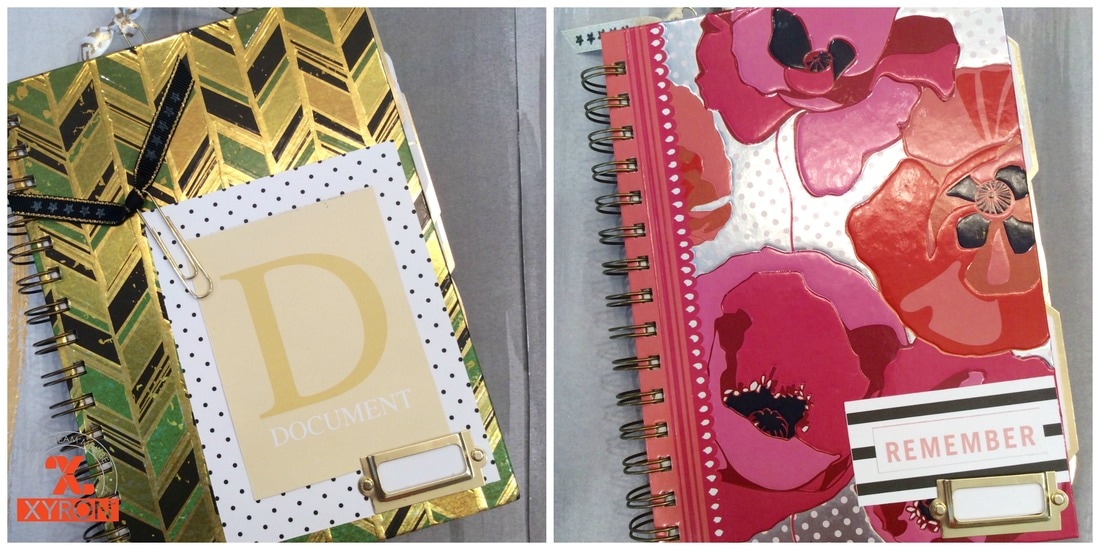
Hey friends! Today we have an amazing project for you!!! Your very own DIY Note Planner. We always have the hardest time when using a planner, because we love to take notes. There is never enough space for us, so we decided to make our own DIY Note Planners! Watch the video for step by step instructions, grab your Xyron Tape Runner and Teresa Collins products and follow along!!
As promised we have close up pictures. Remember, making these note planners is easy when using the amazing Xyron products along with the fun Pattern Paper, and embellishments from Teresa Collins! Below is a supply list that you will need to create this fun project.
Supplies Needed 1- Notebook 2- Teresa Collins Xyron Mega Tape Runner 3- Xyron Tape Runner 4- Teresa Collins Pattern Paper 5- Teresa Collins Studio Gold Clip Set 6- Teresa Collins Stamp Set 7- Teresa Collins Sticky Labels 8-Ribbon 8- Stamp Block 9-Ink 10- Scissors 11- Paper Trimmer **Remember- Be sure to watch the video for step by step instructions!!! 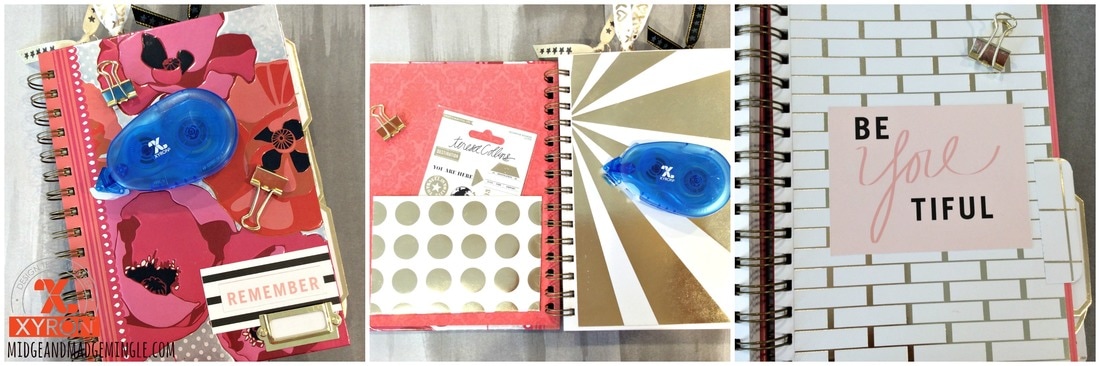
We are so excited for this weeks giveaway!!! Be sure to follow all of the instructions to enter to win one of these awesome Note Planners for yourself today!!! Share the video on FB, Head on over to Xyron and Teresa Collins FB pages and give them some love, tell them we sent you, and follow us on IG! For a BONUS*** Pin one of these pics! Winner will be chosen on Sunday night and announced next Monday!!! Good Luck!!
*** Disclaimer- We were given product for this post and this project. However, all opinions and ideas are our own. 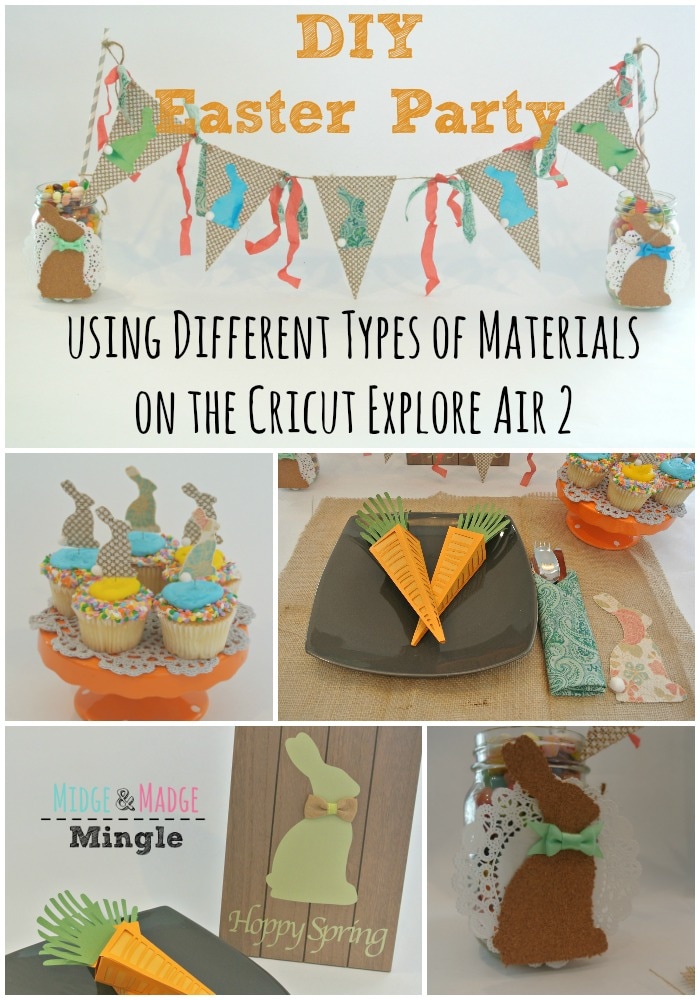
We are so excited to share with you a super fun party that we created cutting out many different types of materials on the Cricut Explore Air 2. Many of you already know that this machine cuts paper and vinyl! But what other types of materials can this amazing machine cut? Let us show you what different types of materials we cut using the same image! Some of the items are smaller and some are larger but all are using the same Teresa Collins silhouette bunny that we got off of our Cricut Access from the Cricut Design Space. Watch our video, here we show you the fun ways in which we used this great machine.
To create this party you will need the following supplies:
*Cricut Explore Air 2 (Or Cricut Explore, Explore Air) *Backed Burlap *Backed Canvas *Cardstock *Adhesive Backed Cork *Fabric *Toothpicks or Straight Pins *Ribbon *Doilies *Bow Ties (optional) *White Bunny Pom Poms (optional) *Xyron Sticker Maker 5" and 1.5" *Qty 2 Mason Jars filled with Jelly Beans *Tall straws *Jute 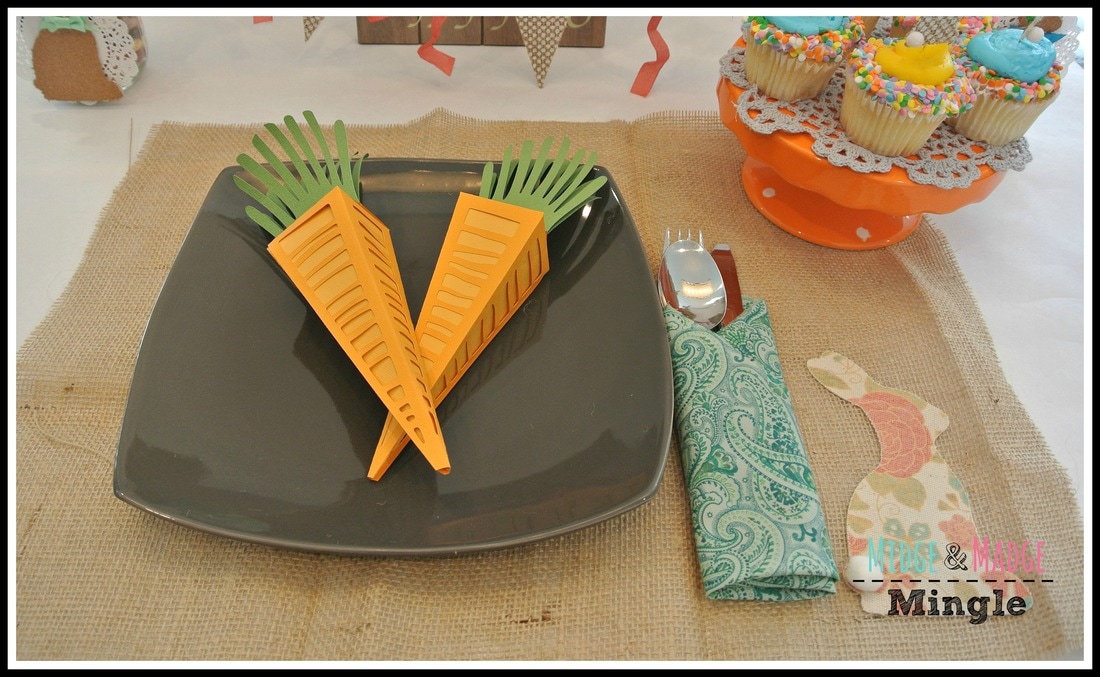
Making the Carrots is a breeze with Design Space you can find these cute little guys in the make now section. We love the make it now projects. The hard work has been done for you. Simply follow the instructions that are given and BAM! you get a fun project in minutes! If you also look we have cut a cute Bunny for our placemat out of Canvas. We cut the Teresa Collins Bunny- this cute little guy to measure 3.25" x 6" We ran the canvas bunny through the 5" Create a Sticker Max station by Xyron and adhered it to the burlap placemat.
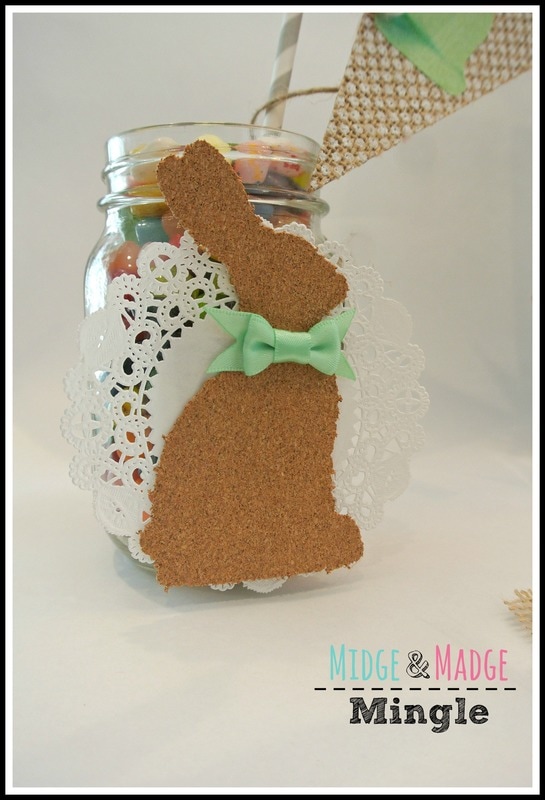
Making the two mason jars is a breeze. Just fill mason jars with Jelly Beans, use a Xyron Tape runner and adhere a doily to the mason jar. Next cut a Bunny out of Adhesive Backed Cork to measure 2.40" x 4.5" and adhere to the doily. Add a bow tie.
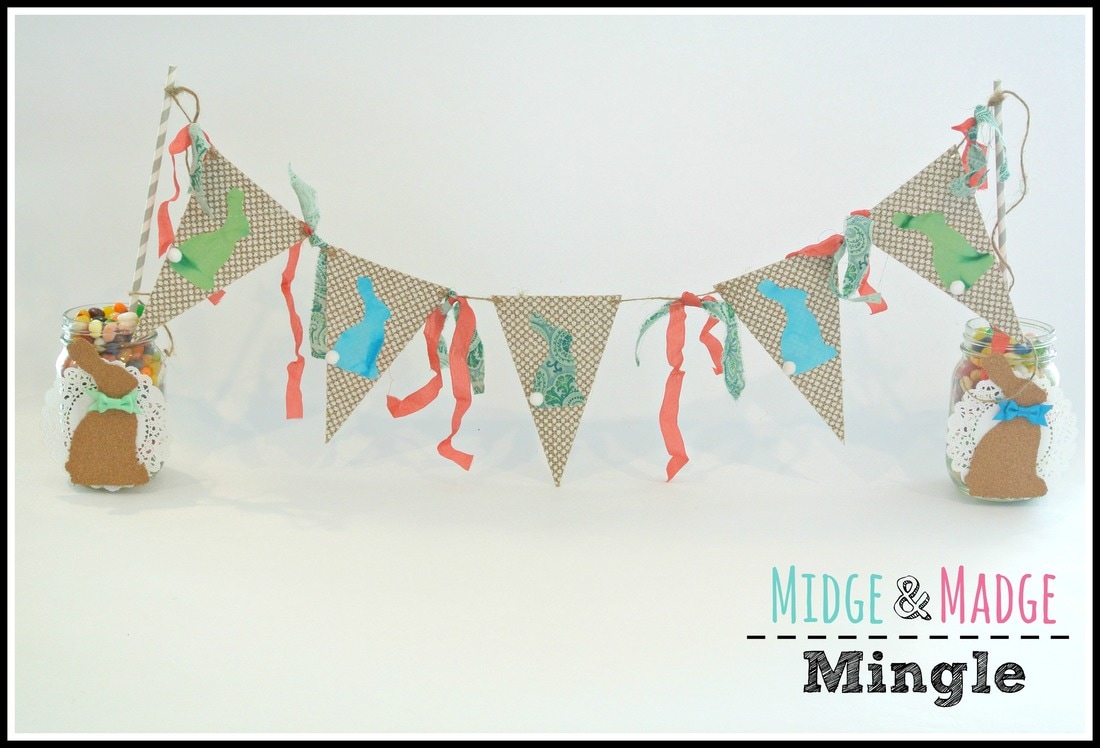
How cute is this table banner? Making this cute banner is fun and easy! First cut 5 Bunnies out of fabric (we used three different patterns) 1.64" x 3.0" Next cut 5 banner pieces that measure 4"x6" out of Backed Burlap. We then ran the bunnies through our 1.5" Create a Sticker Maker Xyron machine, and adhered them to the burlap banner pieces. We then adhered the white pom poms to their tails. To assemble the banner we used Jute, and tied strips of fabric and ribbon onto the banner. Tie to two large decorative straws.
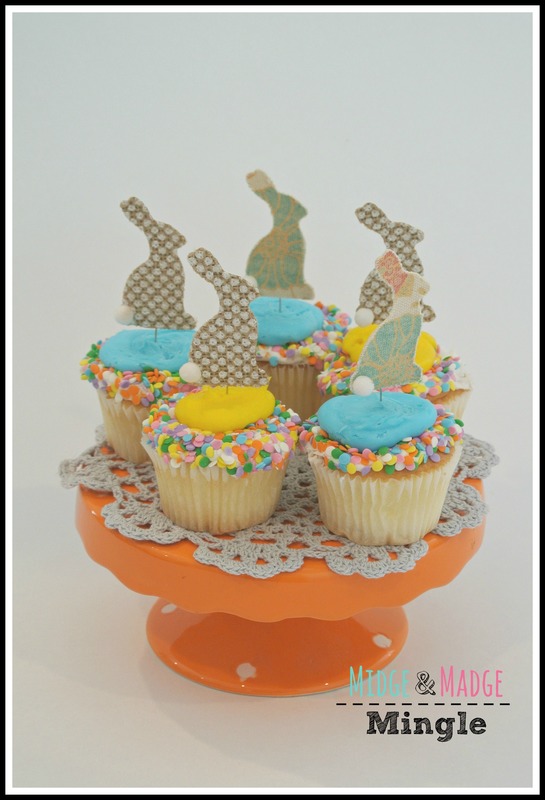
These are the cutest bunny cupcake toppers you have ever seen! Cut 5 Bunnies 1.32" x 2.5" (we cut two out of canvas and three out of burlap). Adhere small pom poms to the bunnies. Adhere the bunnies to straight pins or toothpicks, and place into cupcakes!
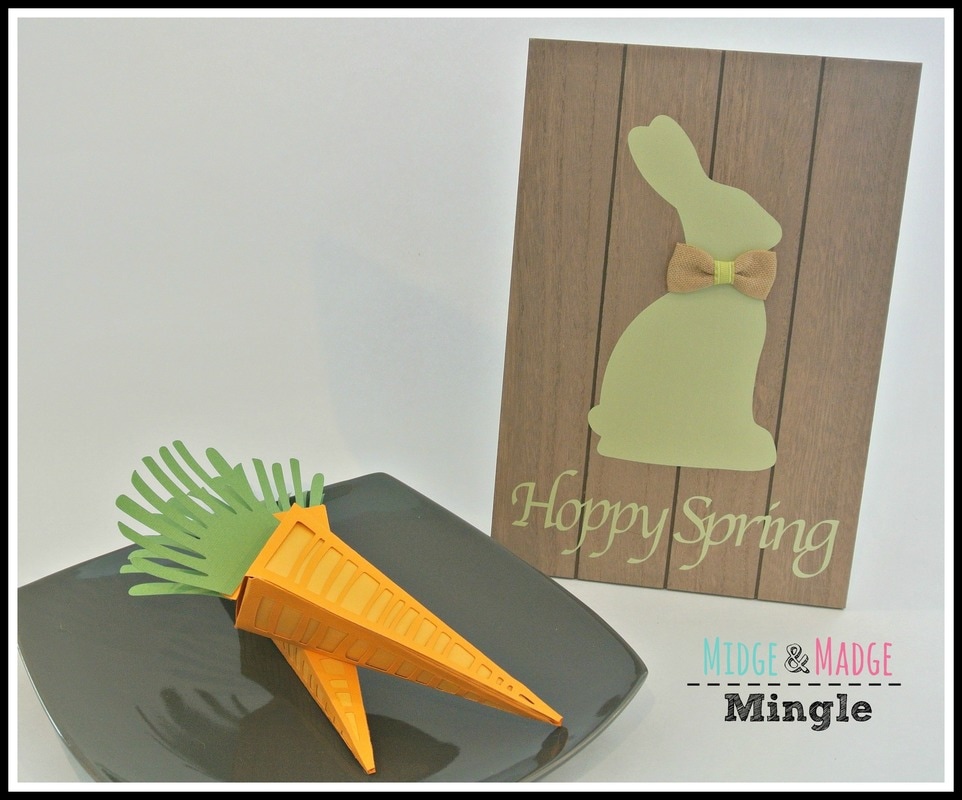
This bunny plaque is one of those projects that you can make in under 10 minutes!! Cut a large bunny to measure
4" x 7.5" out of Vinyl and the saying "Hoppy Spring" and place onto the plaque. Add a bow tie and BINGO!! Your cute home decor piece is ready to be displayed! 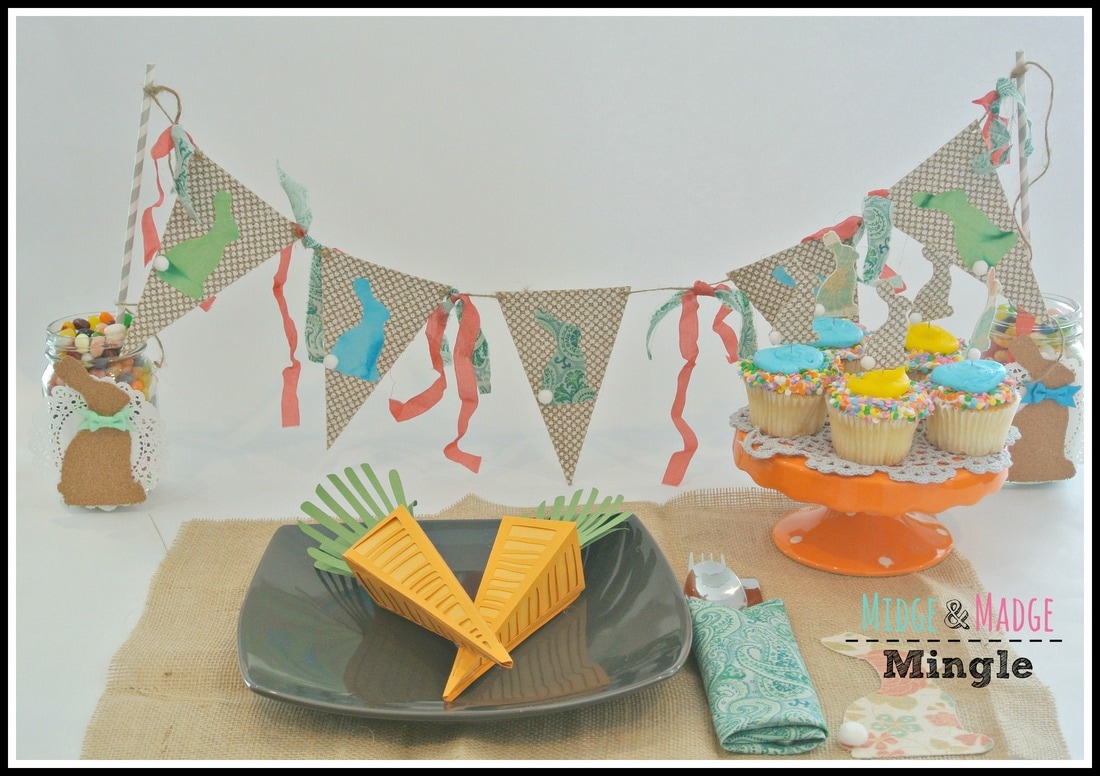
A quick re-cap of our fun Easter Party! We used 5 different types of materials!
1- Vinyl 2- Backed Burlap 3- Backed Canvas 4- Adhesive Backed Cork 5- Fabric We know that there are more products that you can cut! Several being faux leather, chipboard, chalkboard paper, felt, bling sheets and more. We encourage you to try to cut different things with your Cricut Explore Air 2 machine! This machine is fun and easy to use! The possibilities are endless with this machine. If you would like to get your own machine today click on the picture below. (Affiliate link) 
This is a sponsored conversation written by me on behalf of Cricut. The opinions and text are all mine. |
Midge & MadgeTwo Best Friends doing what they love and loving what they do. Learn more about us in the About Us tab above.  
Archives
October 2019
Categories
|


 RSS Feed
