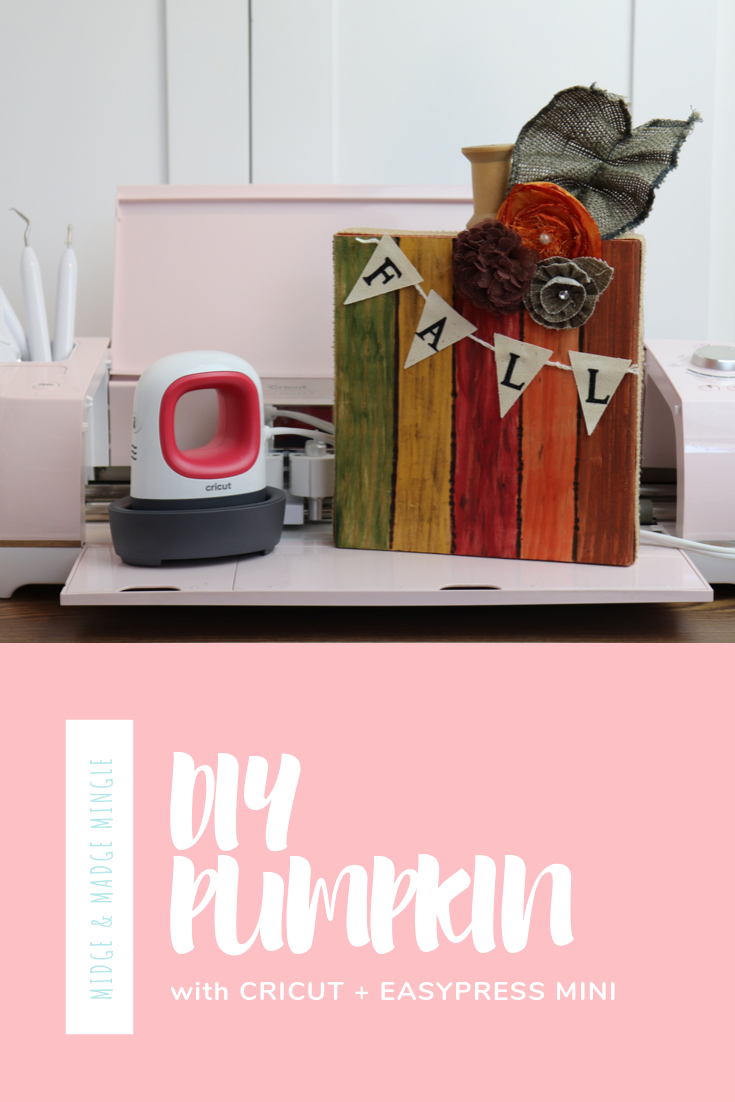
Hello friends! We are so excited to share with you this fun DIY Pumpkin. Of course we used our fabulous Cricut Explore Air 2 to cut out our Glitter Iron On, AND we used the newest addition to the Cricut EasyPress family, (insert drumroll here) and that is the Cricut EasyPress Mini! It is a great companion to whatever size Cricut EasyPress you have in your collection. We all have those smaller and/or unique projects like hats, shoes, shirt sleeves, cuffs, and pockets, and more. Right?
The Cricut EasyPress Mini isn't just adorable to look at, the Cricut EasyPress Mini offers the same benefits and technology as the Cricut EasyPress 2: even heat plate and easy-to-use heat settings for effortless heat transfers. 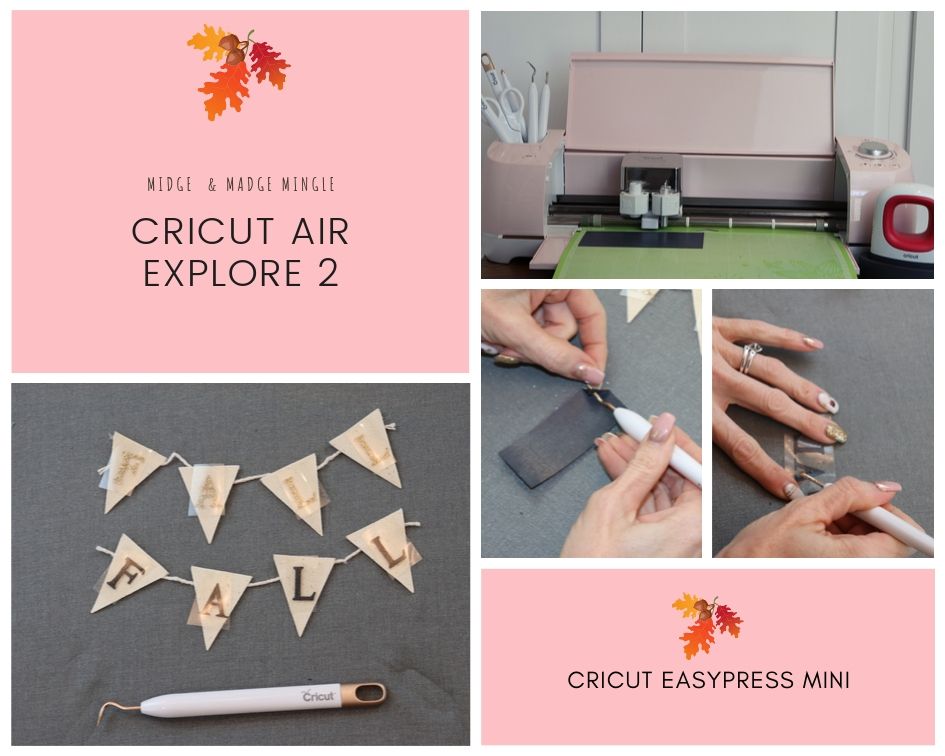
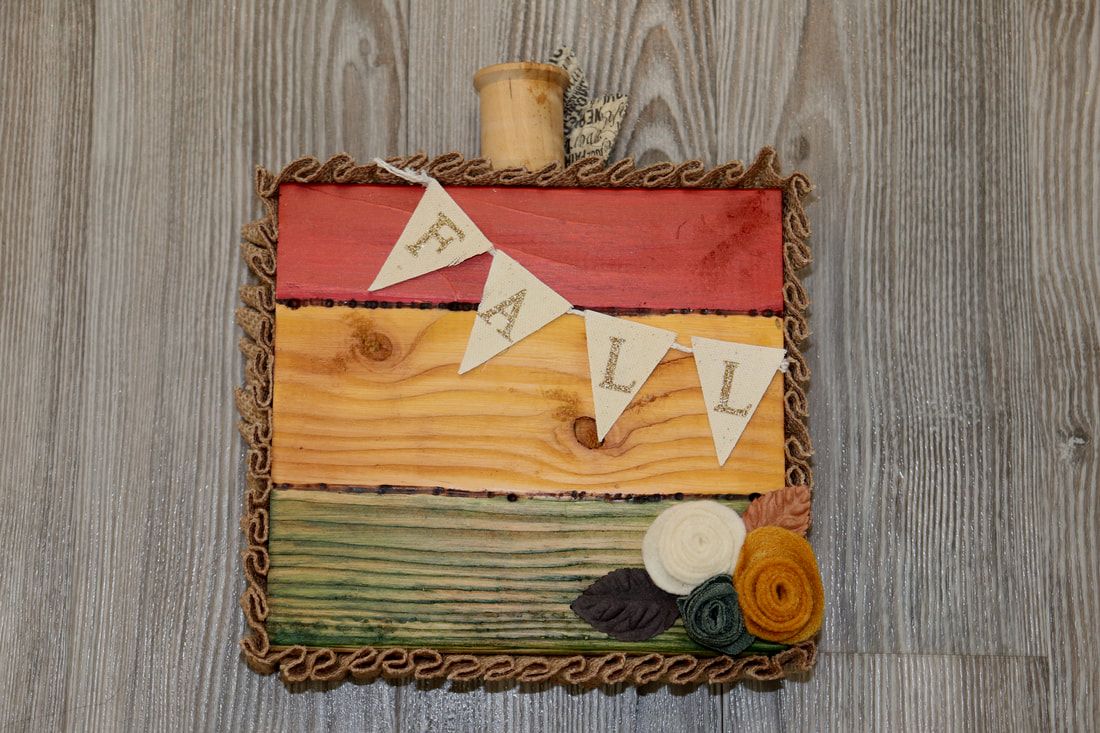
We quickly got started by going into Cricut Design Space and created this fun word Fall. We then sent it to be cut on our Cricut Explore Air 2. Using the Cricut Tools we weeded and placed the letters onto our Cotton/Poly mini banner pieces.

Our next steps are to use the Cricut EasyPress Mini! Cricut has made it so user friendly. Plug in, turn on, adjust temp, and press. It really is as simple as 1,2,3!
You will want to make sure that you check the Cricut EasyPress Heat Guide. First you click on Cricut EasyPress Mini, next your heat transfer material (we chose glitter because that is what we used), Choose your base material (we chose Cotton/Poly Blend), click apply. Another screen will come up with the instructions. For our Project these were our instructions. Pre-heat for 5 seconds Medium heat 25 seconds Constant movement Light pressure Warm peel *Using the EasyPress Mat was also recommended. Cricut even went as far as providing these steps: 1-Supplies 2-Preparation 3- Application 4-Care 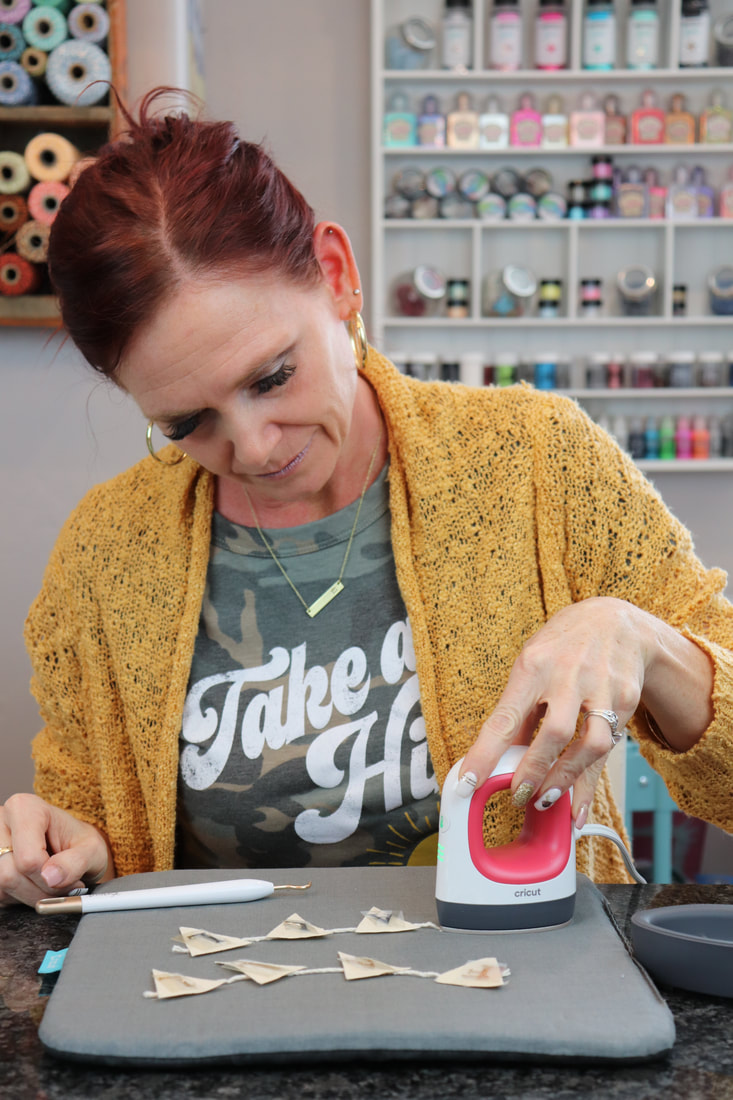
After we were done creating our cute little banner. We were busy making our DIY pumpkins. You can see how they were made below.
We love how our Pumpkins turned out! The Cricut EasyPress Mini made this small project a breeze. Our wheels are turning now with so many projects that we can now make using the Cricut EasyPress Mini.
This is a sponsored conversation written by me on behalf of Cricut. The opinions and text are all mine.
0 Comments
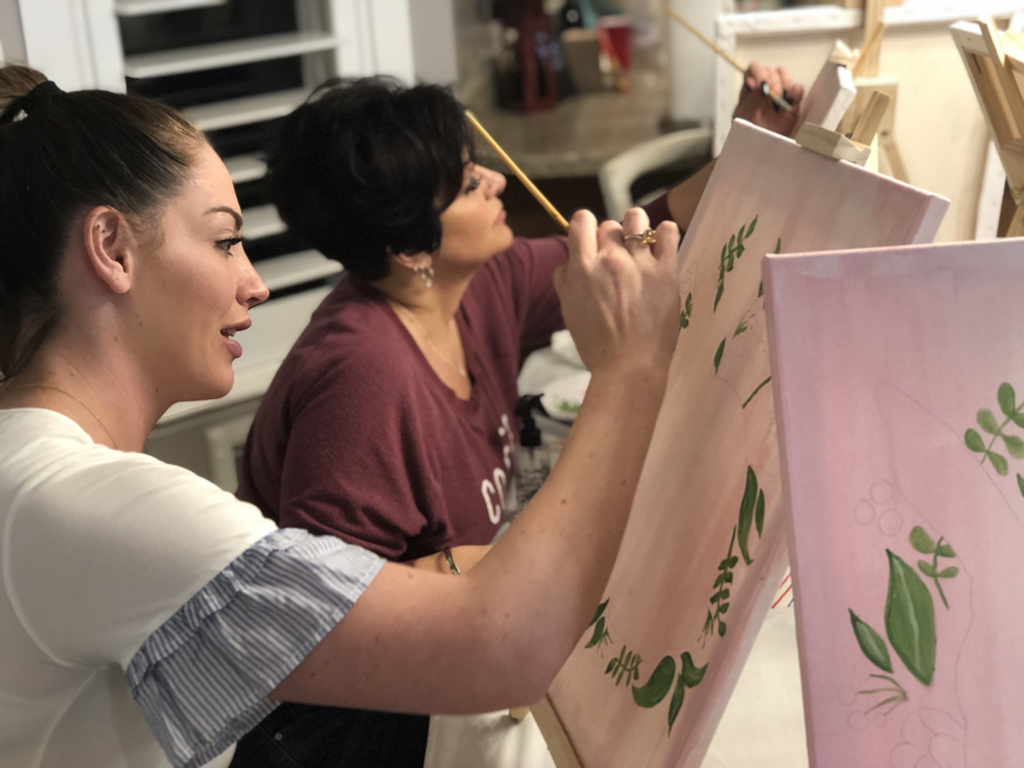
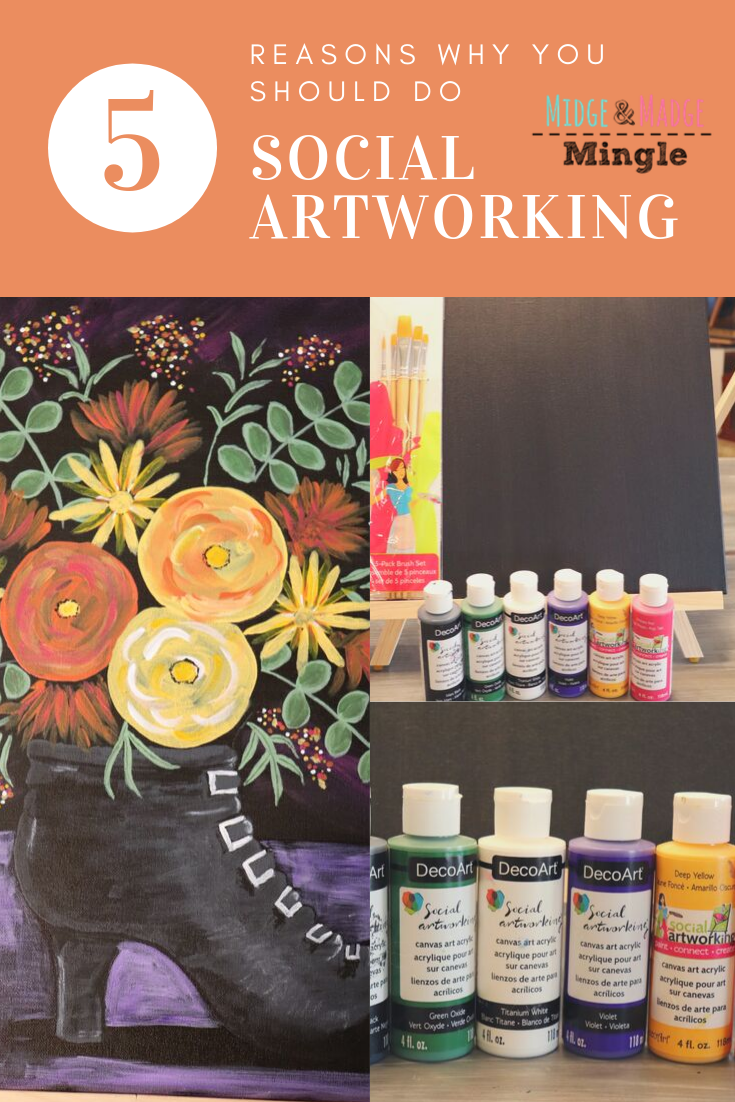 We are so excited to share why we love Social Artworking so much! In fact we are going to give you 5 Reasons Why YOU should do Social Artworking. There are many more reasons but we thought we would just give you the top 5 today! In the photo above you are seeing our newest addition to our Social Artworking projects. This is the Witch's Boot Bouquet, super fun to paint and oh so easy. Let's get started with the 5 Reasons shall we? 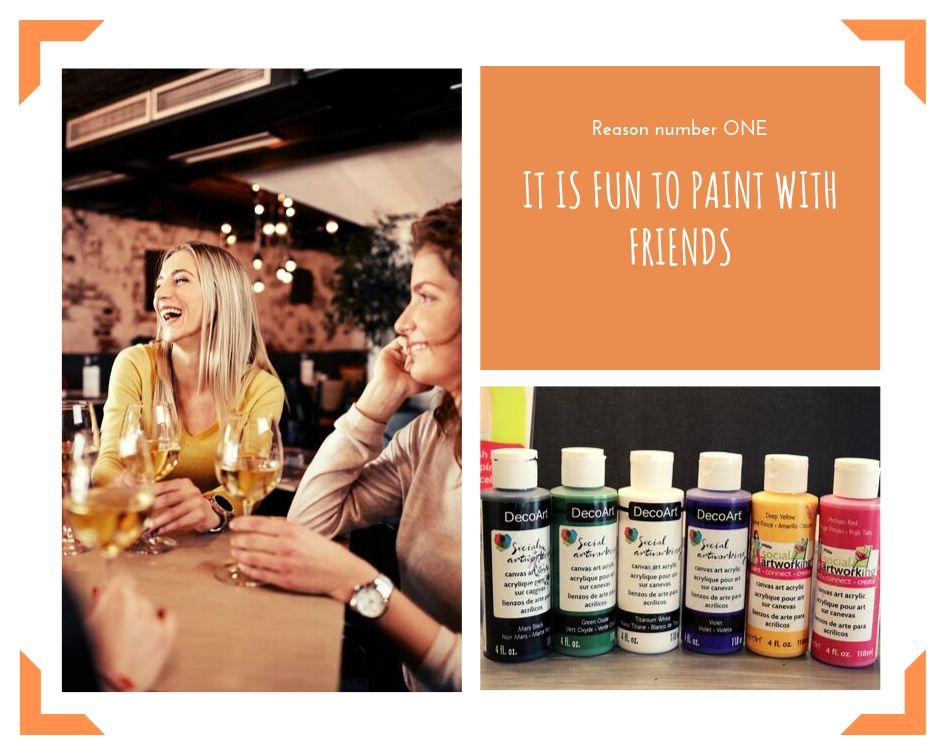 Reason number ONE- It is fun to paint with friends. Who doesn't love a girls night out? We personally look forward to them. With Social Artworking you can get together chat, have a drink AND create a fun home decor piece. It doesn't get any better that that! You can also do this for birthday parties, date nights, bachelorette parties and more. 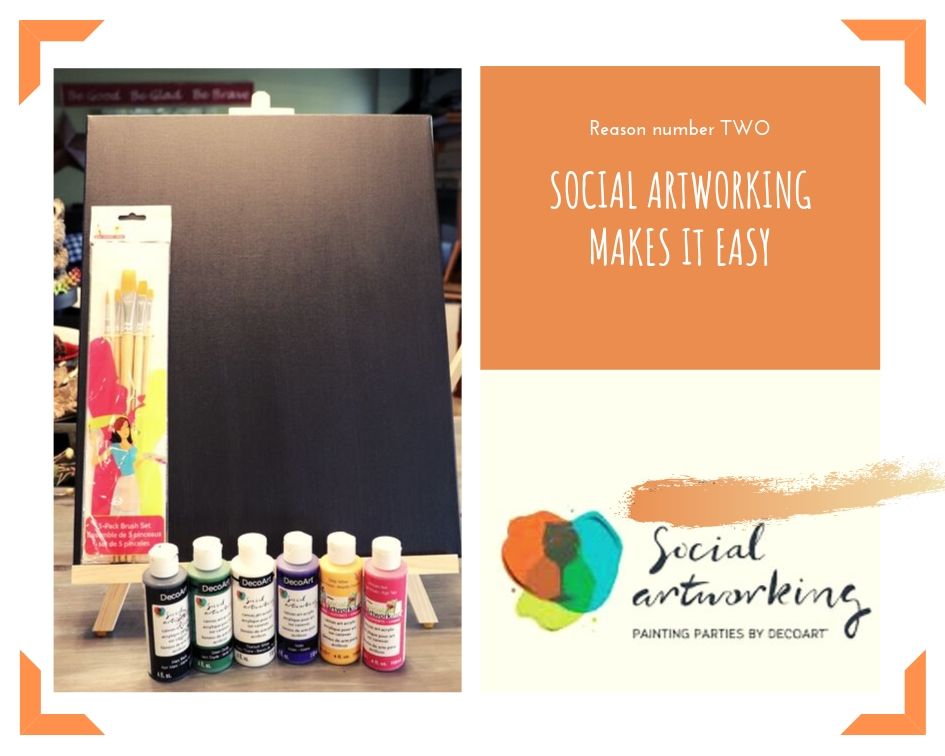 Reason number TWO- They make it so EASY! Providing all of the supplies and step by step instructions. All you have to do is call all of your friends and grab some treats. 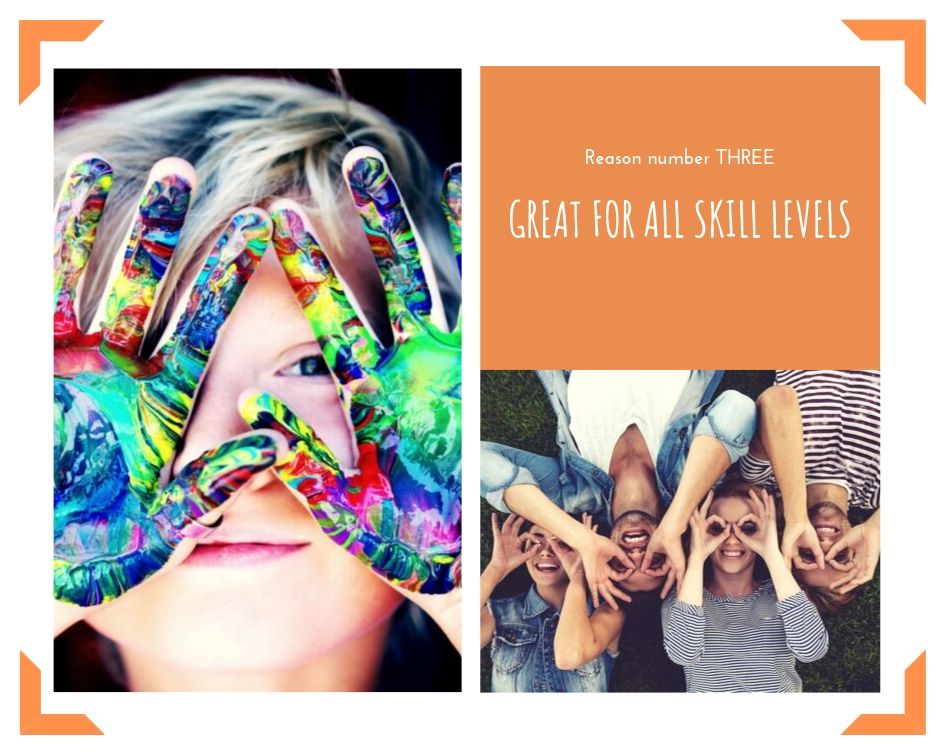 Reason number THREE- It is great for all skill levels. You do not have to be a professional artist to create beautiful masterpieces. Whether you are a beginner, advanced or master painter, everyone will leave feeling like Bob Ross. Social Artworking has many different patterns for all ages.  Reason number FOUR- Stress Relief! We are not kidding here friends. This is a real thing. As you sit and paint you become very relaxed and enjoy the moment. There is NO stress because Social Artworking has made it so easy. "Art therapy is a therapeutic technique rooted in the idea that creative expression can foster healing and mental well-being."- Kenda Cherry  Reason number 5- It is a great way to freshen up your home decor on a regular basis. Social Artworking can help you adorn your home in a seasonal or holiday fashion. For more inspiration head on over to our instagram and facebook page! Get started with Social Artworking today. Contact your local Social Artworking Consultant today.
This post is a sponsored post with Social Artworking. All opinions are our own. 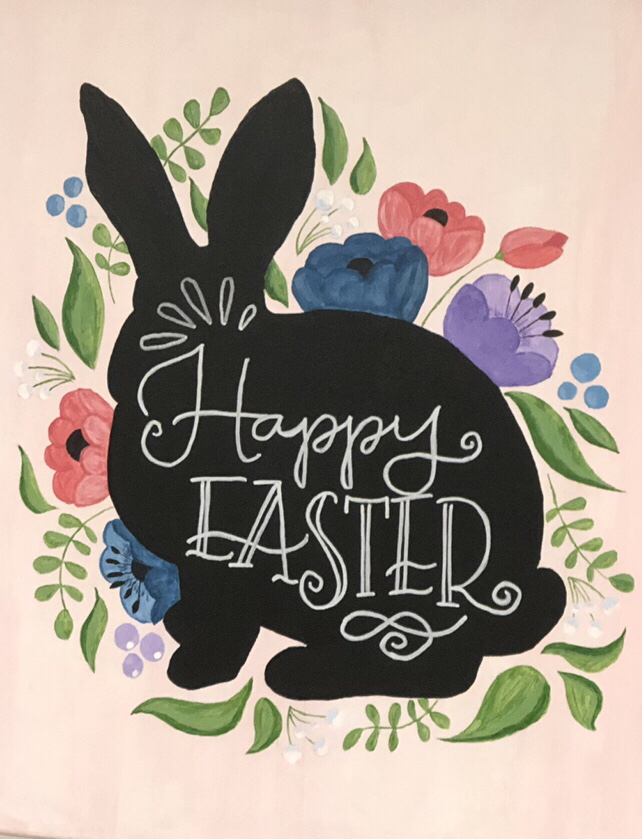
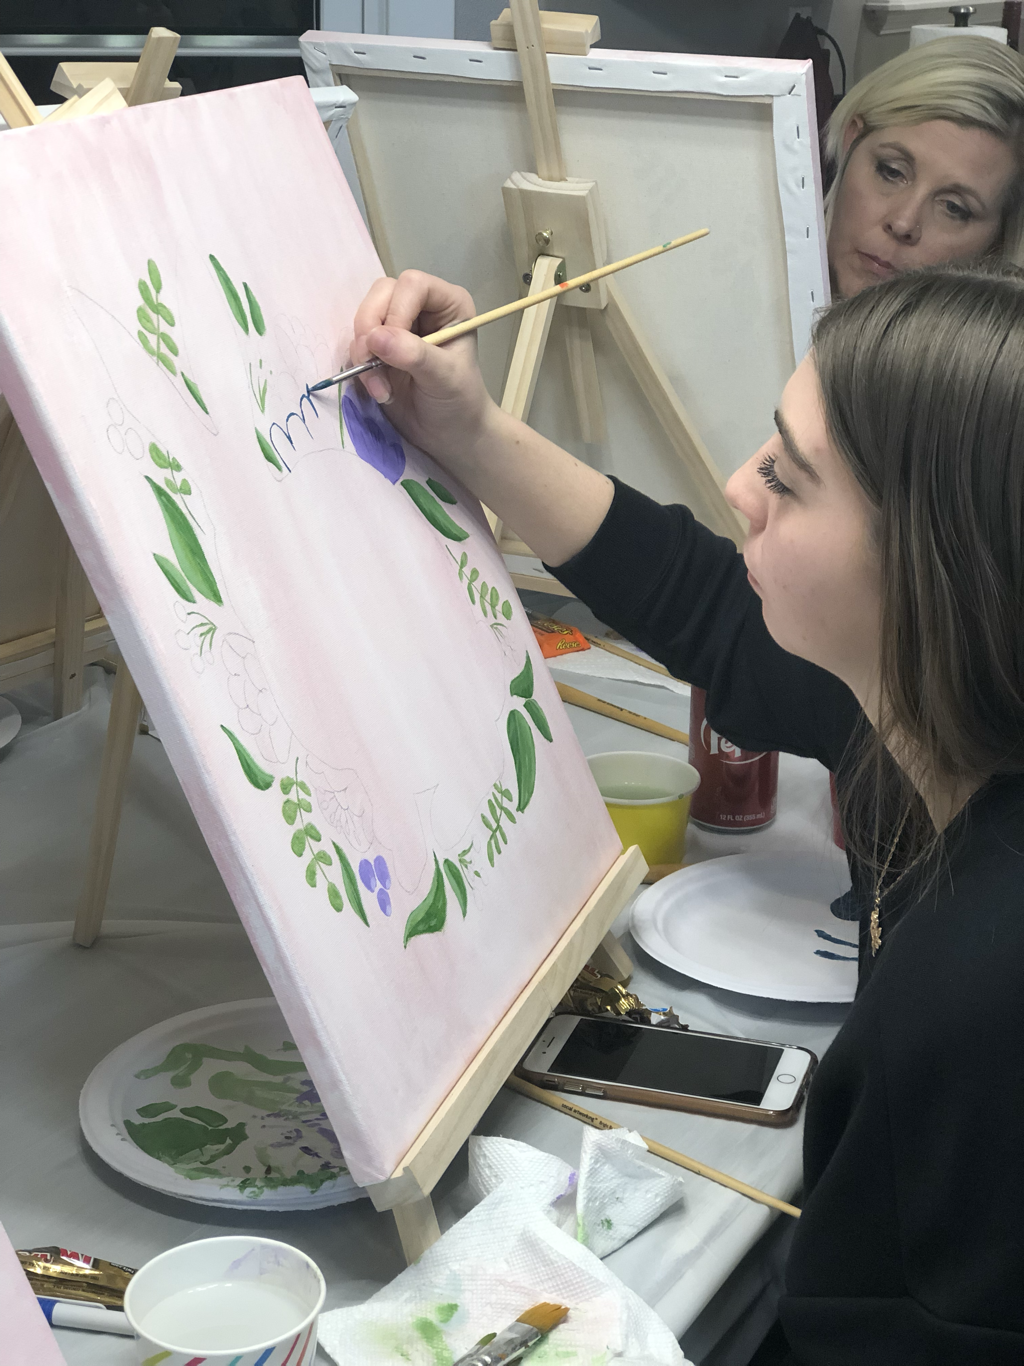
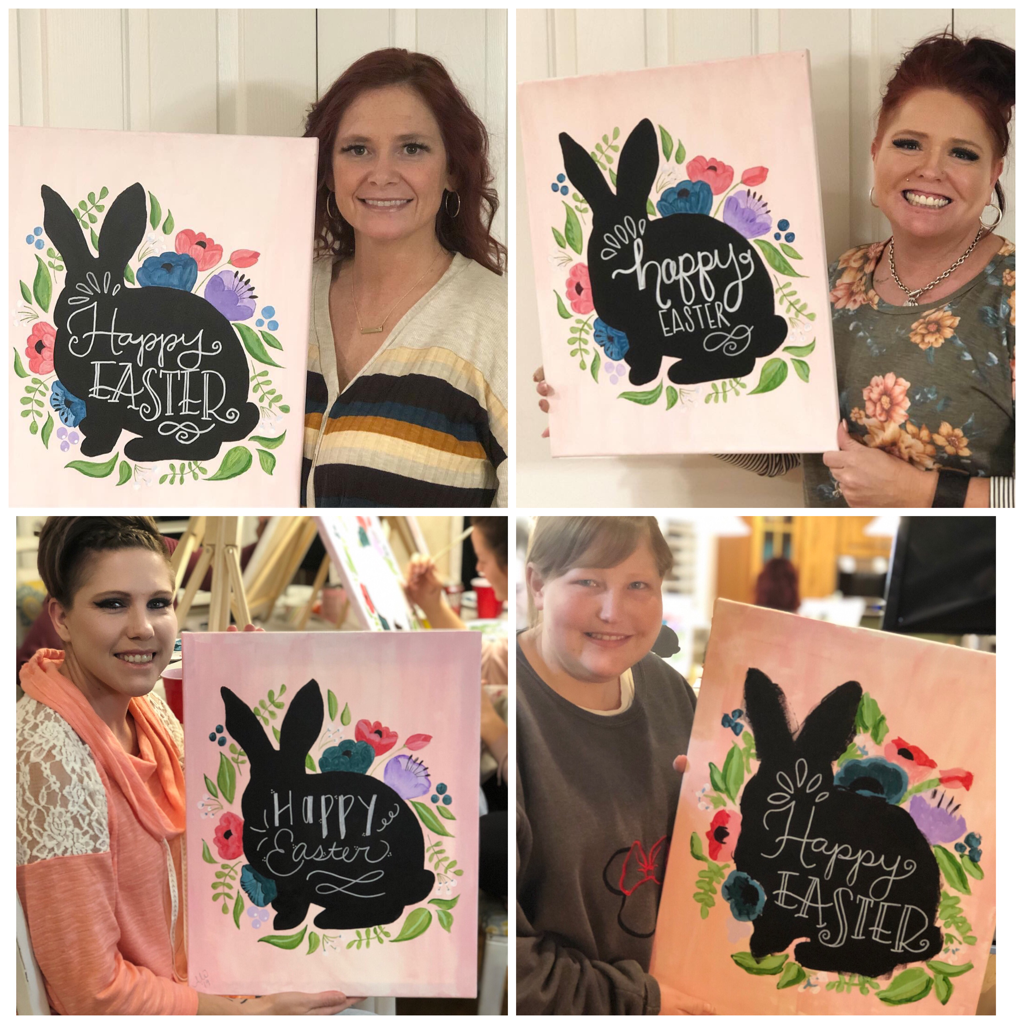
Isn’t this Floral Bunny canvas a cutie? What if we told you that it was easy to make and you can laugh and have fun while doing it? (No need to re-read, we’ll say it again - It is easy to make and you can laugh and have fun while doing it!) Social Artworking makes this happen. Let’s go over the steps.
1. Find a Social Artworking Designer in your area (don’t forget about us ?) 2. Decide what design you would like to paint and set a date. 3. Invite your friends 4. Let’s get this party started. Now, is anything hard about any of the four steps we just mentioned? LOL We didn’t think so. Below is a Facebook Live that we recorded at our Social Artworking Event. Watch it to learn more and see first hand how much fun Social Artworking is.
Now that you have watched our fun video we will show you a few photos that we snapped along the way.
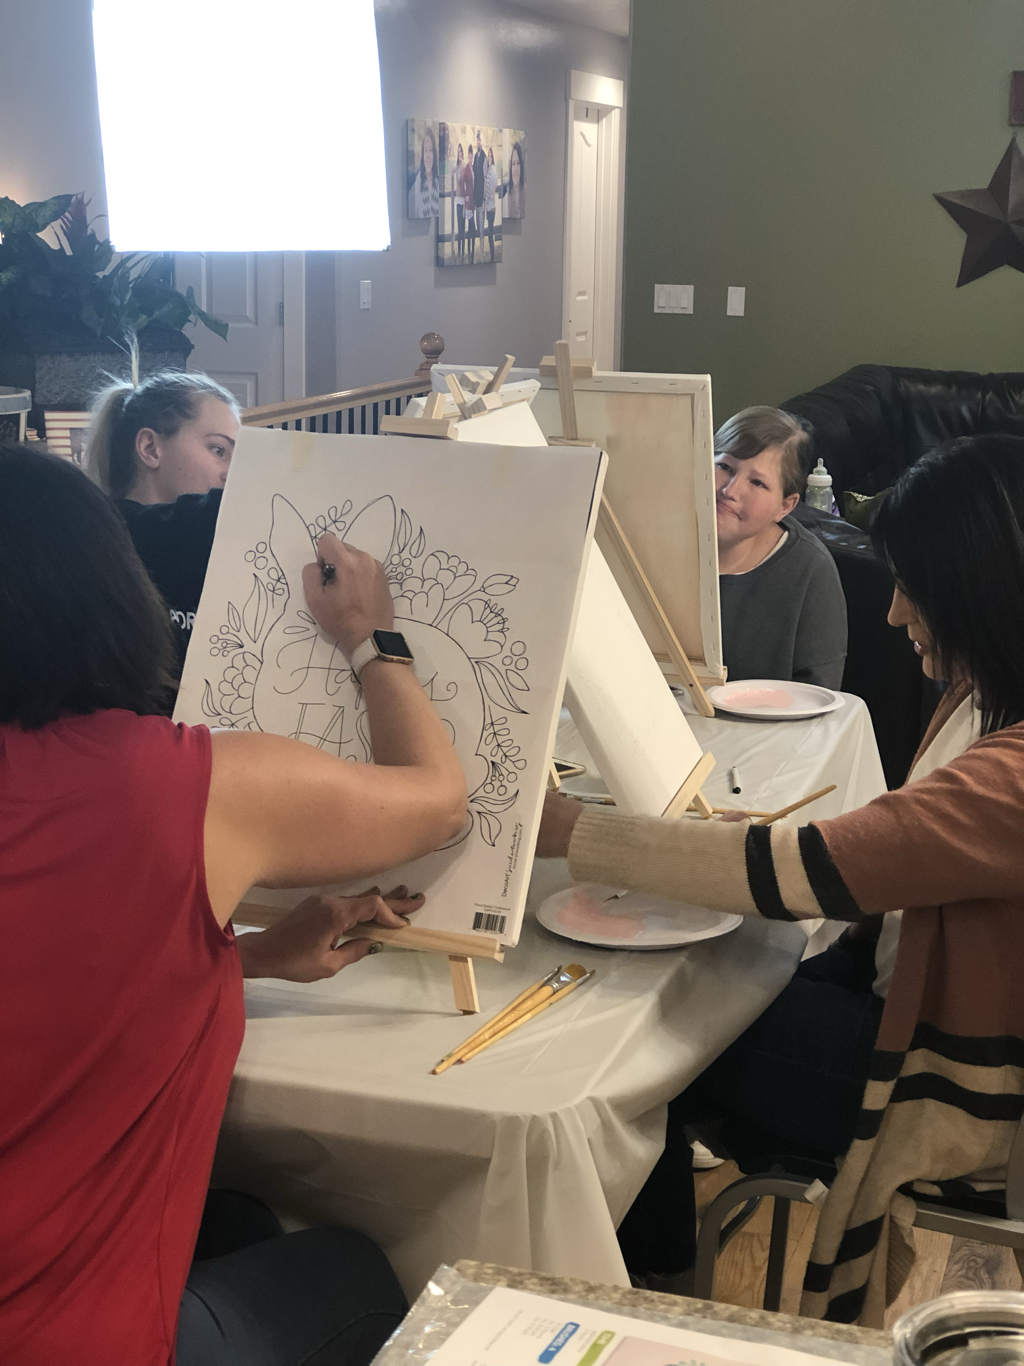
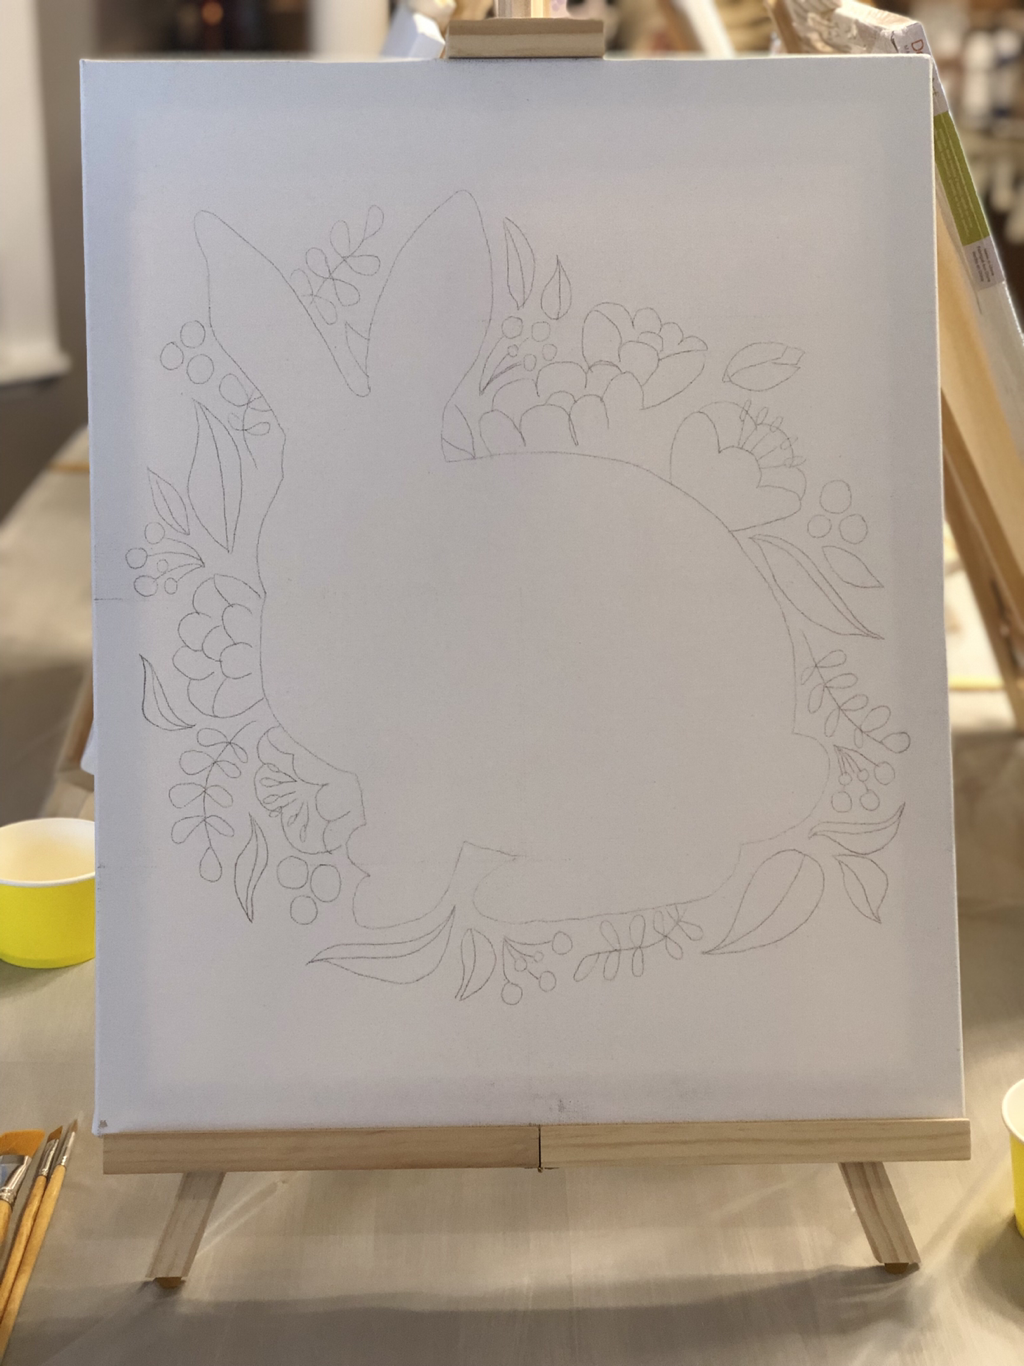
Let the painting begin! Your Social Artworking Designer will now teach you and your guests how to paint your Floral Bunny.
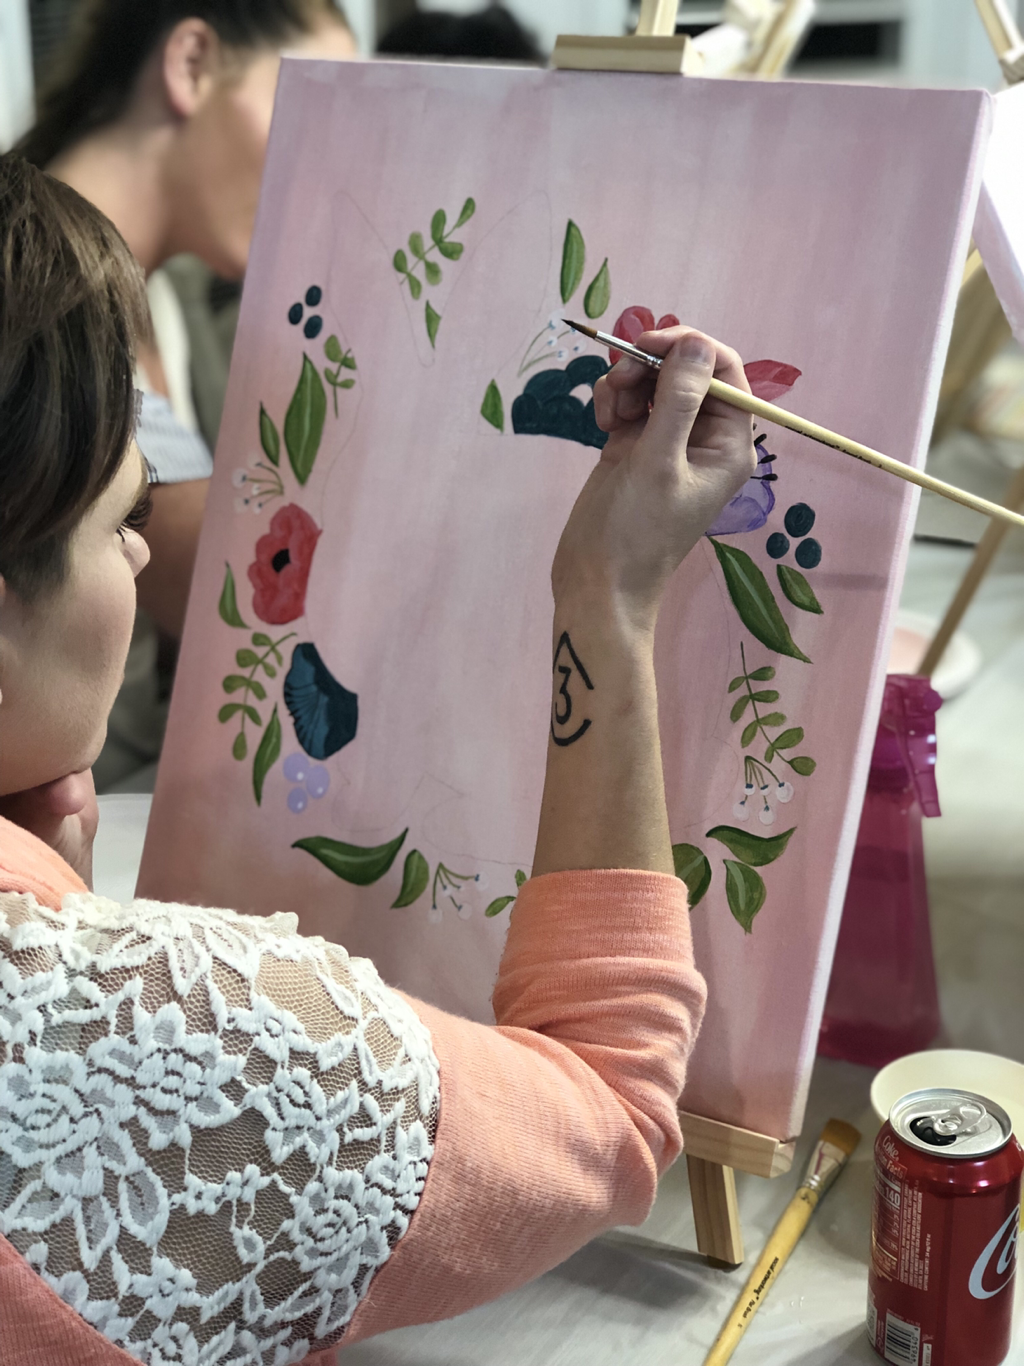
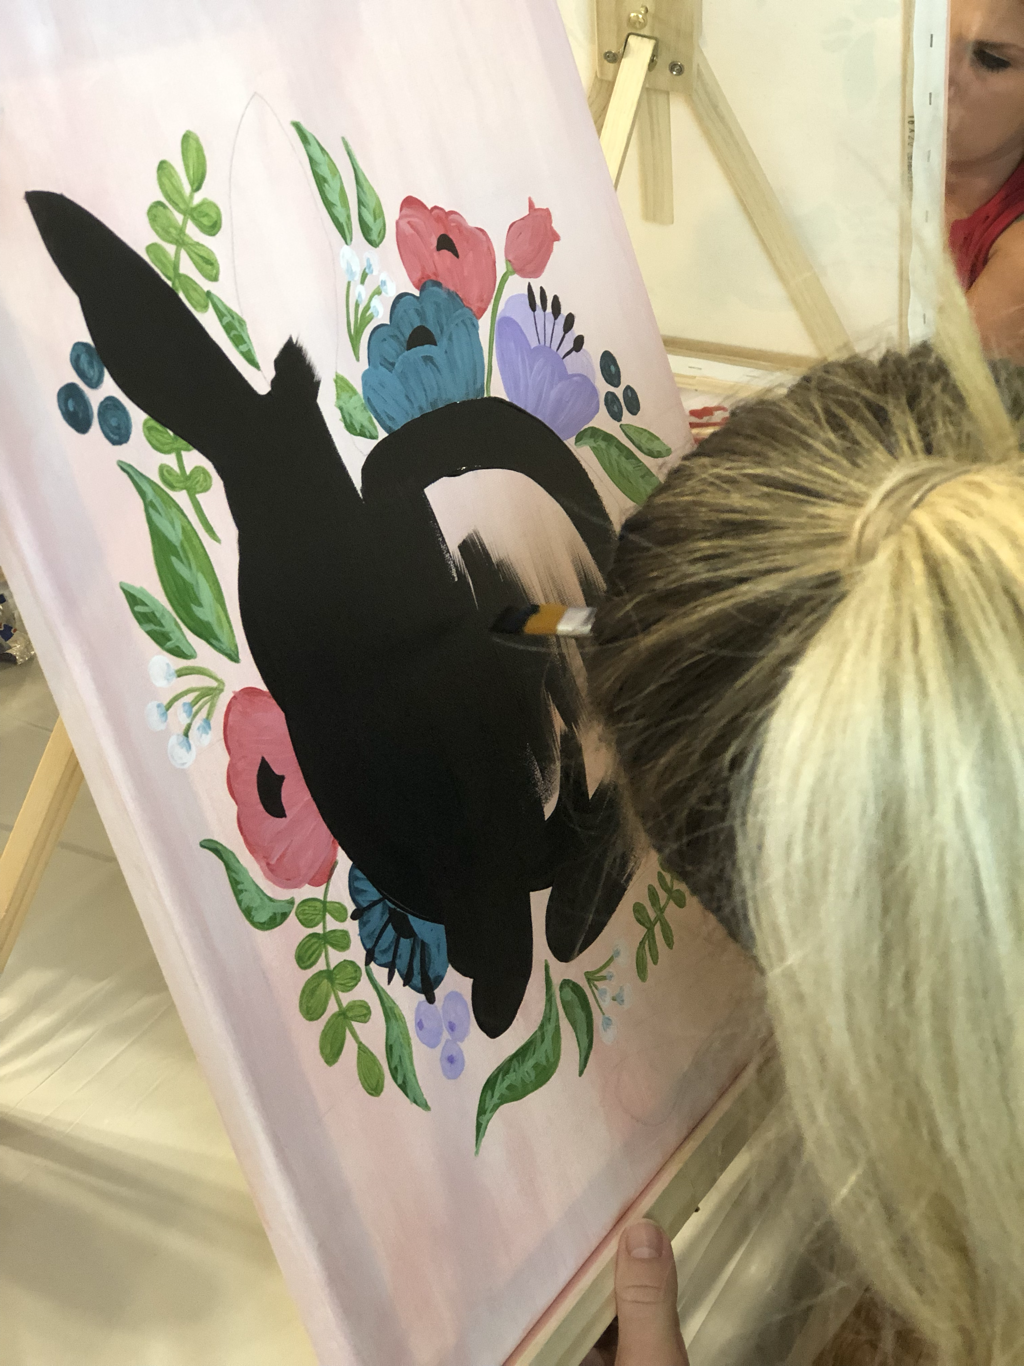
Now check out the final results! And look at those smiles!

We are so excited for this hop! A bunch of your favorite designers getting together to bring you Christmas early! The line up includes Eileen Hull,
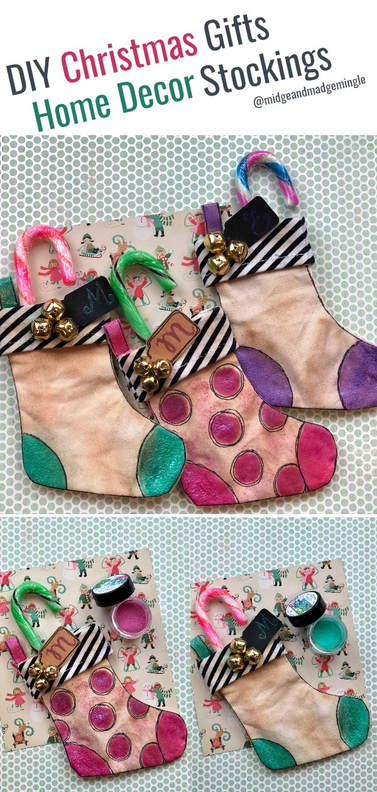
Jo Rotella, Just Yolie, 30 Minute Crafts, Betz Golden, Candy Rosenberg, Jenn Dubell, Susan Shiles, Michelle Wells, Rita Barakat and yes your very own Midge and Madge of Midge and Madge Mingle! Plus there is over $100 in crafty prizes including Rita's latest line of diecuts/ephemra and fabulous paints from Plaid Crafts. More about this fabulous giveaway later in the post. Who is ready to get started??? (We are raising our hands)! First things first. If you love today's project we would love it if you would share this video (that is posted below) and if you would pin the image (up top) that would be fantastic!!! 
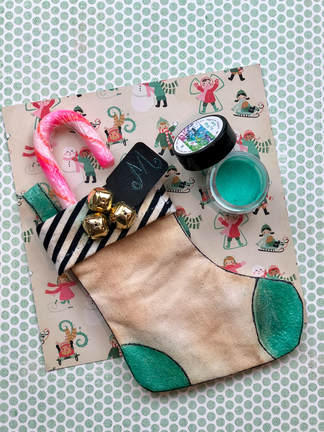
Today we have created the cutest gift card holders with these fun canvas stockings by Heidi Swapp. We used Rita's embossing powders from Emerald Creek, to create these personalized gifts. Not only can these be used as a gift, but they also could create a fun home decor piece Banner, Frame, Christmas Ornaments even! The possibilities are endless with this project! The video below with show you how we created these fun stockings. We go over now only the how to's, but different techniques we used to get the stockings to look aged and a little worn, you may even say vintage looking.
Supplies you will need to create this project:
*Heidi Swapp Small Canvas Stockings *Rita Barakat Fairy Wings Embossing powders colors:Pink, Green, Blue *Embossing Pens *Embossing Ink Pad *Heat Gun *Tag Punch *Black and Cream Cardstock *Hot Glue Gun *Fine Tip Sharpie
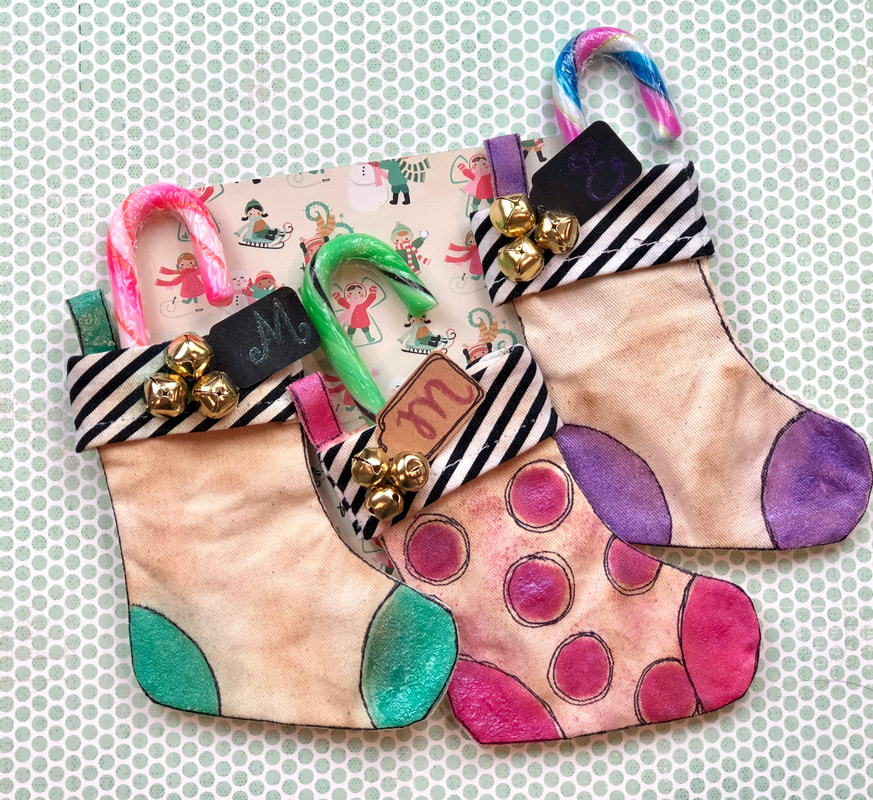
We hope that you enjoyed our fun Mini Christmas socks. We love love how they turned out. Be sure to hop through the whole line up so you can be eligible to win the giveaway!!! To enter to win you must visit and comment on each post! Bonus, stop by Plaid and like their FB Page!
The line up includes : Rita Barakat Eileen Hull Betz Golden Joe Rotella Yolie Burke Midge & Madge Mingle Susan Hiles Carolina Moore Michelle Wells Candy Rosenburg Big Hugs- xoxoxoxoxox Midge & Madge
It’s Blog Hop time and we are featuring the magical mysteries line from Rita Barakat and Emerald Creek! We are hoping to introduce you to many ways of using these new and mysterious embossing powders, turning your works into magical art.
A special thank you goes out to all of the talent in this line up. Joe, Midge & Madge, Ken, Fredrique, Cathy, Stephanie and our amazing coordinator Katelyn, we couldn’t have done this without you. 
To enter the contest: just comment on every project in the Hop by clicking through the links at the bottom of the page. The contest closes
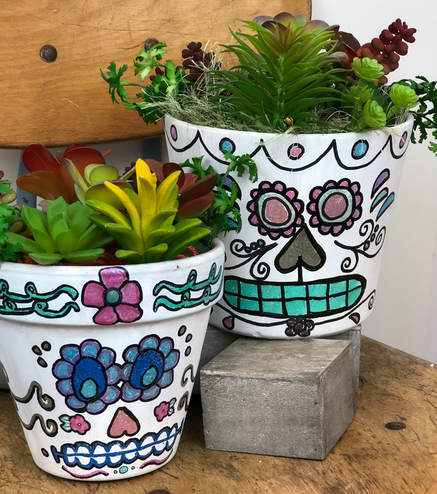
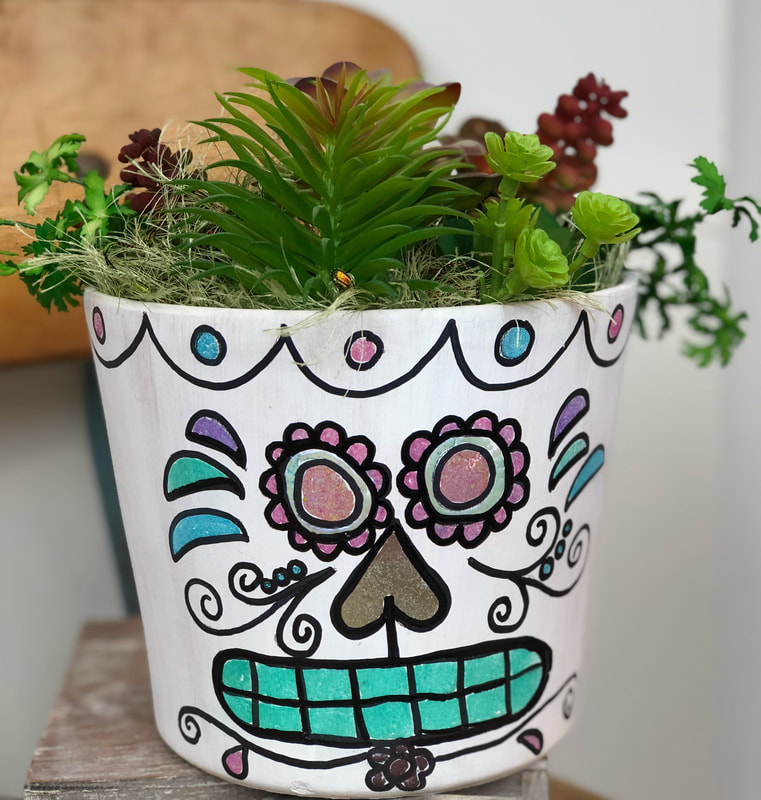
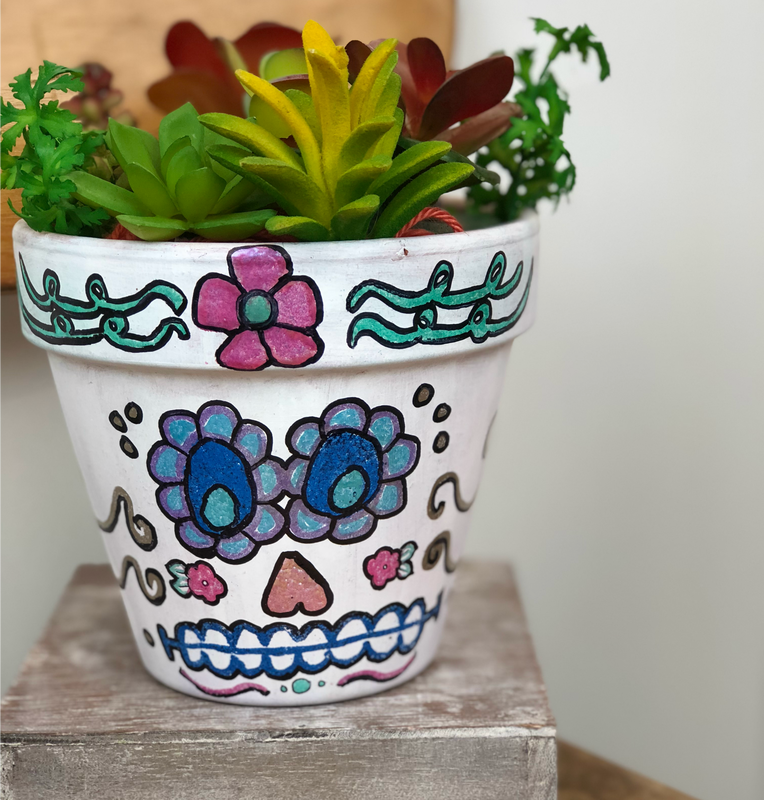
October 10th @11:59pm One lucky winner will be announced Friday October 12th. We are so excited today to be a part of the Magical Mysteries Blog Hop!!! A special thanks to Rita Barakat and Emerald Creek for being the hosts of this fabulous hop!! If you came here from the ever so talented Cathy then you are on the right track! If not you will want to start at the beginning of the hop HERE. Today friends, we are making some fabulous Dia de Muertos (Day of the Dead) Succulent Planters. 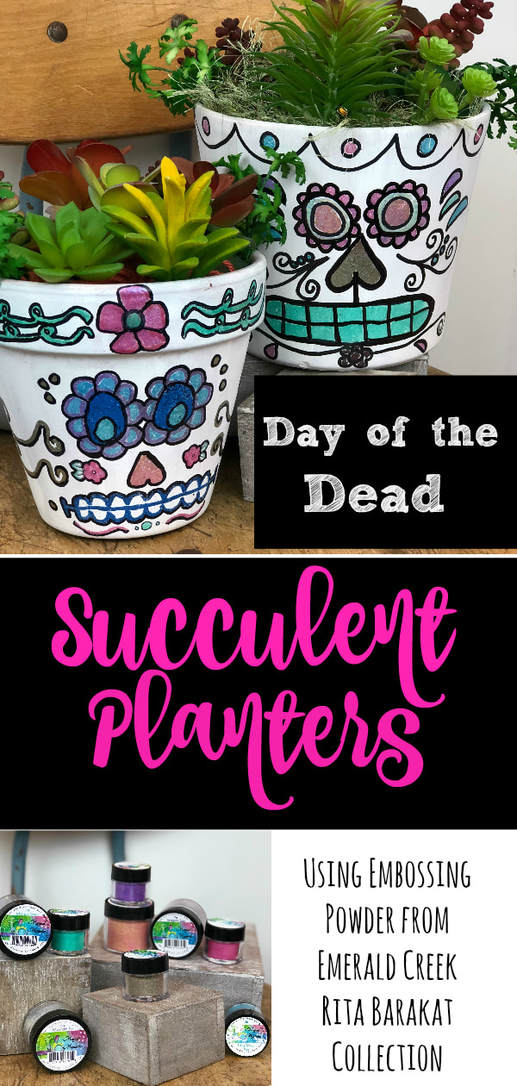
Who wants to learn how to make these cute little guys??? Well you are in luck! Below is a tutorial that was recorded live on FB! We are sure you are have many questions. And we have many answers! But first lets talk about how amazing these embossing powders are shall we?
First off we take our hats off to Emerald Creek for all of the amazing products that they have! You know us, we try many different products and only use what we love. And we LOVE Emerald Creek! They are hands down the best company out there. The color and texture is amazing. The ability to apply layer upon layer is fantastic, and the way that our projects turn out each and every time that we use them leaves us in awe... It really is the finishing touch to any and all projects! Now to add the Magical Mysteries Collection by Rita Barakat is just brilliant!
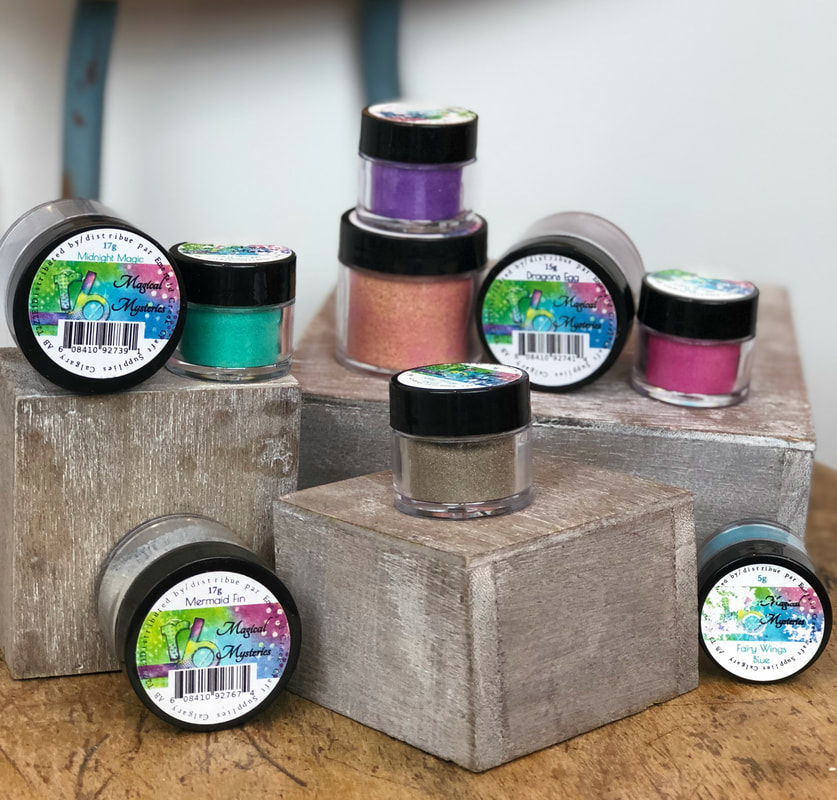
We loved each and every color that is in this collection! Of course we are just a little biased to the Fairy Wings Pink and the Fairy Wings Blue (LOL). To make a Day of the Dead Planter here is a list of things that you will need.
* Terra Cotta Planter Pot (any size) * DecoArt Snow White Acrylic Paint *Foam Paint Brush *The Magical Mysteries Embossing Powders *The Magical Mysteries Fairy Wings Kit *Zig Embossing Pens *Heat Gun *Pencil *Black Sharpie (fine tip and regular) *Foam square *Faux Succulents
We had such an amazing time creating these fun planters today! We hope that you enjoy them as much as we did. Be sure to watch the tutorial to see how to create your very own Day of the Dead Succulent Planters using the fabulous Rita Barakat Magical Mysteries embossing powders from Emerald Creek.
Next up is the crazy talented Freddie click HERE for more fun! Also don't forget to you have a chance to win Rita's entire line- Magical Mysteries (four individuals) and the Fairy Wings kit together is over $60.00!! Check out Emerald Creek and Rita Barakat!!! Whoop Whoop! Enjoy your week!
Here is the full line up just in case you get lost!! It actually goes live at 2 pm CST, but ours posted early so you will see the others go live then! Kim Rita Stephanie Cathy Midge & Madge Freddy Jo
Have you ever wanted to make fun festive 4th of July Shirts for the whole family? We have made it easy for you! Midge and Madge have created a fun file in Design Space and you too can create these amazing holiday shirts in minutes! Watch the full tutorial below. Here is the link to our shirts on Design Space
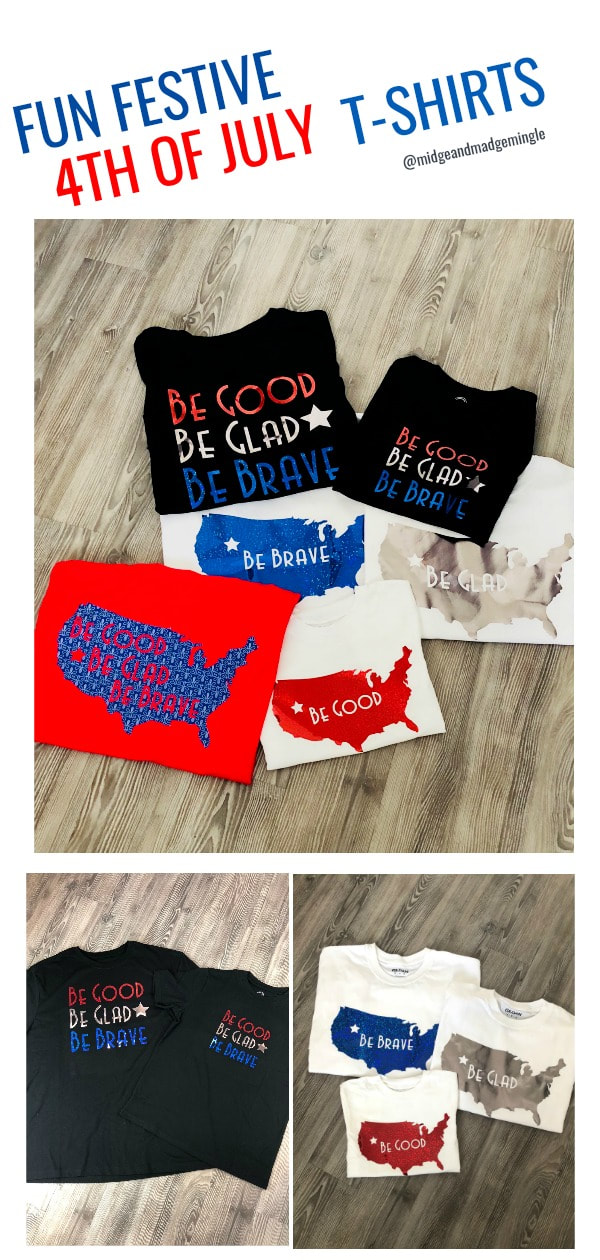
The supplies that you are going to need to create your shirts are below. (Please note some links may include affiliate links)
Cricut Maker or Cricut Explore Cricut Mat EasyPress EasyPress Mat Red Holographic Iron-on Blue Holographic Iron-on Silver Foil Iron-on Filigree Blue Sampler Patterned Iron-on T-Shirts of Various Sizes
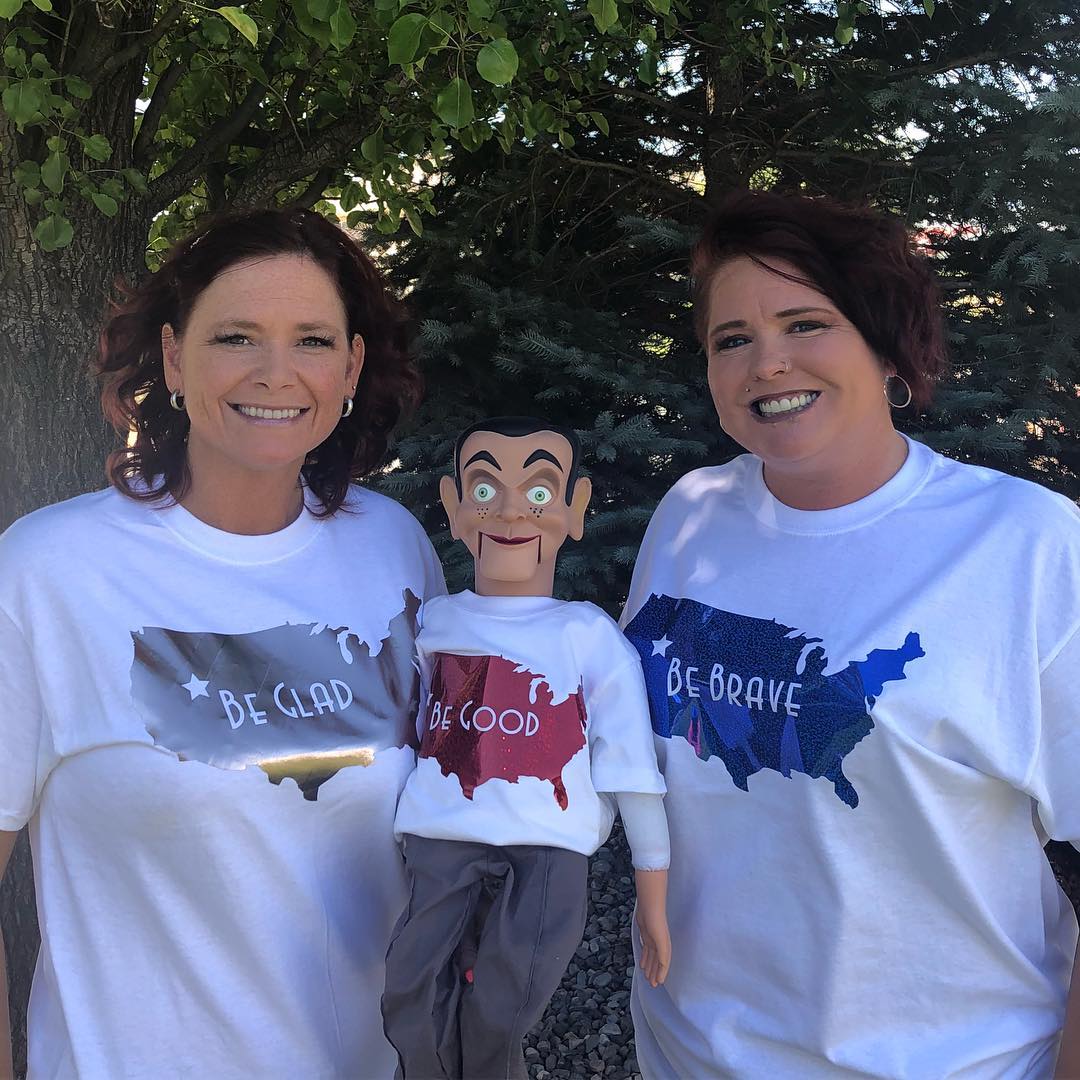
Here is a close-up of our fabulous shirts!!!
This is a sponsored conversation written by me on behalf of Cricut. The opinions and text are all mine. 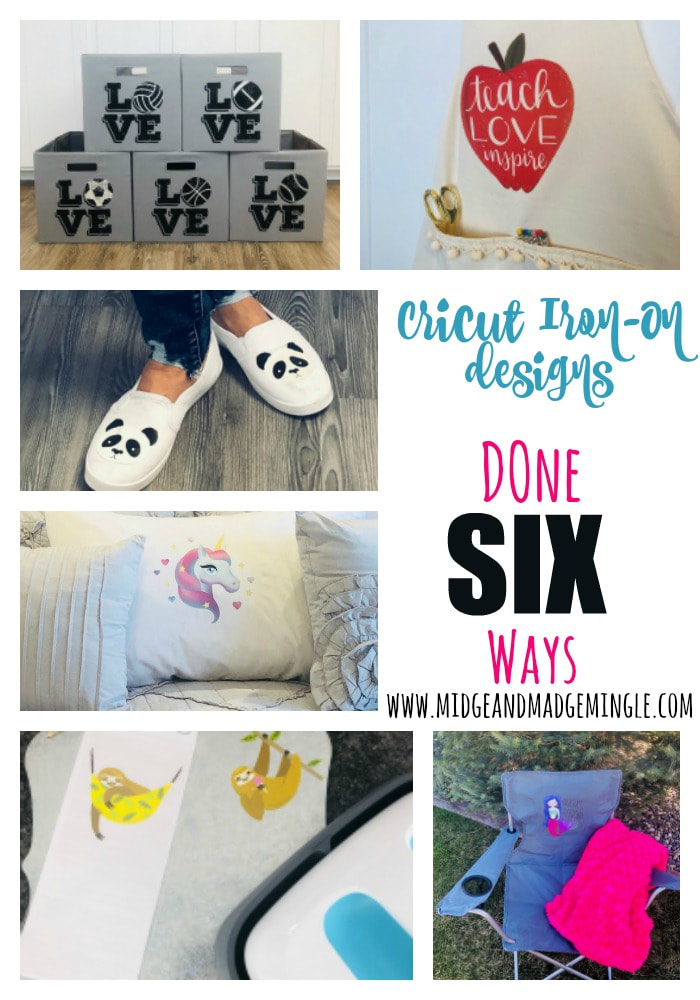
As we walked up and down the aisles of our local craft store, throwing different items into our cart, (we all know that we don't need anything, but we "just have to have it") we came across something that changed our DIY lives! Yes, you heard us correctly "Changed our DIY lives". The NEW Cricut Premium Iron-On Designs are here friends, and boy are they cute! There are over 50 designs available, with more on the way! Now, we are sure that you are scratching your head and wondering, "what are they and how will they change my life"? Here is the answer! These Iron-On Designs make it easy. They are perfect for apparel, home decor, tote bags and more.

You will find that we could not just stop at one project! We had several different designs to choose from and our minds were spinning as fast as a hamster runs on his wheel! The great thing about all of these Premium Iron-On Designs is that you can apply them just the way they are, or you can take your Cricut project to the next level by customizing it and making it your own.
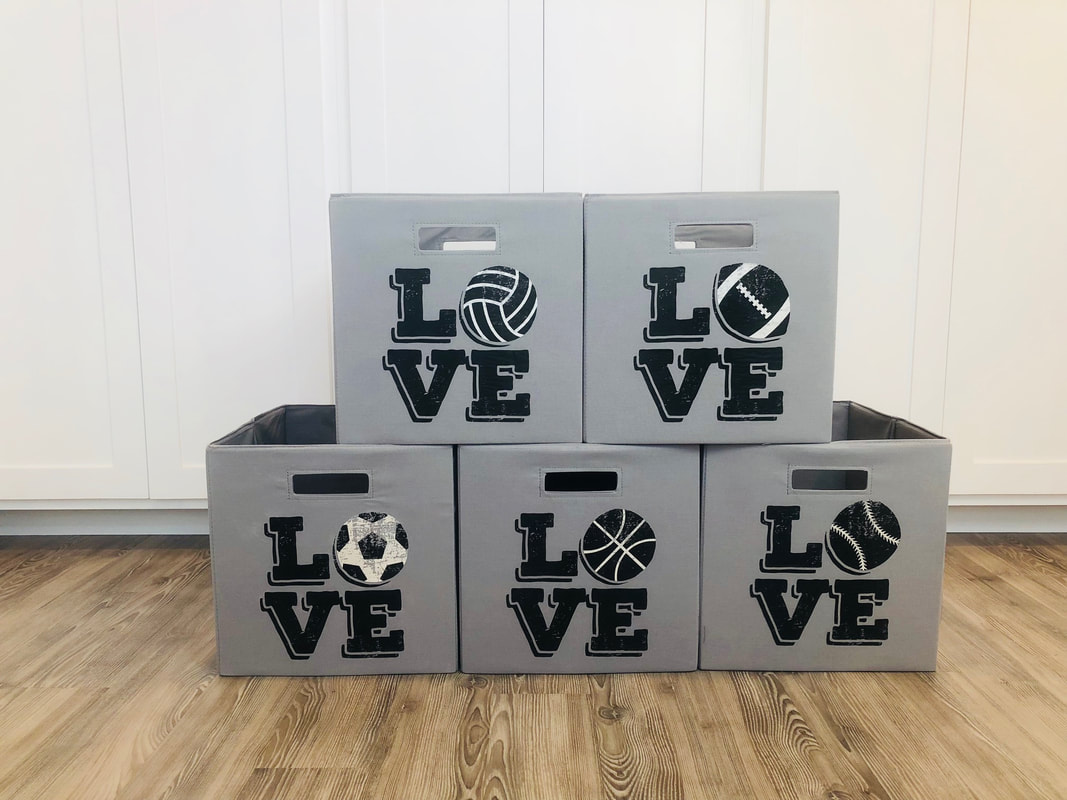
Our first projects we are going to share with you are some Sports Organizers using the Iron-On Designs Love Soccer, Love Basketball, Love Volleyball, Love Baseball, and Love Football. Below you will see all of the supplies that we used to create our fun projects. 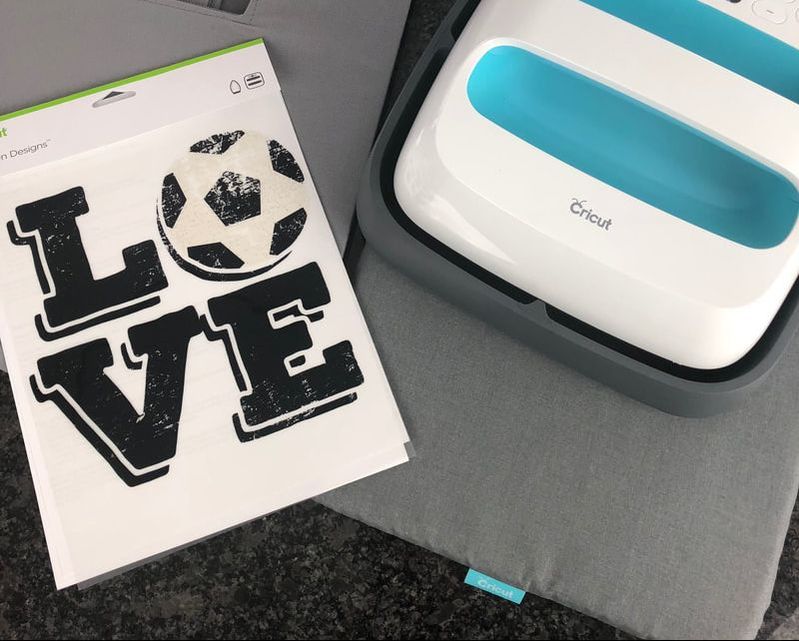
(Click on any of our Affiliate links below to find the supplies
*Cricut EasyPress *Cricut EasyPress Mat *Cricut Iron-On Designs Love, Basketball *Cricut Iron-On Designs Love, Football (available soon) *Cricut Iron-On Designs Love, Soccer *Cricut Iron-On Designs Love, Baseball *Cricut Iron-On Designs Love, Volleyball *Cricut Iron-On Designs Mermaid *Cricut Iron-On Designs Panda *Cricut Iron-On Designs Sloth Nap *Cricut Iron-On Designs Unicorn *Cricut Iron-On Designs Teacher Apple We are now going to walk you through a few quick easy steps so you can start creating your amazing DIY Cricut Projects. Step 1: Take your Cricut Iron-On Design out of the package and set aside. Step 2: Heat your EasyPress to 340 degrees Step 3: Pre Heat Cricut EasyPress Mat and project piece Step 4: Place your Iron-On Design Step 5: Press for 30 Seconds Step 6: Cold Peel You can find all of the EasyPress recommended settings page HERE *There are different instructions if you are using a towel in place of the EasyPress Mat. Shown Below we are Pre Heating our project. We Pre Heat for approx 5 seconds. 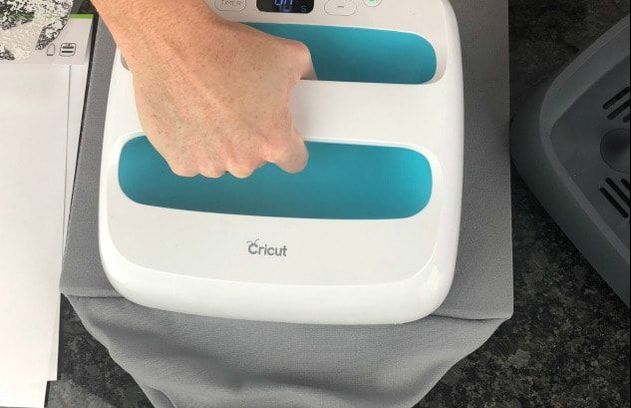
It's pressing time! EasyPress time that is. Using our Cricut EasyPress and EasyPress Mat, we laid our Cricut Iron-On Design onto our organizer box, and pressed.. Remember to check the EasyPress recommended settings page for different types of materials.
Directions for pressing Cricut Iron-On Designs: (Always heat your EasyPress Mat and the fabric slightly before adhering) Temperature Setting- 340* Time Setting-30 seconds on the front, 15 Seconds on the back (if the fabric allows. Our organizer boxes were a different type of fabric on the back so we skipped this step) COLD PEEL Care Instructions:* Allow 24 hours after application before washing. * Wash and tumble dry inside out. * Do not bleach. * If you need to iron, only iron on the backside of the garment. 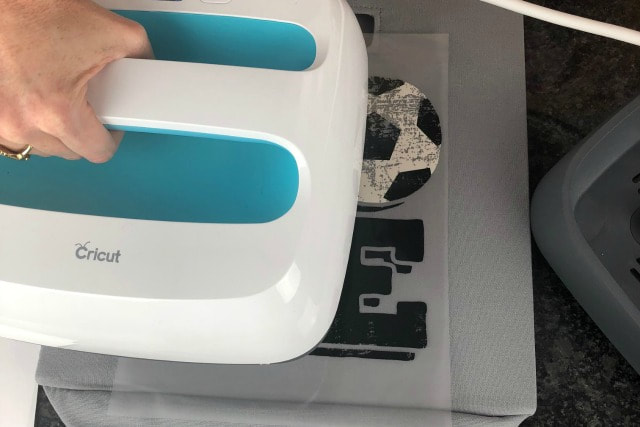
We are thrilled with how our Sports Organizers turned out! No more cleats, gloves, mitts, or balls on the ground! Fill these babies up and keep things organized! Psssst... can we share a secret? This fun organization idea would work fantastic with any of the Cricut Iron-On Designs! We see many more organization projects in our future!!!
We are now going to share several other fabulous ideas we came up with using these amazing Iron-On Designs! Be sure to leave a comment and let us know which is your favorite!
Mermaid Chair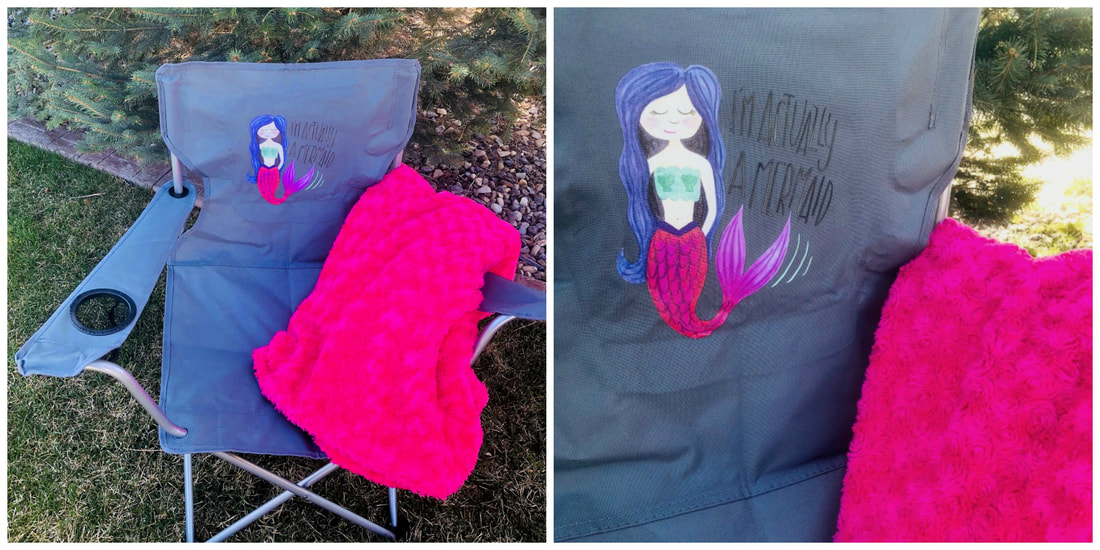
*Please note when making your own custom chair with your Cricut Iron-On Designs* Make sure that your chair is not plastic and that the material will work using the EasyPress or Iron.
Teacher Apron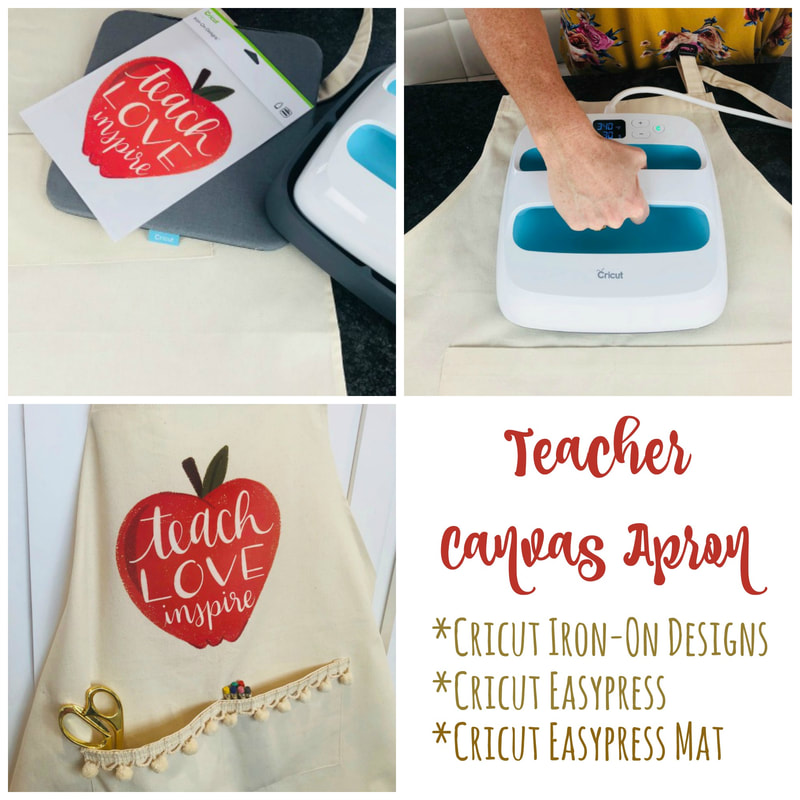
What a perfect gift to give to an amazing teacher in your life. Also this is another fun project that you can create using many of the Cricut Iron-on Designs that are available.
Sloth Metal Sign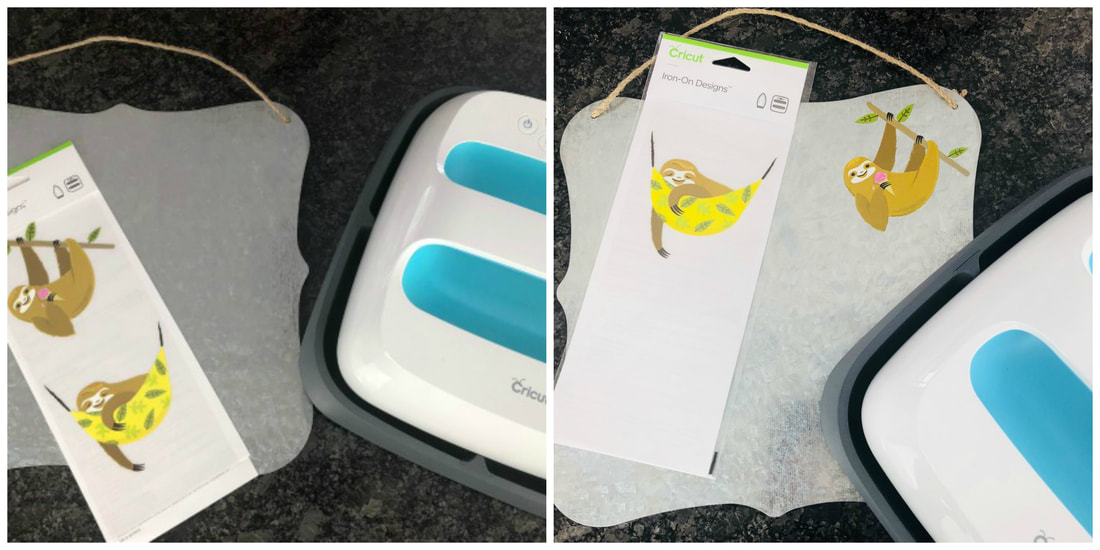
Remember when working with metal that the surface will become HOT so please be cautious. And allow to cool completely before handling.
Unicorn Pillowcase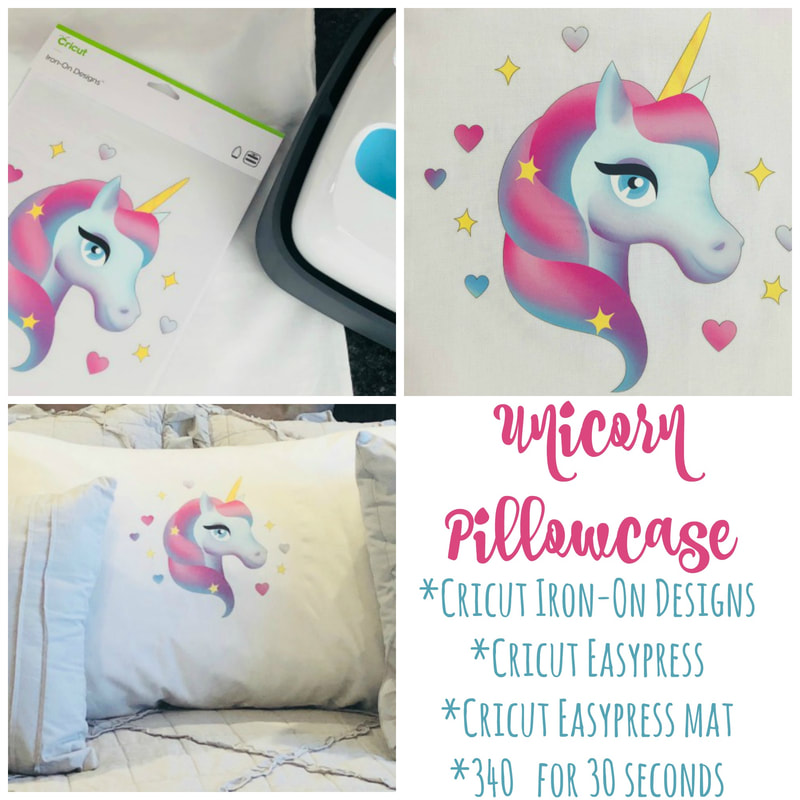
This one is for sure going to be a hit with our nieces. But imagine all of the possibilities with this project. We can think of at least 50 (Wink Wink).
Panda Shoes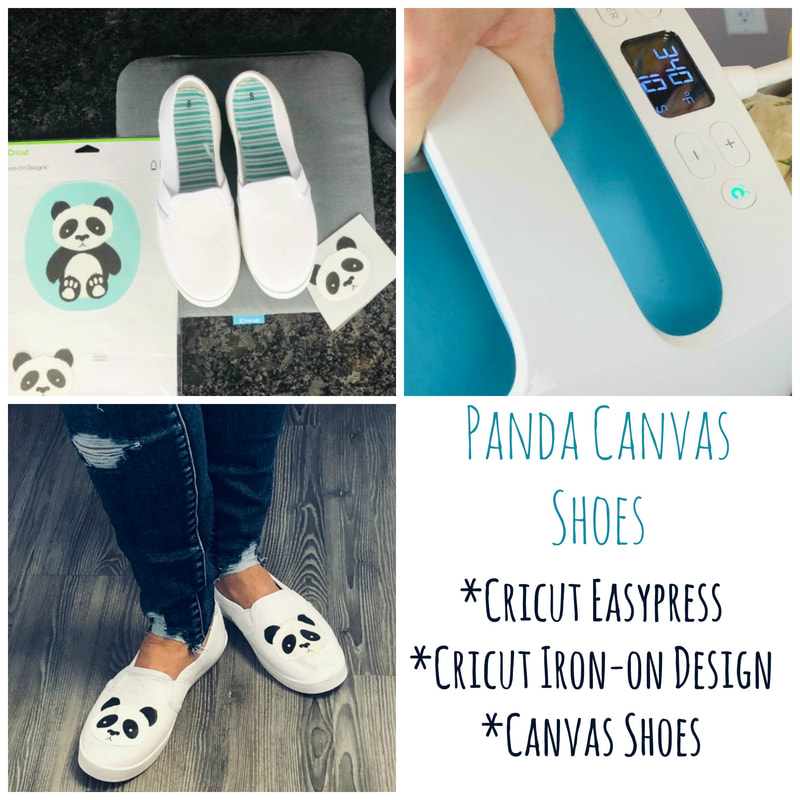
* We stuffed the shoes with oven mitts and covered the toe (where the rubber is so it wouldn't melt) and then followed the instructions to press.
Did you know that the Cricut Iron-On Designs come in two different sizes? There are Large and Small designs for you to create with. We are compensated for this post. However, the opinions, photos, and text are all our own. Remember...sharing is caring! This is a sponsored conversation written by me on behalf of Cricut. The opinions and text are all mine. 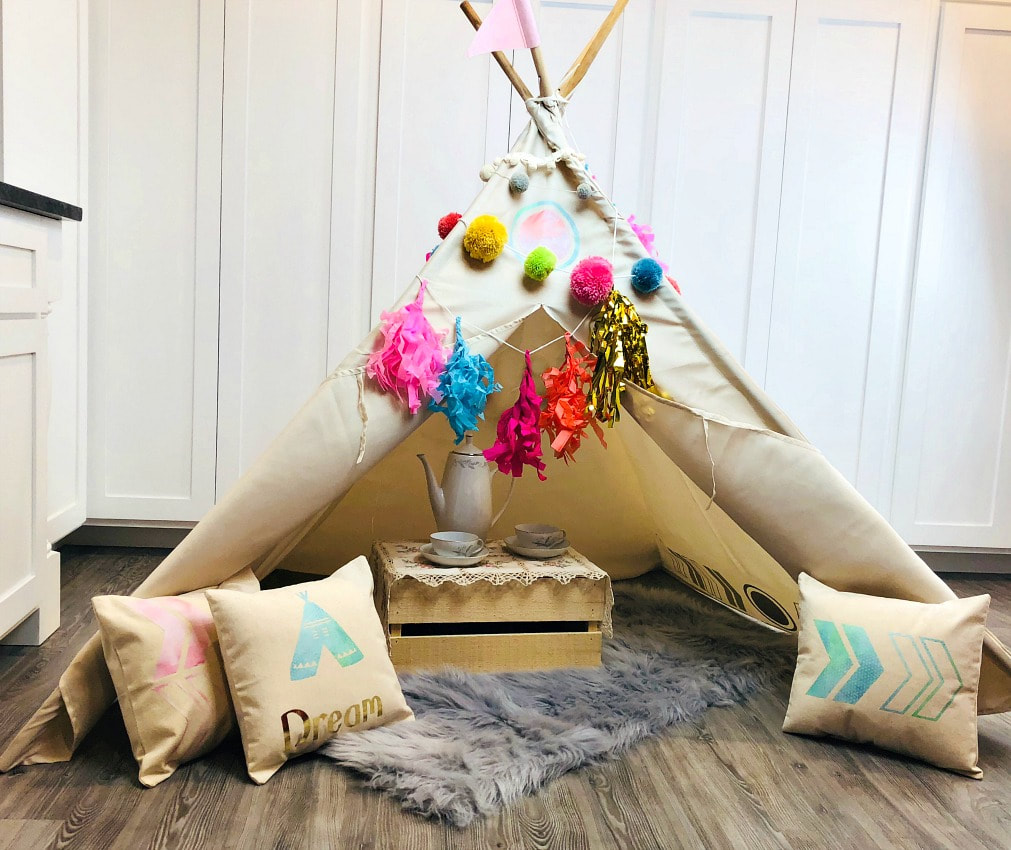
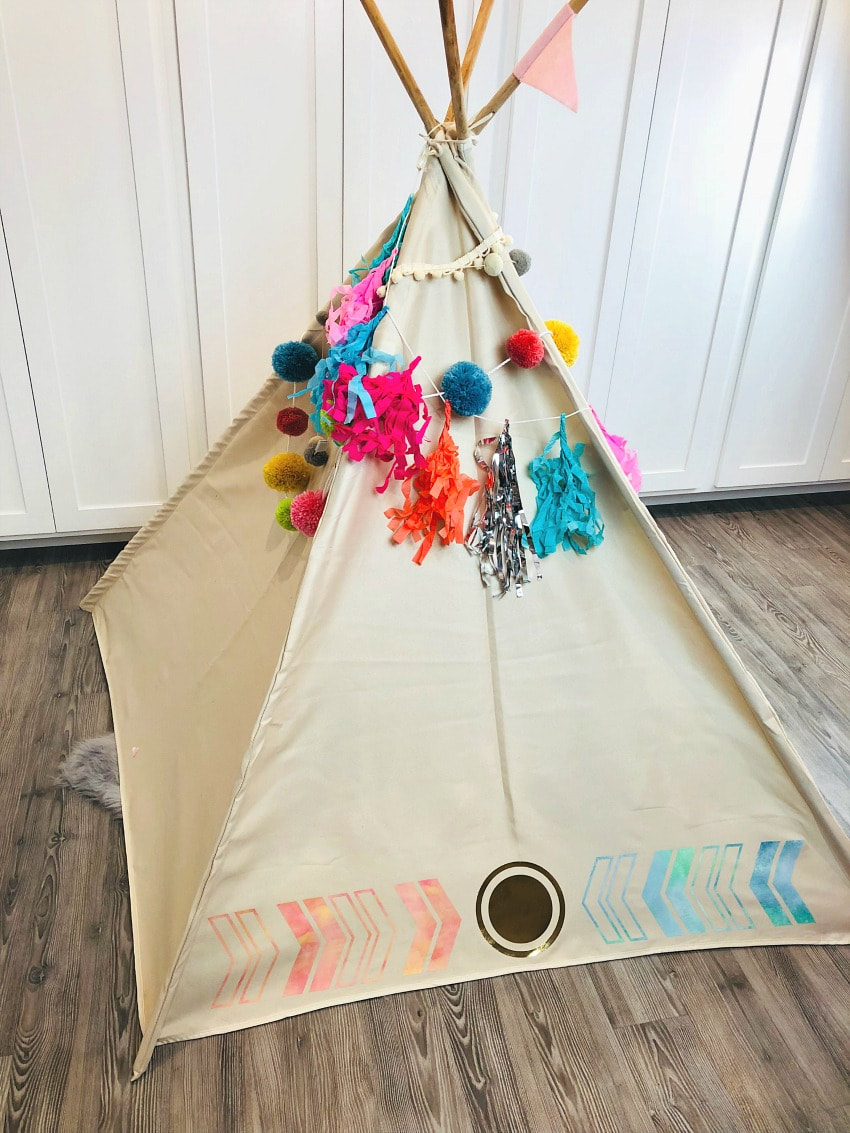
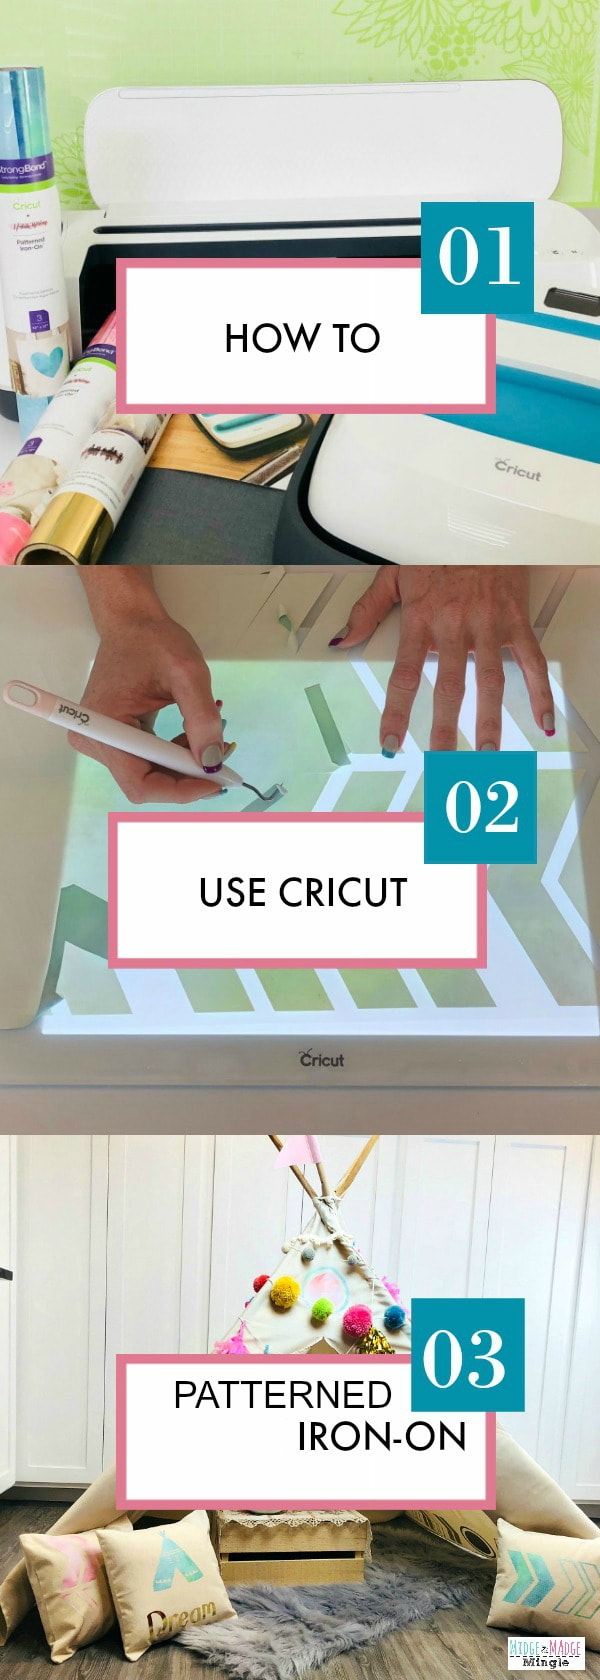
When we looked at our plain old canvas teepee and pillows, we knew that the new Cricut Patterned Iron-on would add just the perfect splash of style. With the Cricut StrongBond guarantee, you will get long lasting iron-on results. (*Cricut stands behind it's Iron-On products with the Cricut StrongBond Gurantee, when used and applied as directed.) It is so easy to work with. The Cricut Patterned Iron-On is simply fabulous! Check out our detailed YouTube Video below.
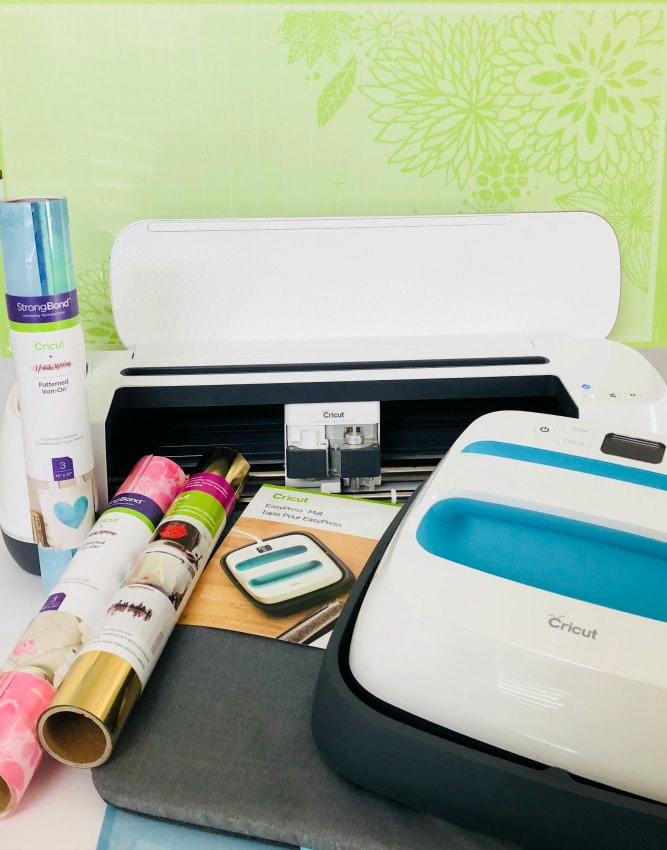
There are currently nine different sampler packs that mix and match to offer an amazing color variety. Each of the sampler packs comes with 3-(different, but coordinating) 12"x17" sheets. Pull out your teepees, sheets, or pillows and let's get started! Below we have pictured all of the supplies that we used:
Click on any of our affiliate links below to find these supplies-
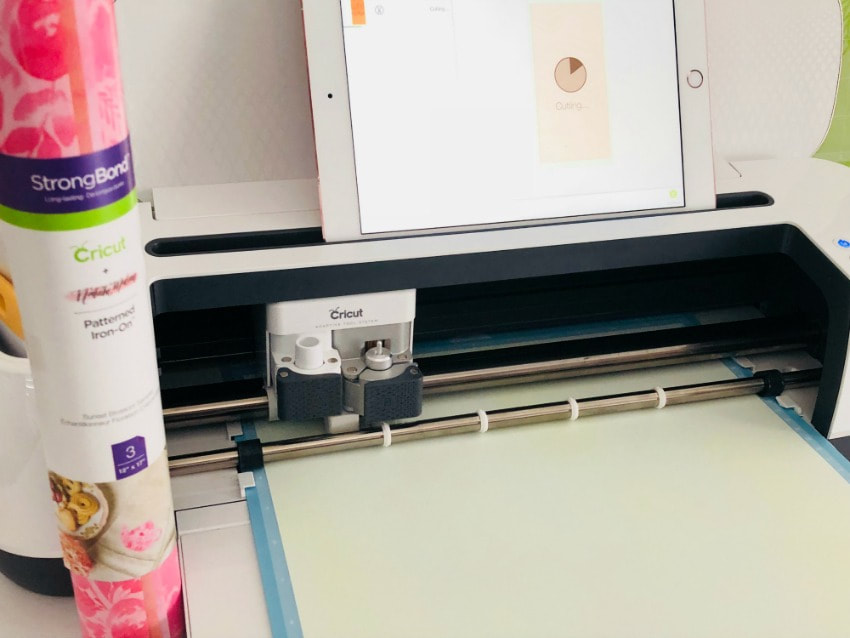
*Cricut Patterned Iron-On (Aquamarine Sampler & Sunset Blossom Sampler *Cricut Maker *Cricut EasyPress *Cricut EasyPress Mat *Cricut BrightPad *Cricut Foil Iron-On (Light Gold) *Cricut 12"x24" LightGrip Mat *Cricut 12"x12" LightGrip Mat *Cricut Weeding Tool Set *Canvas Teepee *Canvas Pillow Covers You can find all of the images needed to create this project here in Design Space. Once you have selected which designs and how many you want to cut, put your Cricut to work. We used our Cricut Maker. You can see it in action below: (Remember to cut Cricut Patterned Iron-On PATTERN SIDE DOWN on the mat, And cut "Mirror Image" when needed.) 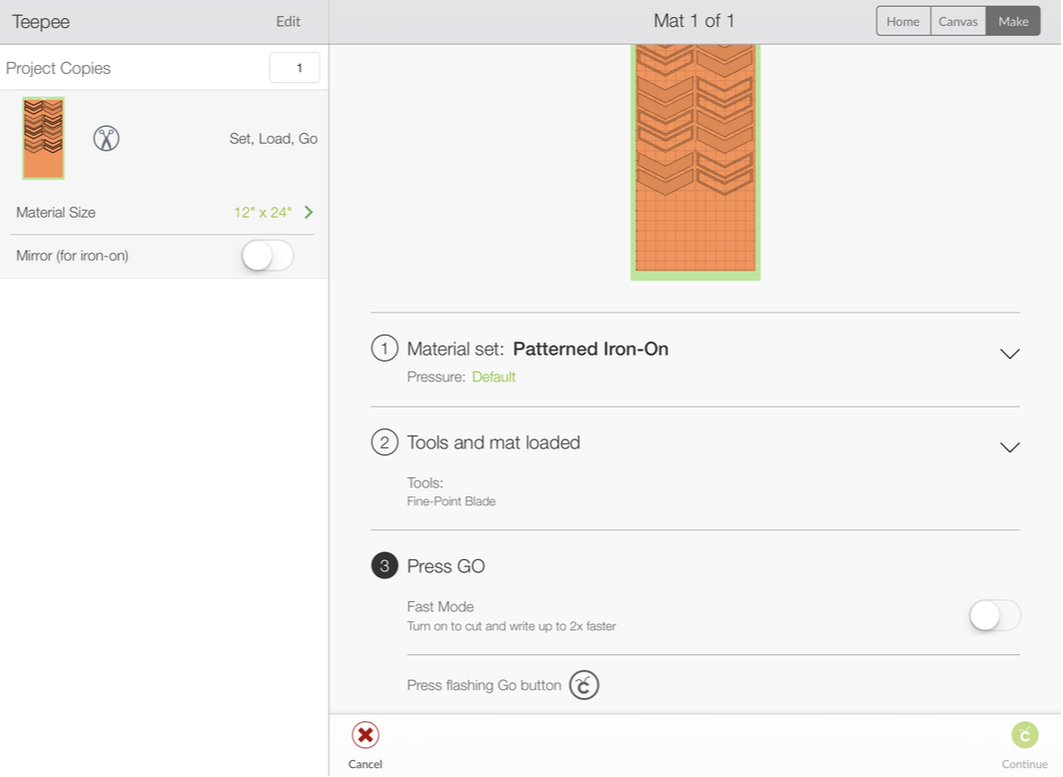
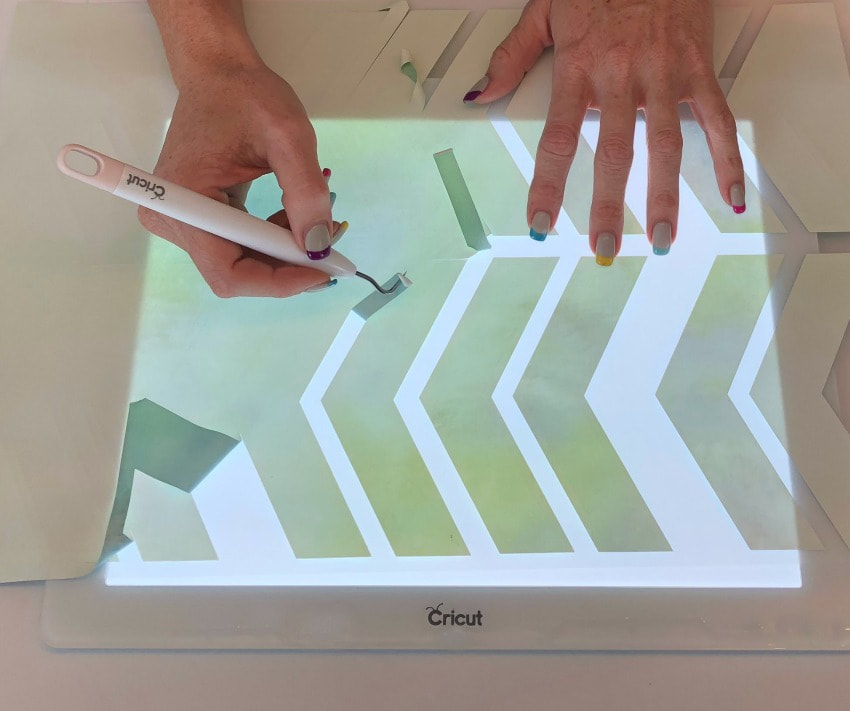
The Cricut BrightPad makes weeding projects pretty darn easy! And, we have to admit, the Patterned Iron-On might be the easiest material to weed ever! Your pieces glide right off like butta'! Go on now, give it a try. Weed all of the pieces that you will be using on your project. It doesn't take long...
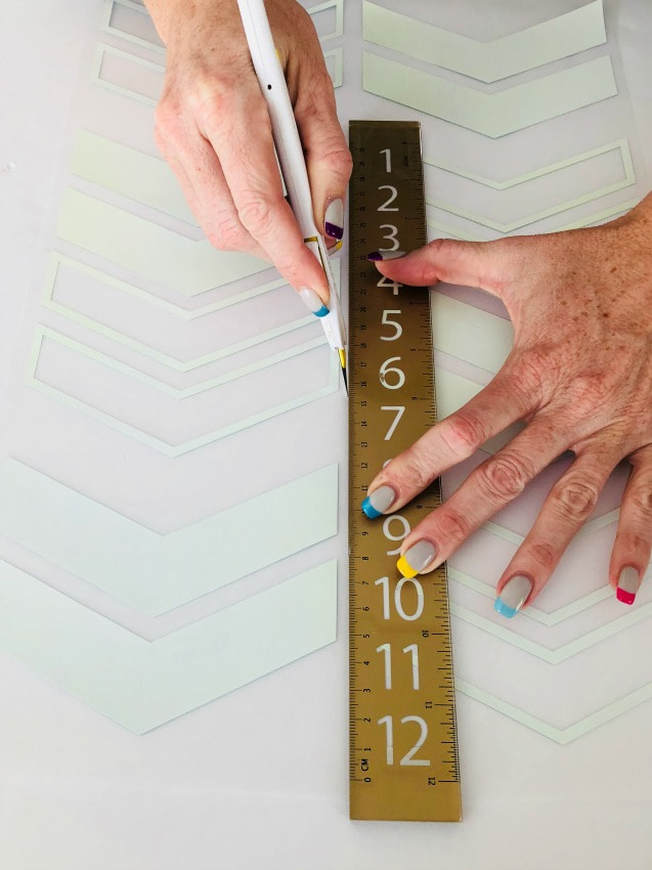
Hooray! You have now cut and weeded all of your project pieces! To create single rows of arrows (like those running around the bottom edge of our teepee and on one of our pillows), you just need to cut your sheets in half lengthwise. We simply used a ruler and a craft knife as shown in the photo below:
It's pressing time! EasyPress time that is. Using our Cricut EasyPress and EasyPress Mat, we attached all of our pieces to our teepee and pillows.
Directions for pressing Cricut Patterned Iron-On: (Always heat your EasyPress Mat and the fabric slightly before adhering) Temperature Setting- 340* Time Setting-50 seconds on the front, 15 Seconds on the back COLD PEEL We also used Light Gold Foil Iron-On, following the instructions included with our EasyPress. 
We think our little "Tea Time Teepee" makes an adorable and cozy little play spot!

The side view shows a little more detail...
Like these projects? Click the collage below to "Pin It" now!
We are compensated for this post. However, the opinions, photos, and text are all our own. Remember...sharing is caring!
This is a sponsored conversation written by me on behalf of Cricut. The opinions and text are all mine. 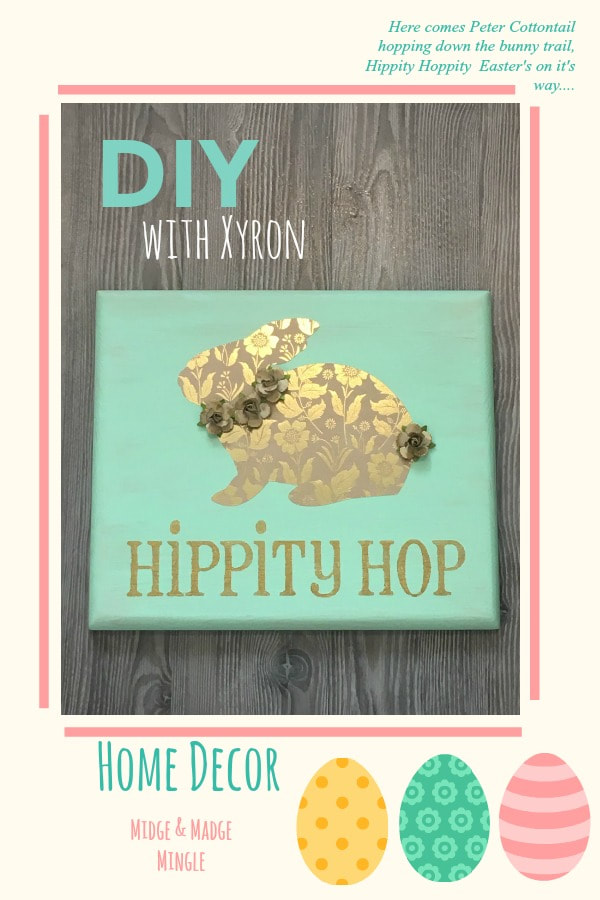
Who loves Xyron? We do, we do! As many of you know we absolutely love our Xyron Creative Station! It is something that just sits on our desk and it is our everyday go to! If we are not using the Xyron Creative Station we are using our Xyron Mega Tape runner or our Create a Sticker Maker! If you have not heard of Xyron and want to see all of their products check them out HERE!!! Now who wants to create this fun "Hippity Hop" Easter Plaque?
Check out the video below for the full tutorial on how you can create your very own Easter Plaques. This is a project for all crafters. Sit back relax and enjoy the show!
Supplies Needed:
Xyron Creative Station Xyron Creative Station Permanent Refill Xyron Creative Station Repositionable Refill Wood Plaque Paint Paint Brush Silhouette of a Bunny Paper Words or Phrase "Hippity Hop" Flowers Foam Sheet (optional) If you have access to a Cricut and would like to get the cut files that we used to create this project click HERE and it will take you to the link for Cricut Design Space. If you do not have access to a Cricut, you still can create this project simply by cutting out a silhouette of a bunny from your home computer. 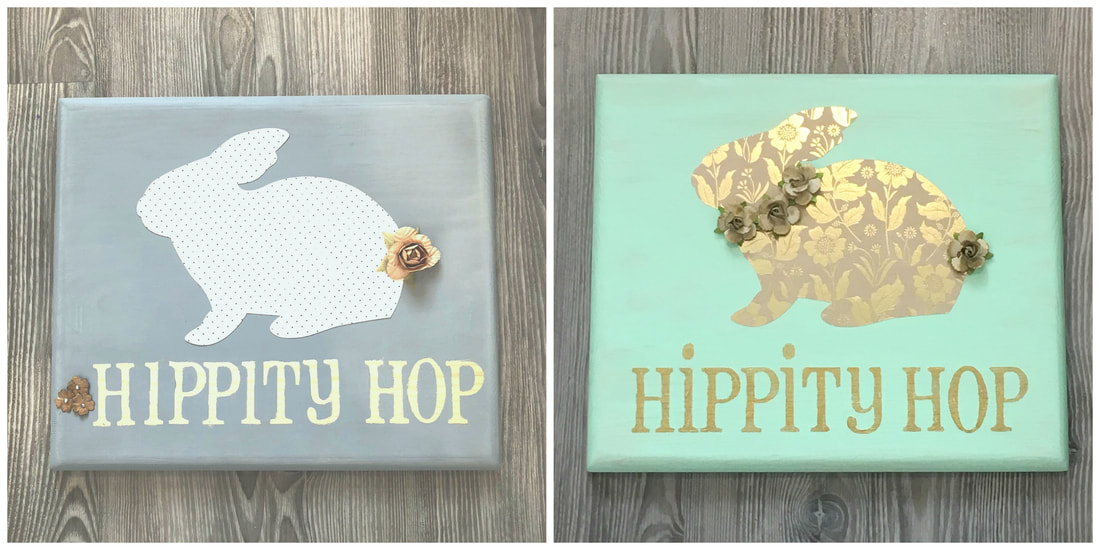
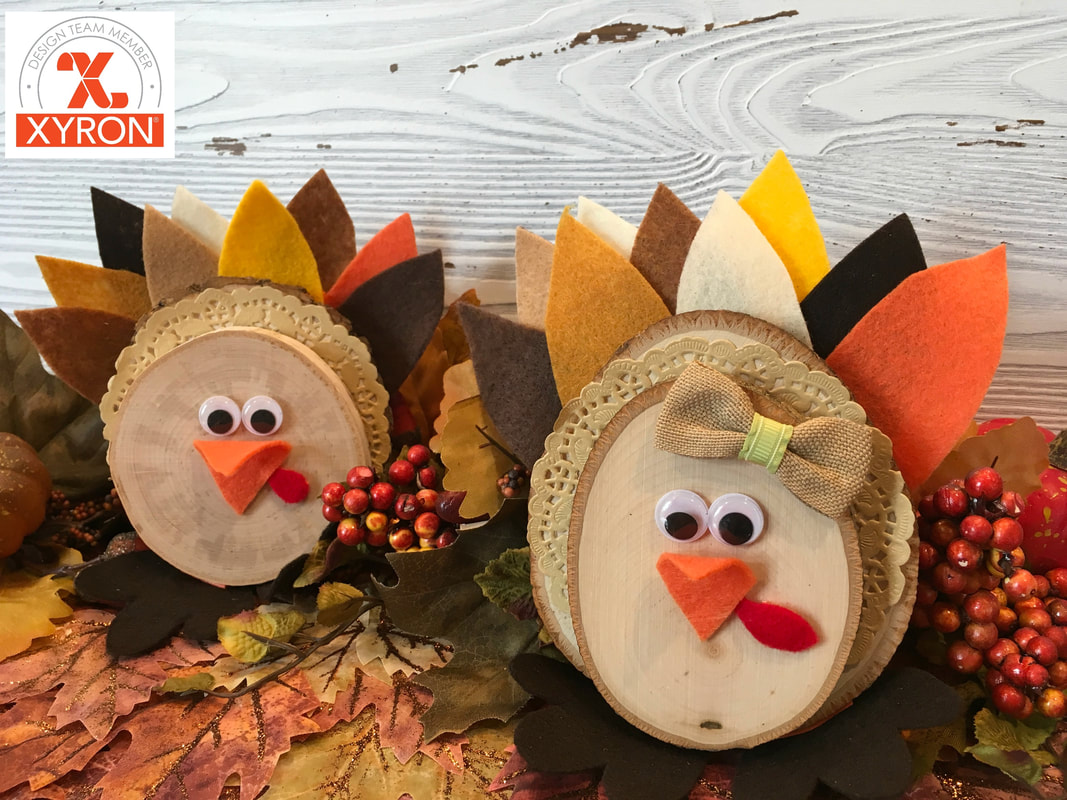
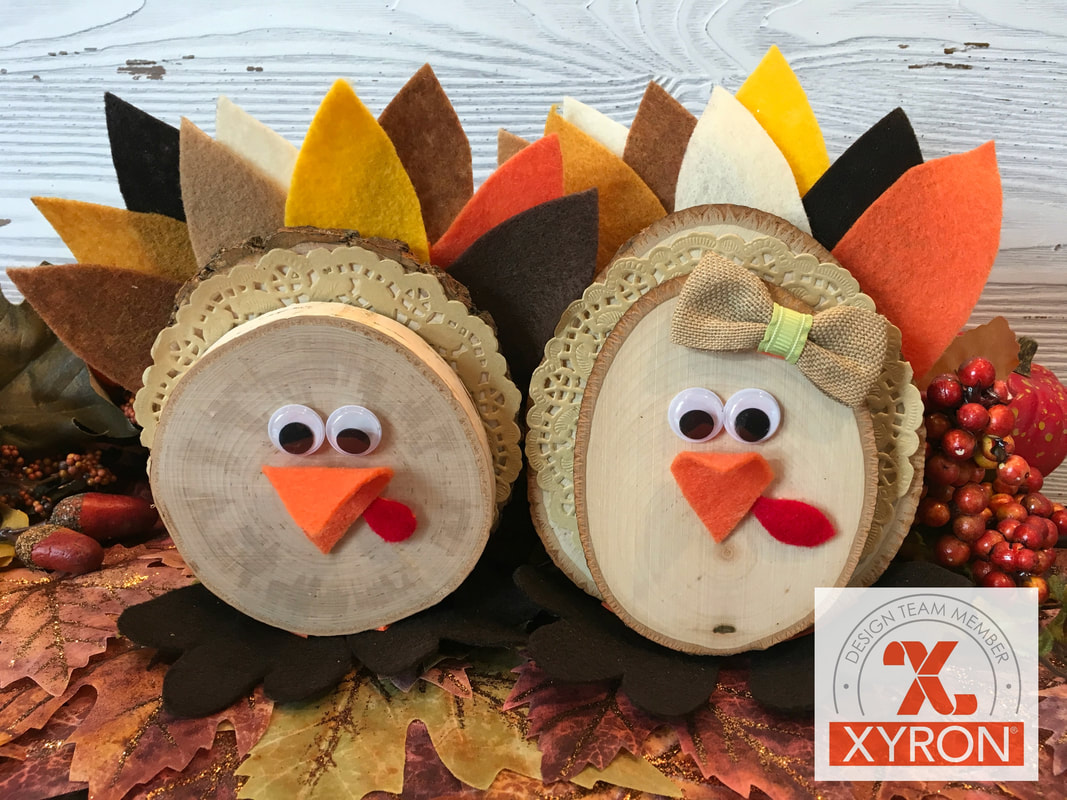
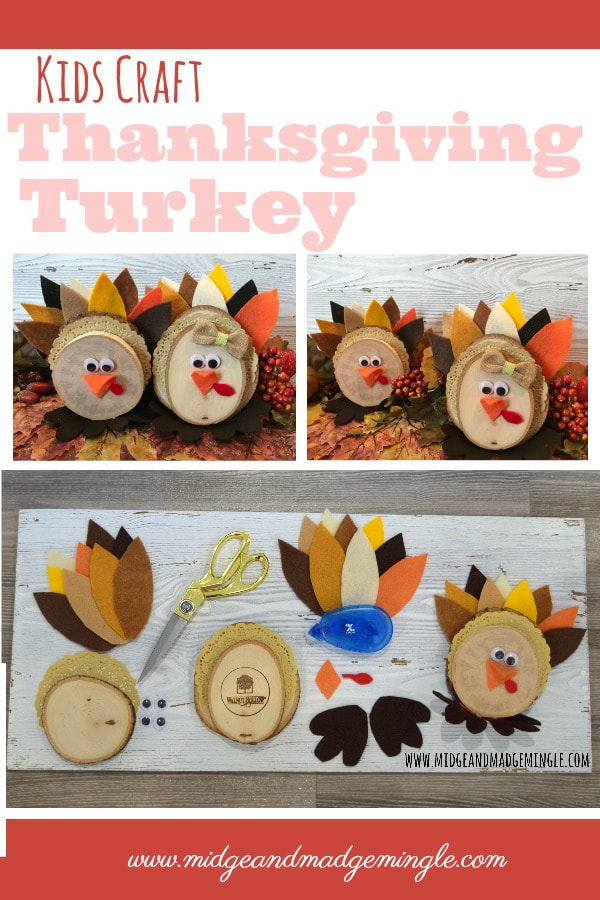 We had so much fun creating this Turkey! With the Xyron Mega Runner and the Creative Station this kids craft is fun and easy. Watch the tutorial below to see how to create these cute little guys.
Supplies Needed:
Xyron Mega Runner Xyron Creative Station Permanent Adhesive Refill Two wood rounds (2 different sizes) Foam Felt Sharp Scissors Google Eyes Kraft Doileys We hope that you enjoyed the kids craft today! To see how to make your own Xyron Foam Squares click HERE This is a sponsored post with Xyron. However, all ideas and opinions are our own. Some links provided are affiliate links, by purchasing from our affiliate link helps support Midge and Madge Mingle. |

Midge & MadgeTwo Best Friends doing what they love and loving what they do. Learn more about us in the About Us tab above.  

Archives
October 2019
Categories
|


 RSS Feed
