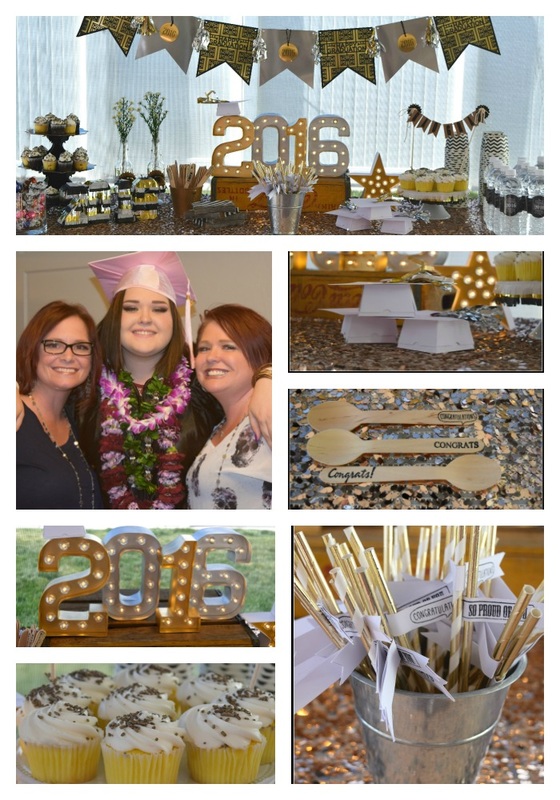
 Congrats! Class of 2016. We created this fun Graduation Party to celebrate in style. Using these quick and easy projects and techniques (along with our handy dandy Cricut Explore Air) moved us to the front of the class.  Making this banner was a breeze! Using our Cricut Explore Air we created this Graduation Banner. This intricate design cut so smoothly. We love the Cricut Design Space, because it is so user friendly! We also used the Cricut to create the flags on the straws! 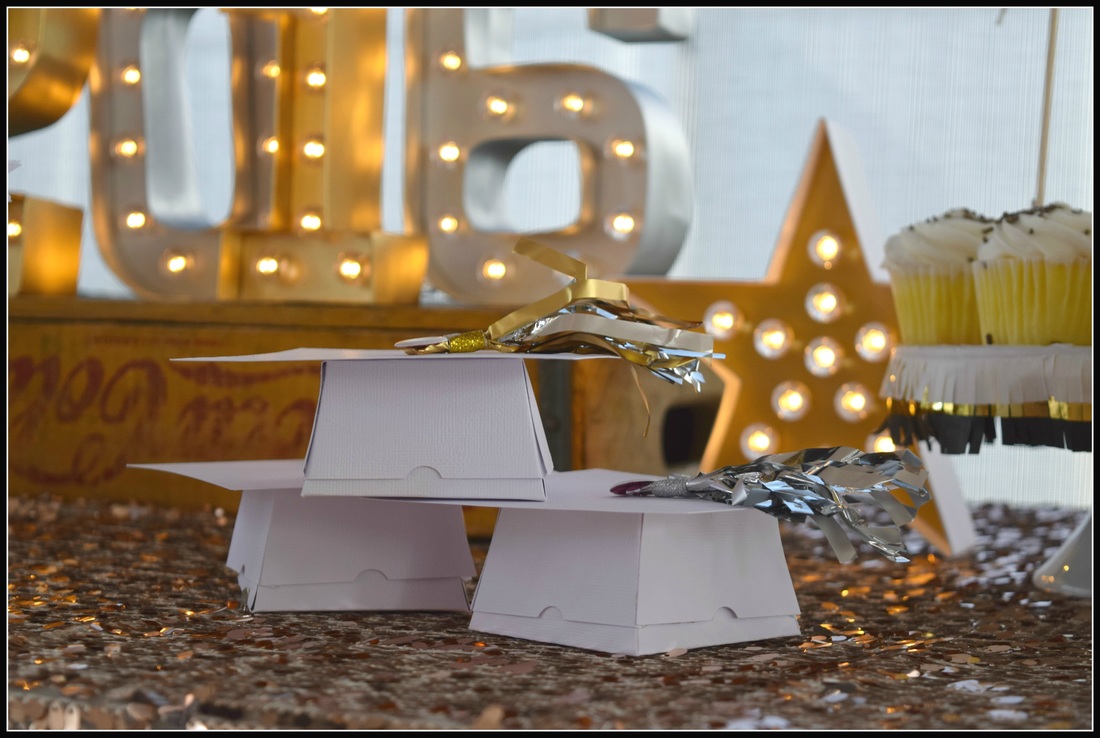 Check out our awesome Grad Caps! We purchased the Grad Cap SVG file from the Lori Whitlock Collection. Uploading the file to our Cricut Design Space is as easy as 1,2,3... We added the brads and tassels and BAM! Instant Graduation Caps! 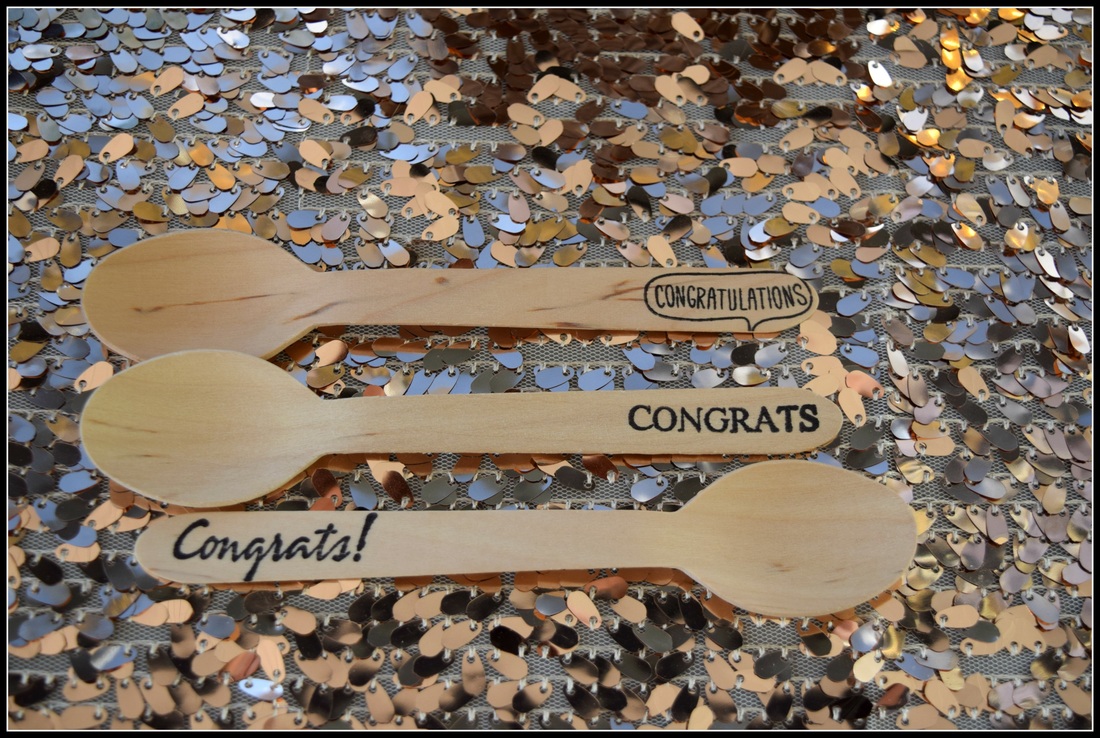 We ordered the spoons off of Amazon. They were just plain wooded spoons. We used our black Archival ink and some small sentiment stamps to doll the spoons up a little :) 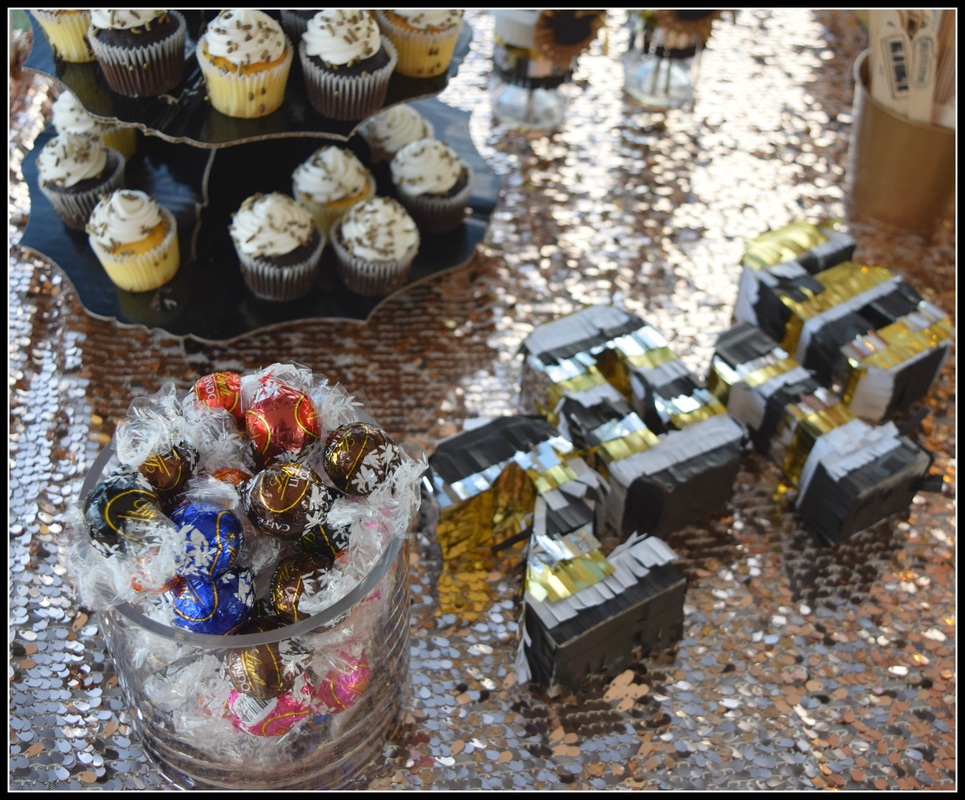 Lindt Chocolates are one of our favorites. So, of course we had to set out a festive little jar of yummy goodness! And how cute is this "2016"?!? WE R Memory Keepers makes these adorable pinata numbers. Add a little We R fringe tape and you have a fancy frills centerpiece!
We had a blast getting ready for this party. If you have any pics of your graduation part, we would love to see them. We hope to Mingle with you again soon
4 Comments
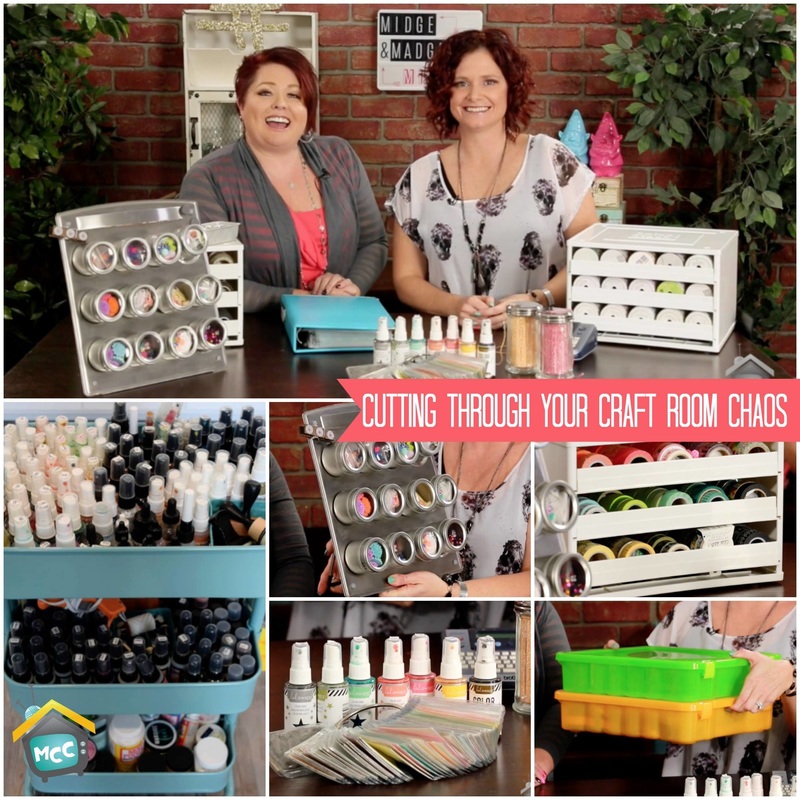
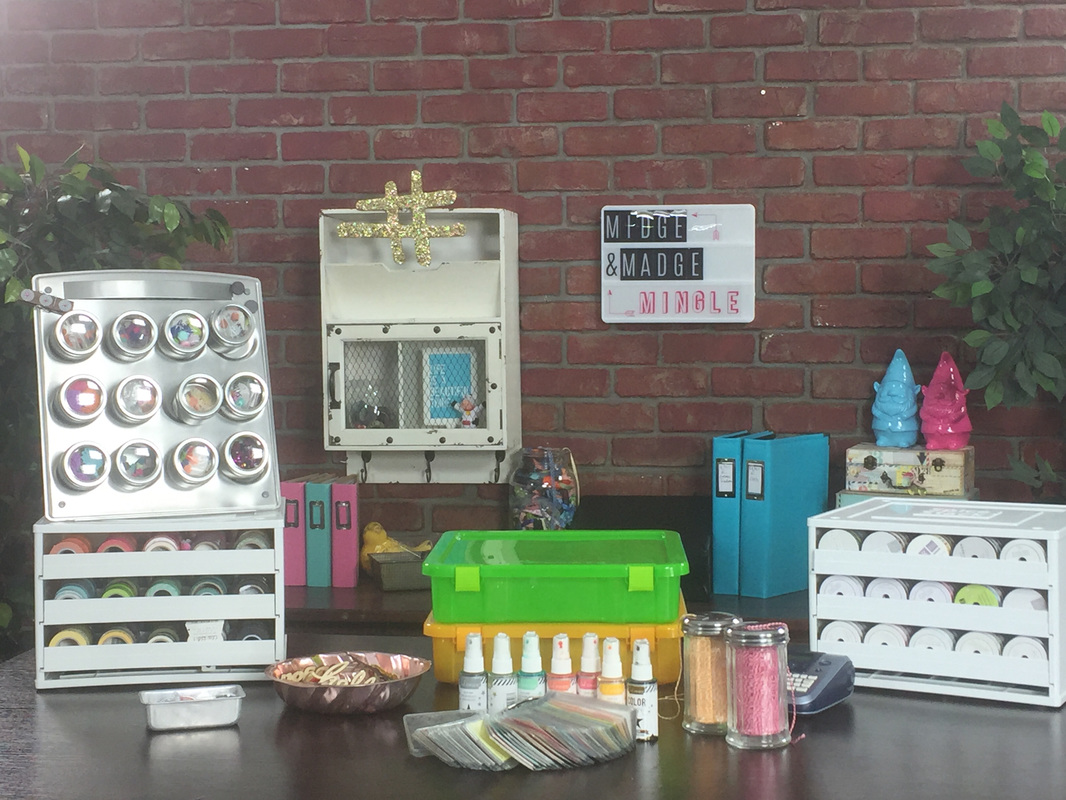
Is your Craft Room a compete disaster? Tired of not being able to find what you are looking for amongst all of your crafty clutter? We were too! Today we are sharing some of our favorite out of the box stash storing solutions. Some of these were found on Pinterest. Follow us on Pinterest and go to their board “Crafty Organization” for all the details. Check out this weeks Mingle Below. And don't forget, you can enter to win a Prize by leaving a comment on this blog post and share one of your favorite Organization Techniques.
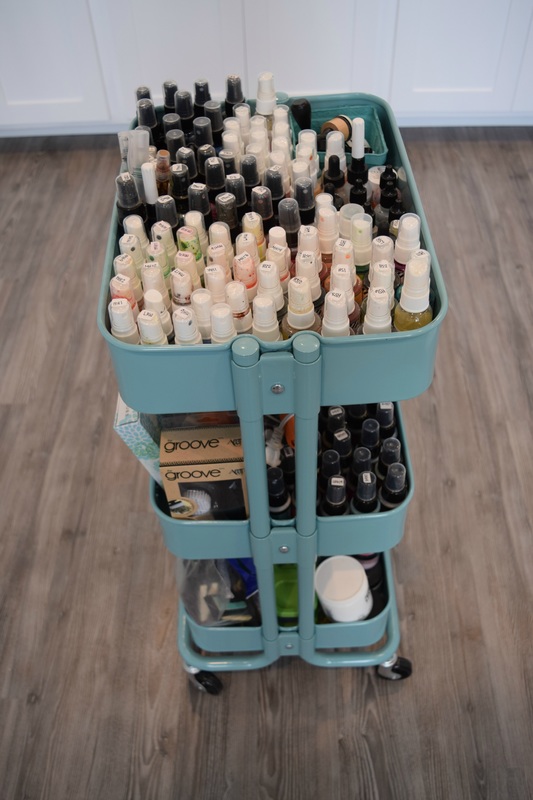
We absolutely love our Raskog Carts from IKEA! They are great and hold so many things. Keeping everything organized. In the video Madge explains how her system works and why the spritz bottle have labels on them.
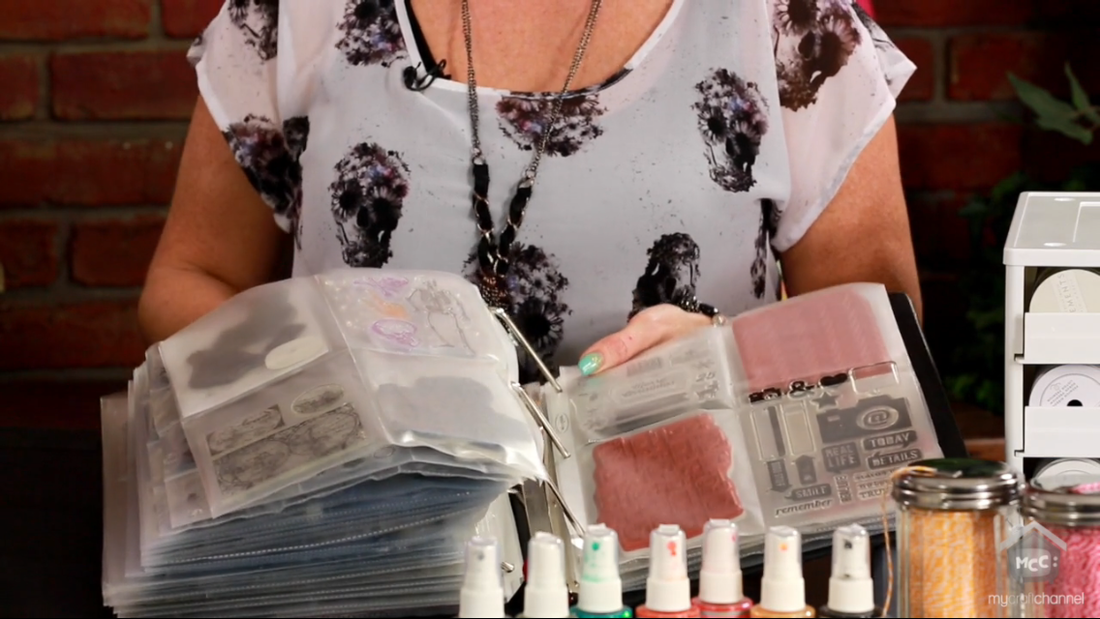
In this pic you will see Midge explaining how she made her own Stamp Holders using her We R Memory Keepers Fuse Tool.
Use little tins and baskets to hold your "go to" embellishments. Madge has hers in little bread pans and other fun vintage tins that she has collected. They keep everything organized but yet they are still within arms reach.
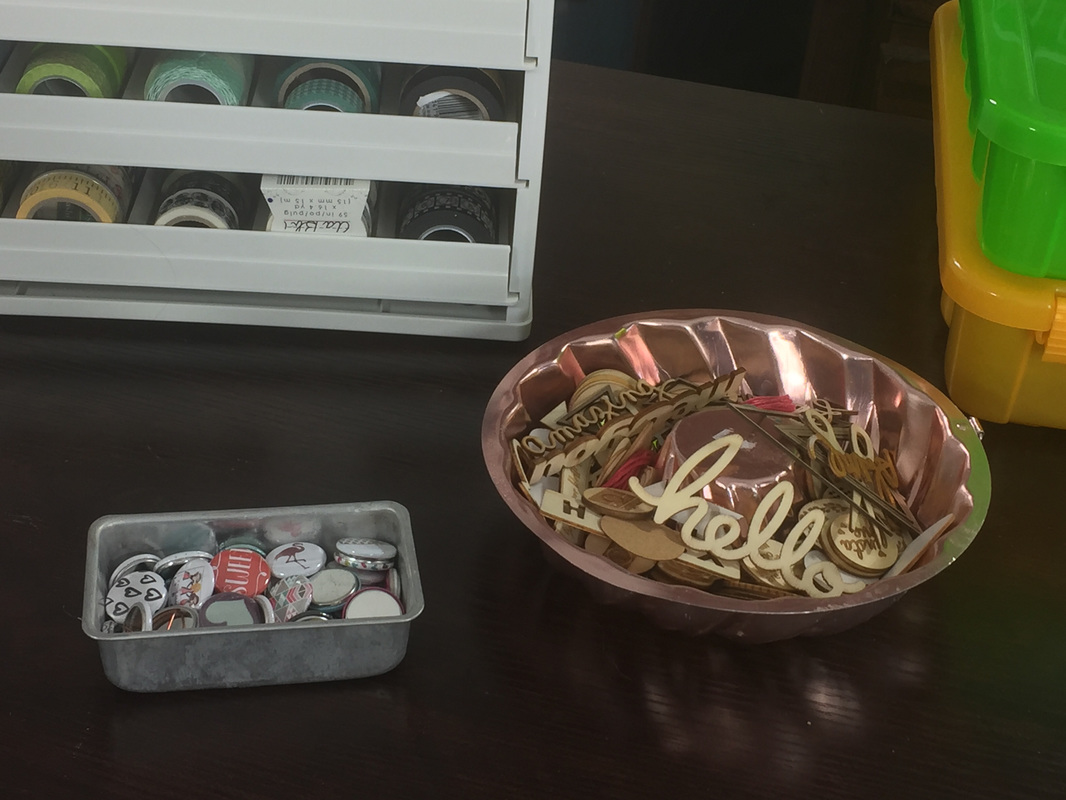
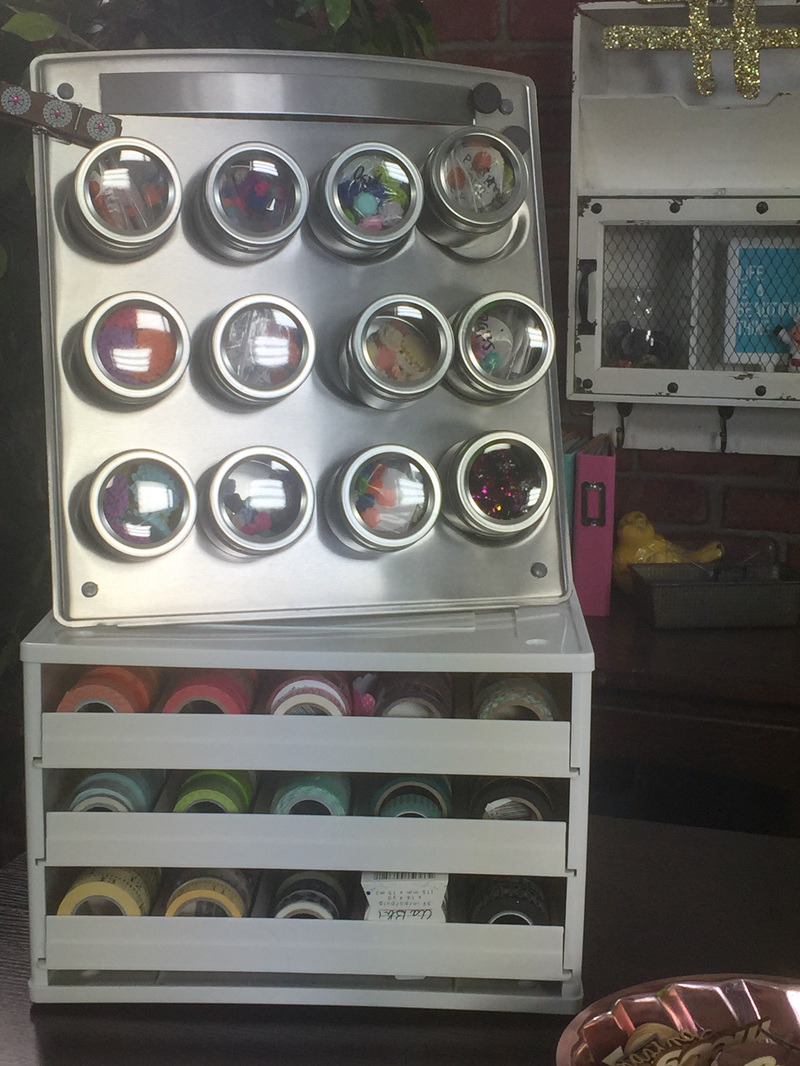
This is a fun Spice Rack that Midge bought from Costco! She took out the Spices and put in the embellishments! They are magnetic and it even has a stand!!! WHAT!!! But wait the coolest thing is the way we organize our Washi tape and our small ribbon. This is called a Spice Stack and we got ours at Bed Bath and Beyond. This is a fabulous idea that we found on Pinterest. Be sure to check out our Board Craft Room Orgaization HERE to find original post!
Again be sure to watch our fun Mingle to see all of the different types of Craft Room Organization!!! Be sure to enter to win a a fun prize!!! Remember Winners will be posted on our sidebar weekly!!
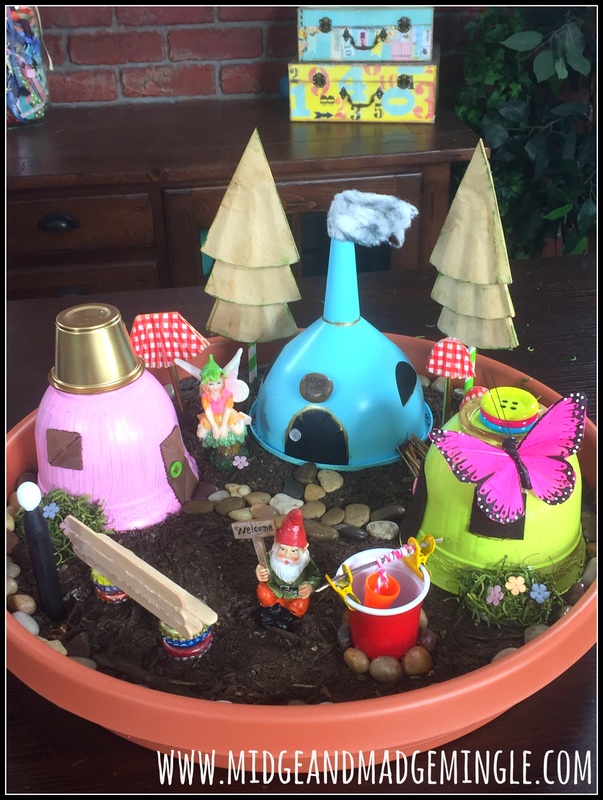
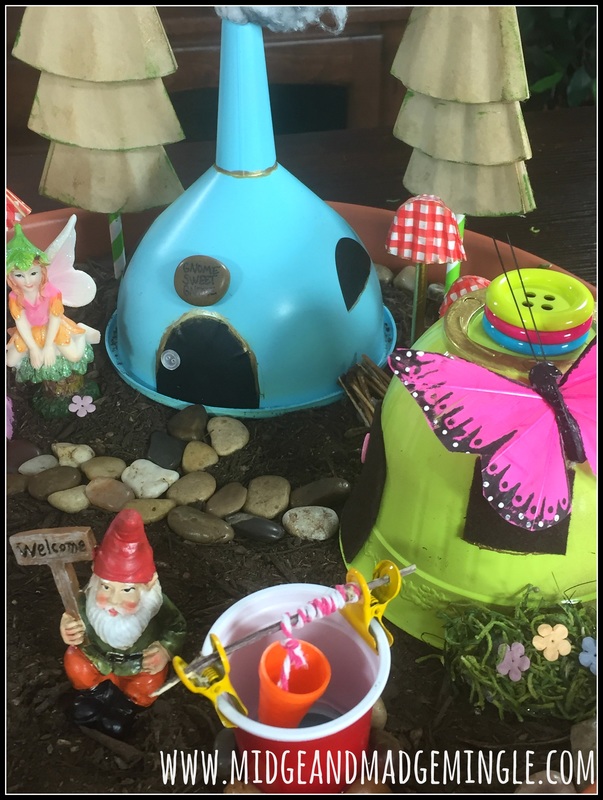
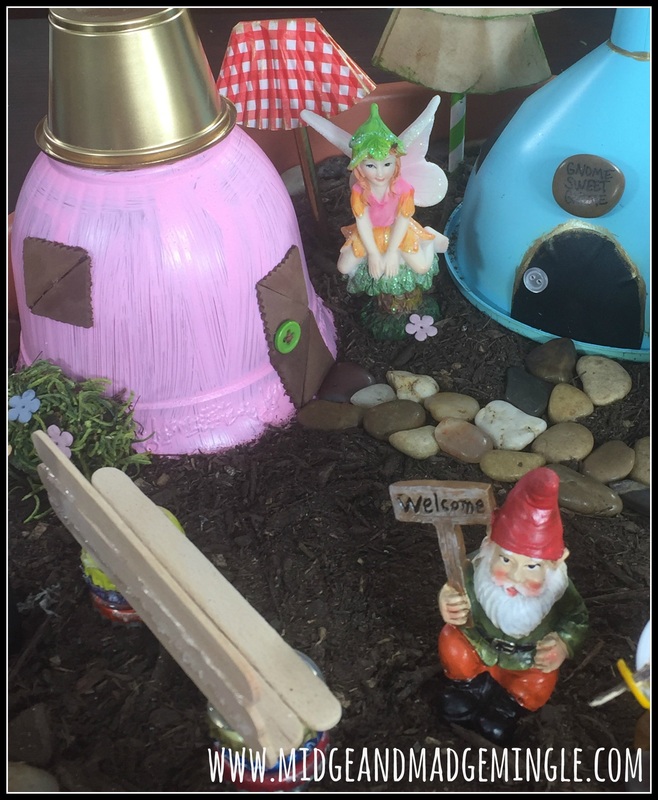
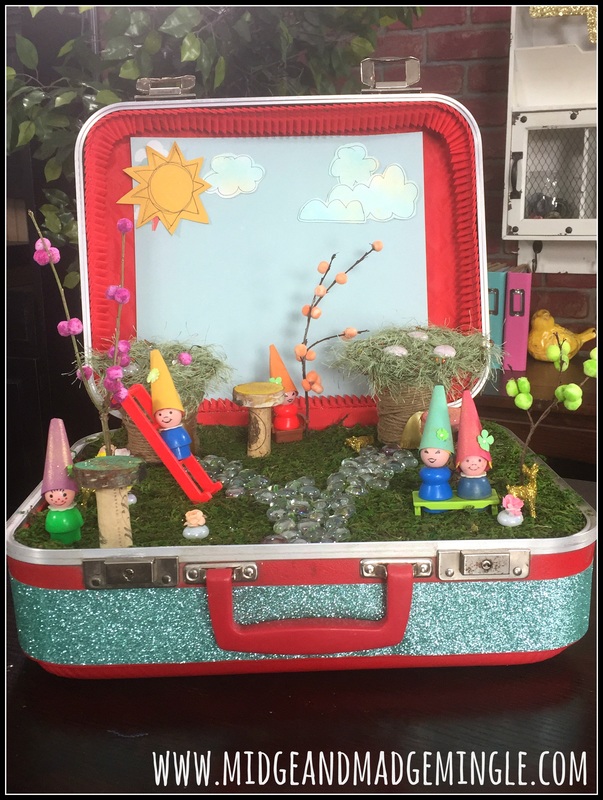
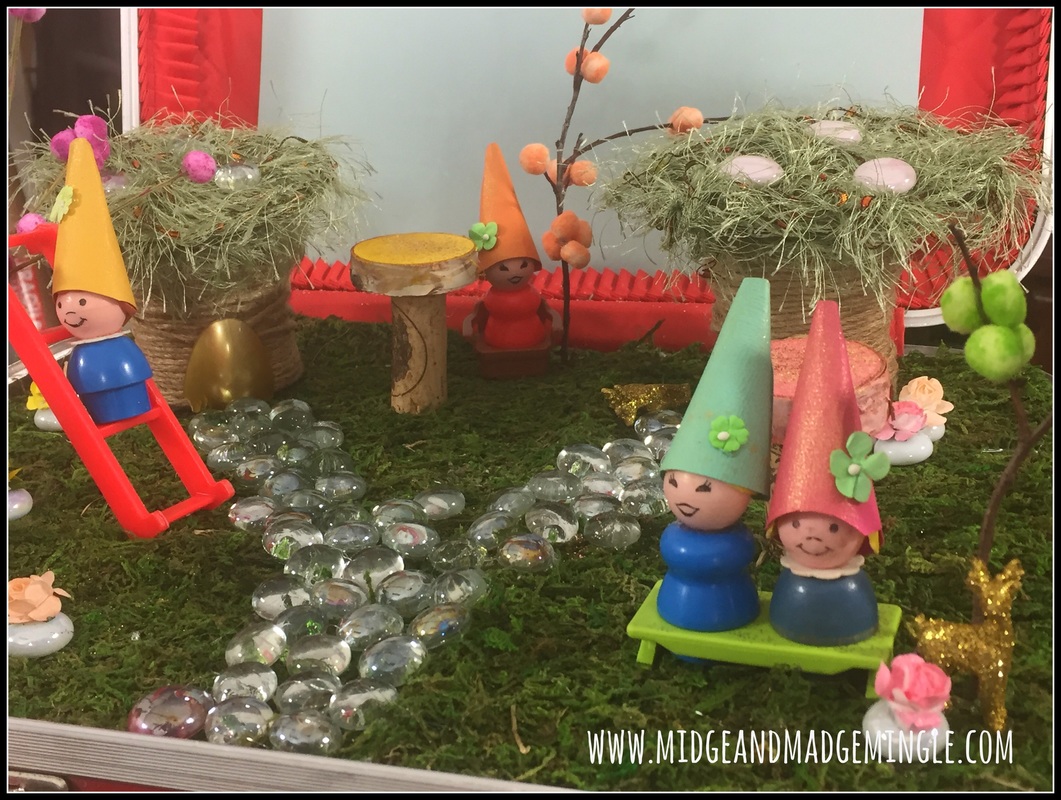
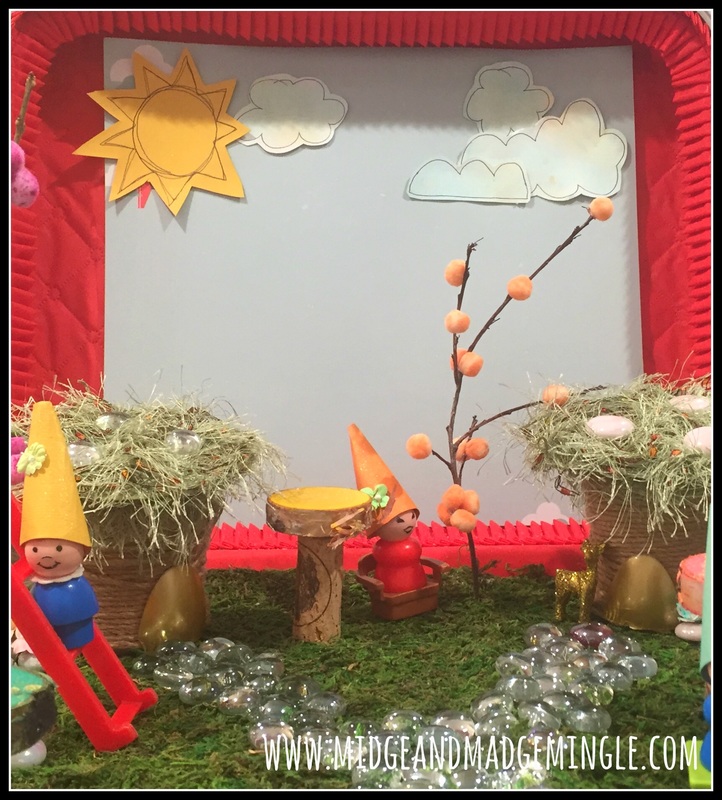
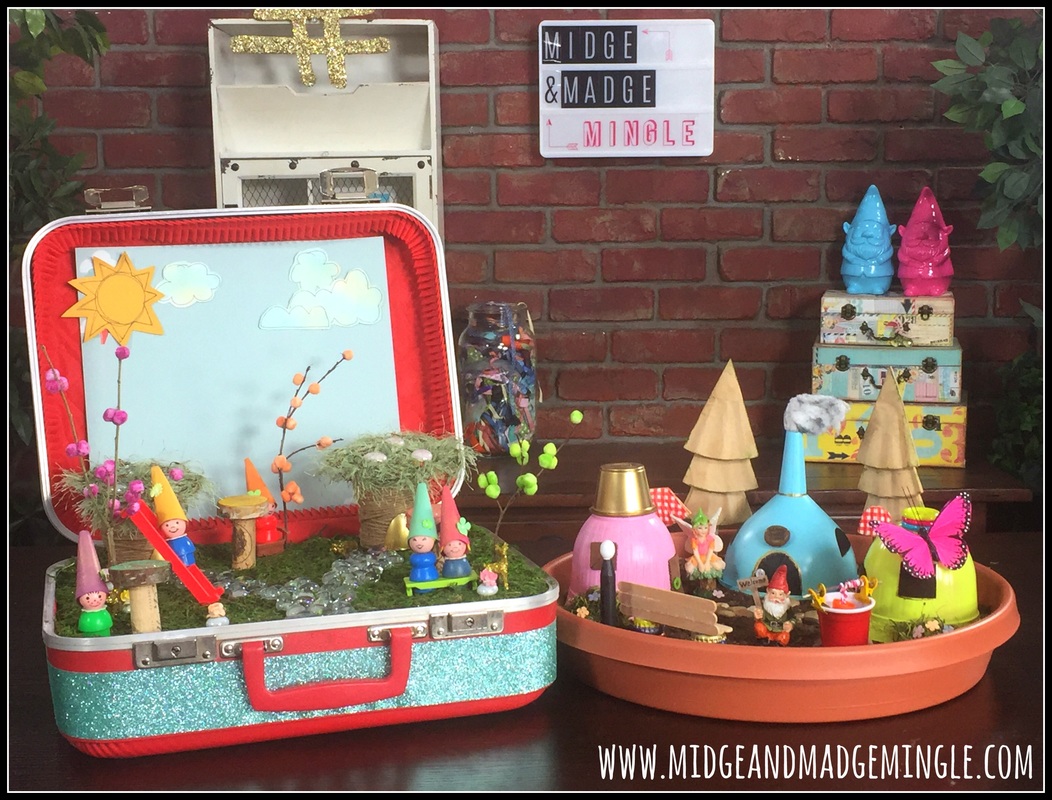
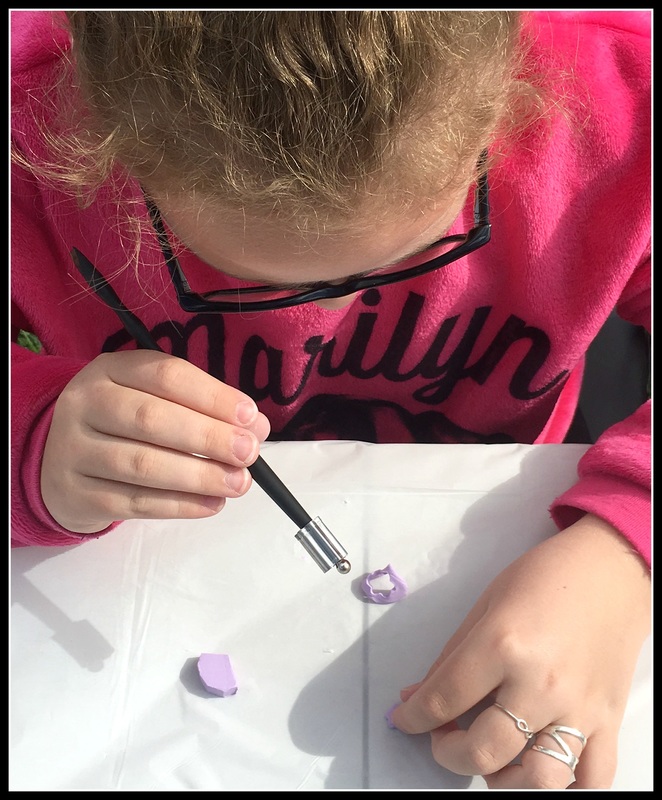
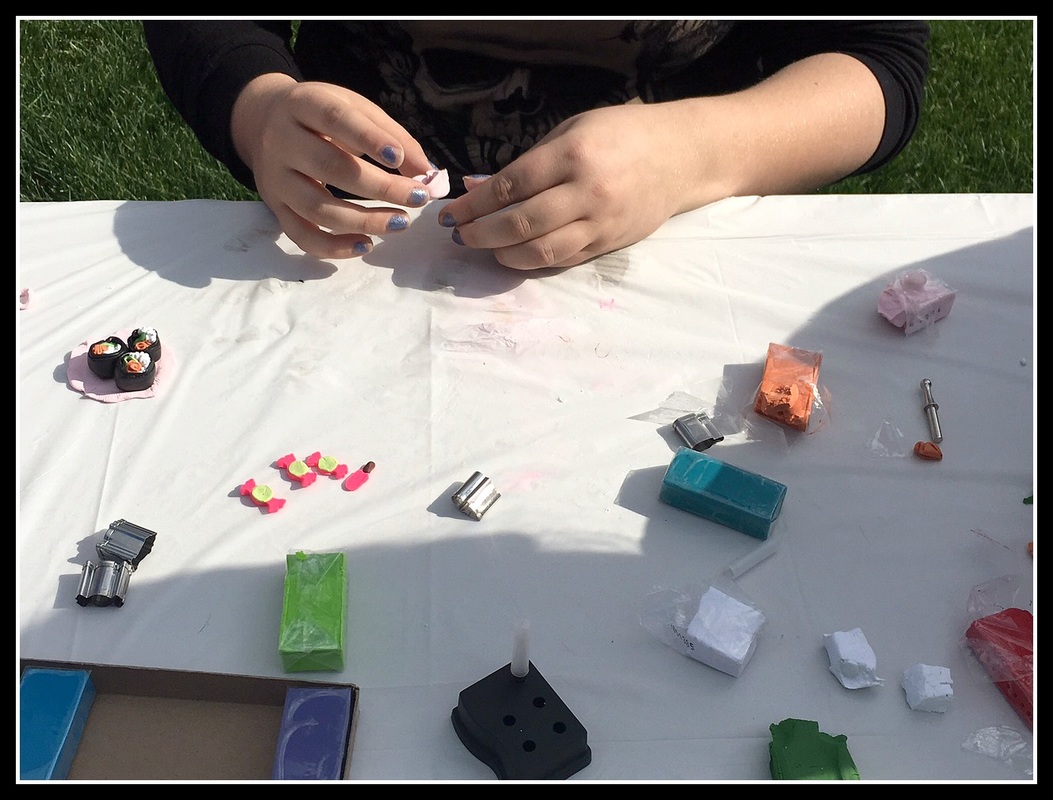
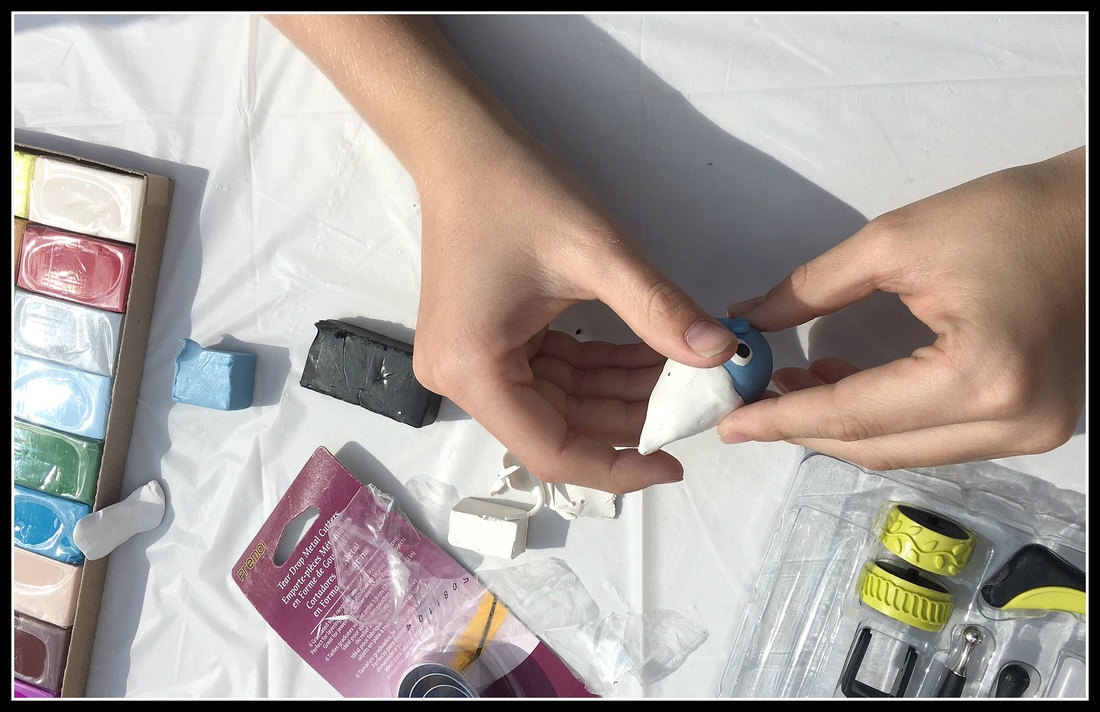
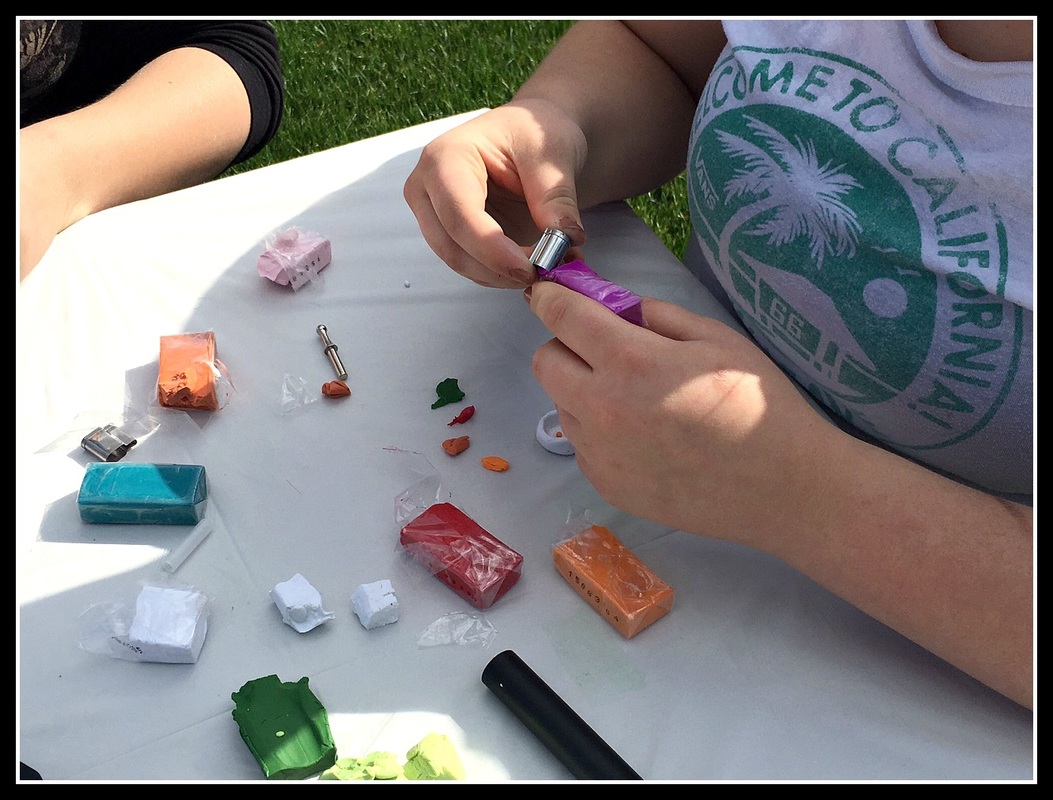
Have you been wanting to make a Fairy Garden, but don’t want to break the bank? It can be done! Let us share with you some of our “on the cheap” tips and tricks. It’s fairy garden madness! And mind you Midge and I kept it a secret the whole time. We didn't reveal our gardens until we recorded this weeks episode. Midge may or may not have liked that surprise! Be sure to watch below....
What did you think? Super fun right? Yes, we made our Fairy/Gnome Gardens for Indoor/Outdoor use. However, you can use these tips and tricks and create your very own fairy garden. Let's go over a couple of the tips shall we?
Tip #1
|

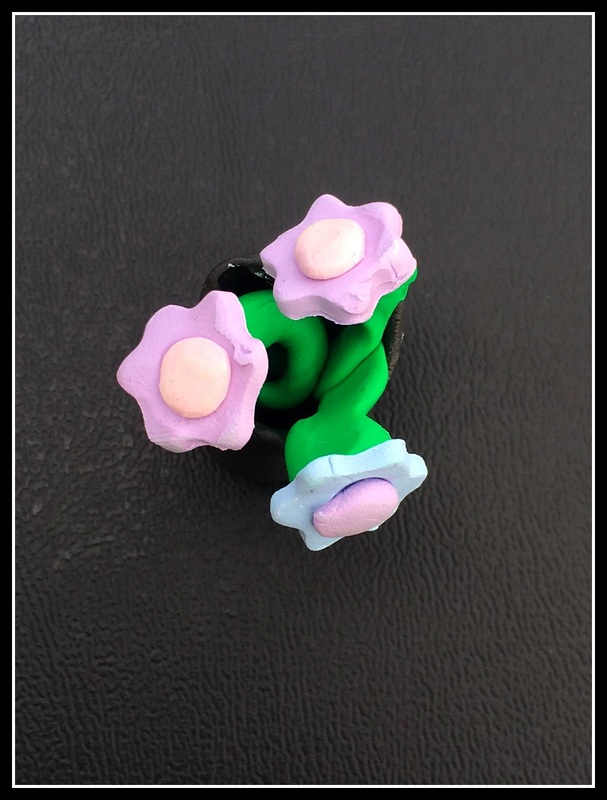 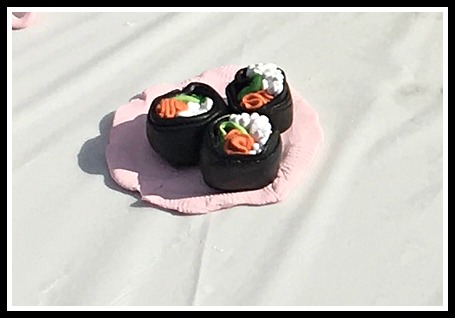 |  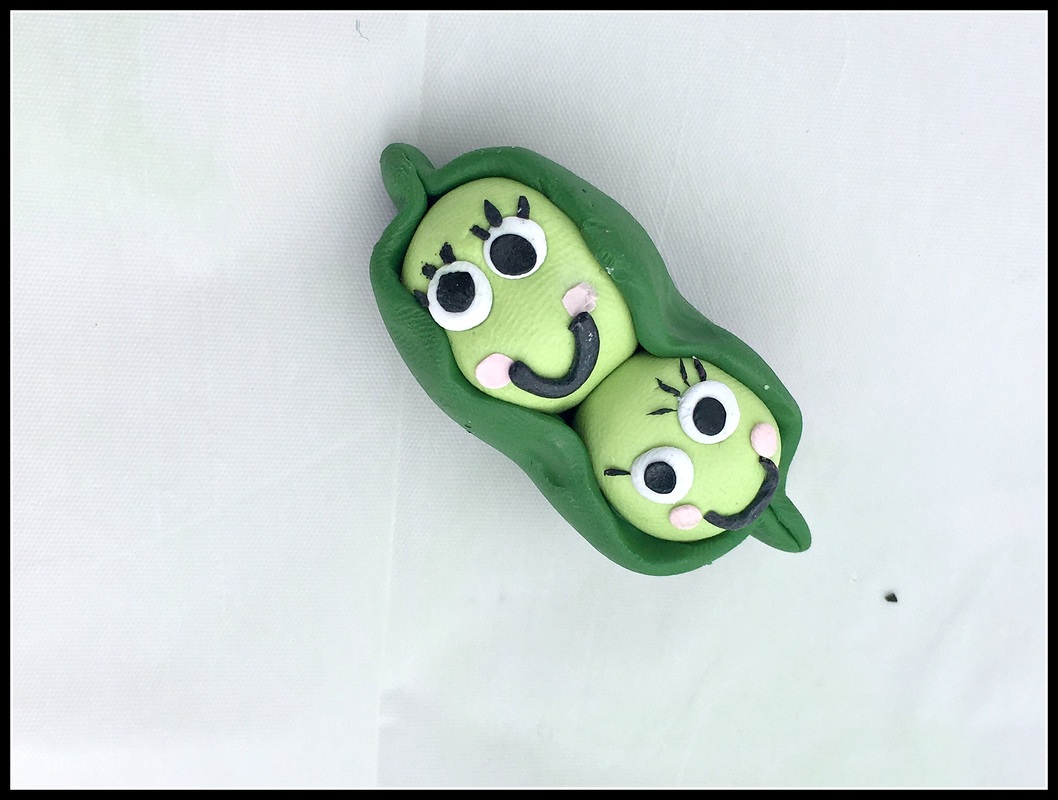 |
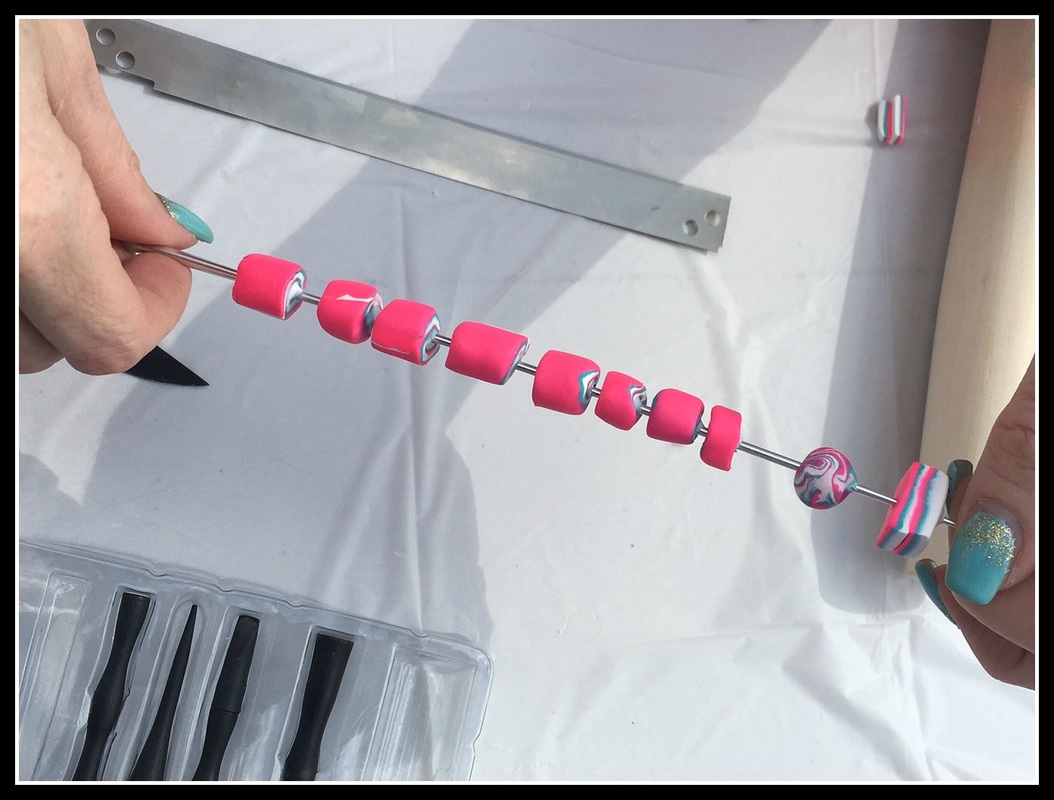
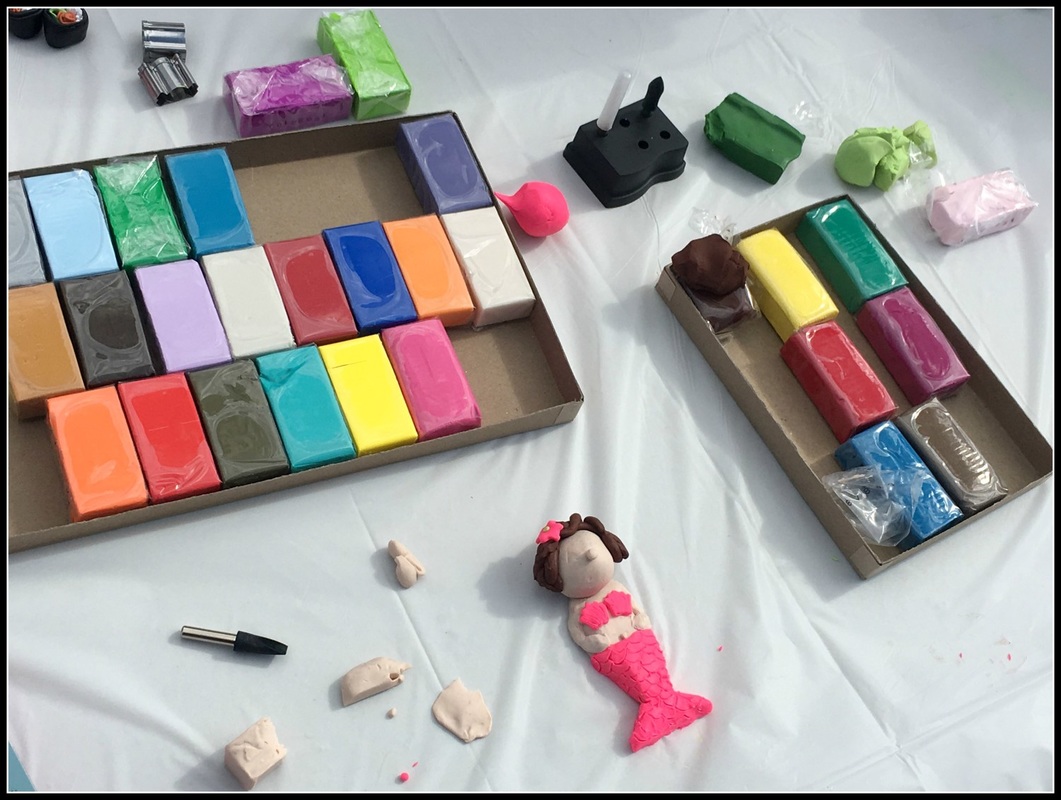
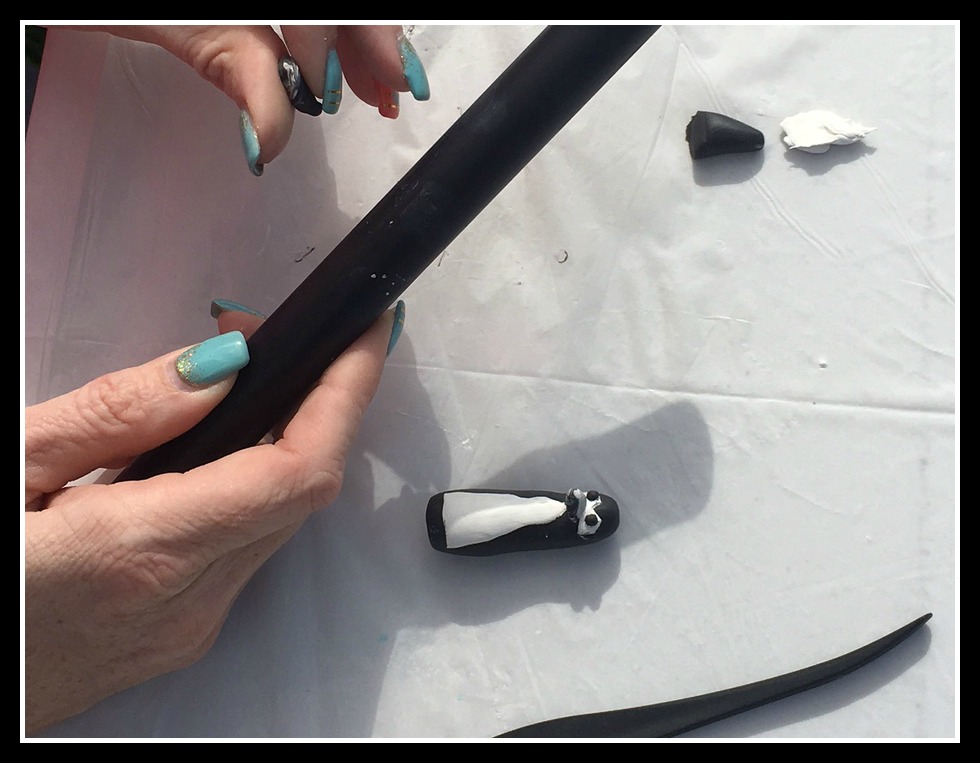
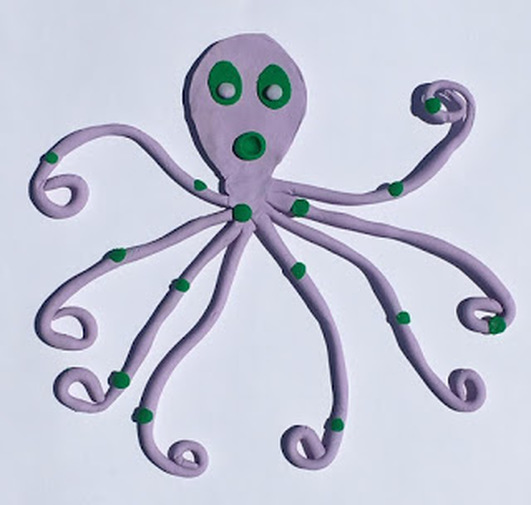
We would like to Thank Sculpey for sending us this awesome product to play and work with. We would also like to Thank Sculpey for sponsoring this post. As designers we receive select products so we can share projects, tutorials and more with all of you. Posts include affiliate links. Our projects, tutorials experiences and opinions are 100% our own.
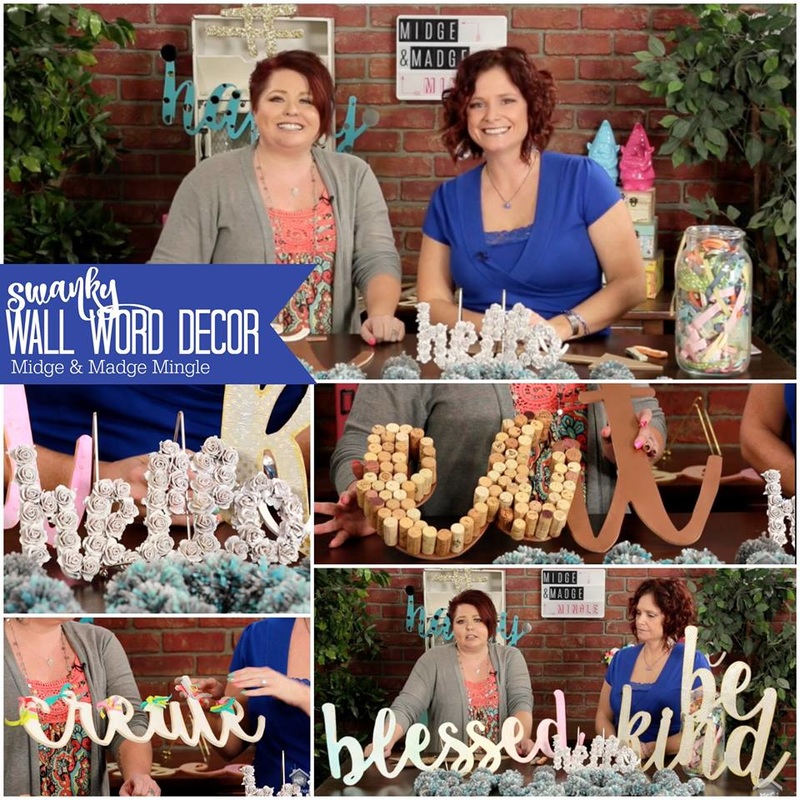
Impressions Shop has a variety of hip wall words, sayings, and symbols. Join us as we share a few unique ways to dress up your “Impressions”. But first we want to give a big shout out towww.impressionsshop.com for providing us with their wood products to play with. Go over and order some for yourself today! Before we dig deep into each and every project (WARNING: this is a long post with many pictures) be sure to watch our mingle below!
Let's get started with a little instruction on each of these fabulous words, arrows and hashtag!
Tissue Paper- You will need tissue paper, Mod Podge and a paint brush, and some Tim Holtz Distress Paint (I used Gold) Start with a full sheet of Tissue paper (if you want to keep the pattern) and start at one end of the word and paint with the Mod Podge and laying the tissue paper down smoothing it out as you go. When you run out of tissue paper just align the tissue paper and start again. Allow it to dry and take a craft knife to cut off the excess tissue paper. Add your paint and Bam! Your word is ready to be hung. - Madge
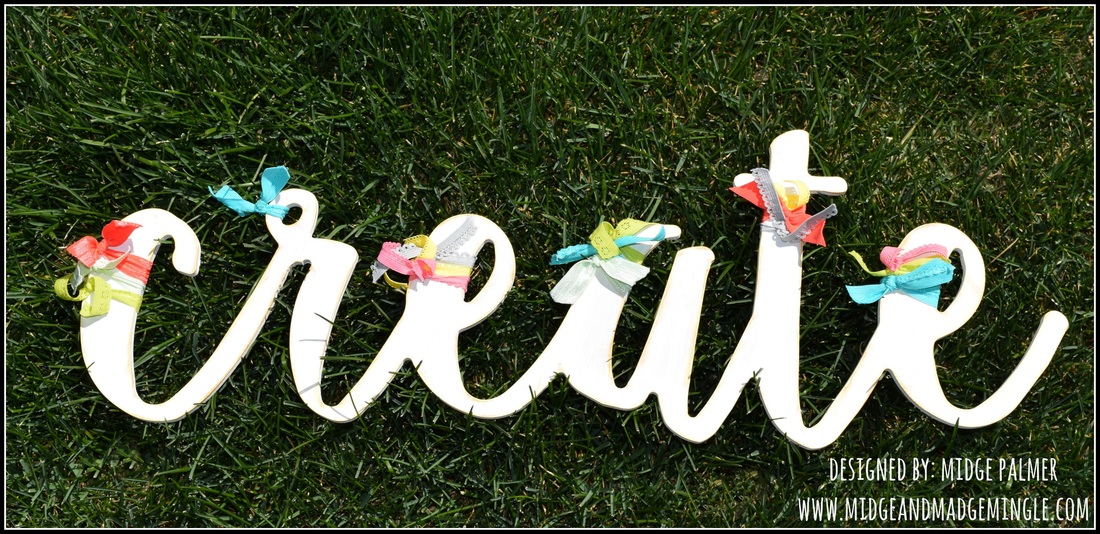
Create- Midge- used acrylic paint and a sponge brush to cover wood. She did a light coat and wanted to leave brush strokes to give a more aged look. When paint was dry, she used distress ink to darken/age all the edges of the word. After that she cut strips of different colors of elastic (you could use ribbon, fabric or whatever you want.) and tied it in knots around the letters at different intervals. You could add as much or as little as you like. This one is so simple but has a really fun look!
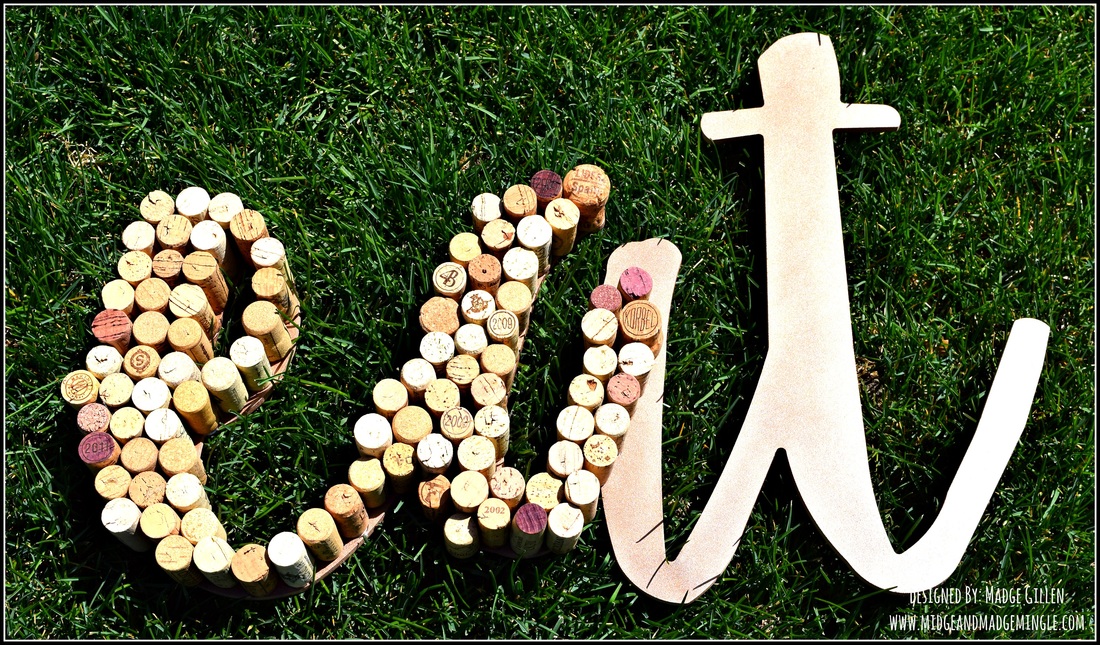
Corkscrews- Spray paint your word first. (This helps when you have little holes where the corks touch to show that this isd a completed word. This technique takes a lot more corks than you realize. I ordered mine from Amazon, however, if you are a wine drinker than save your corks! (LOL) I plugged in my hot glue gun and glued them to my letters. - Madge
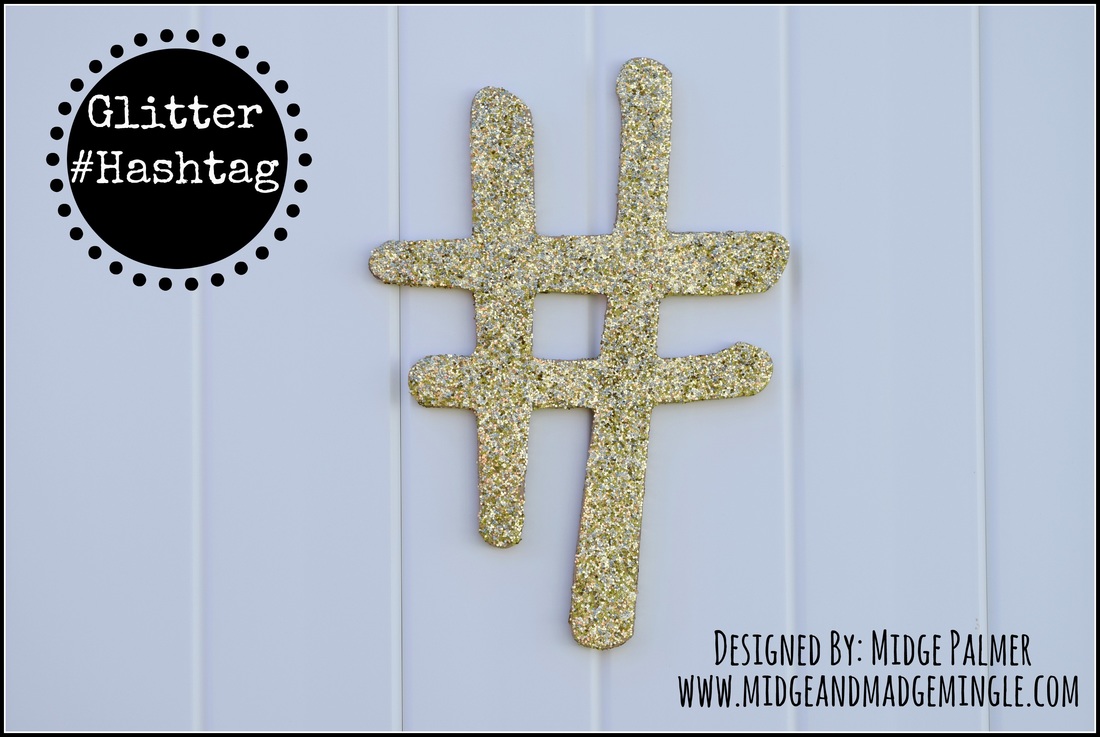
Glittered Hashtag- Using a sponge brush, paint a fairly heavy coat of Mod Podge, Decoupage, Glitter Glue, or whatever is your favorite glitter adhesive, over entire piece. Then, generously cover with glitter. Apply pressure to set glitter. When dry, shake off excess glitter and spray with clear lacquer. -Midge
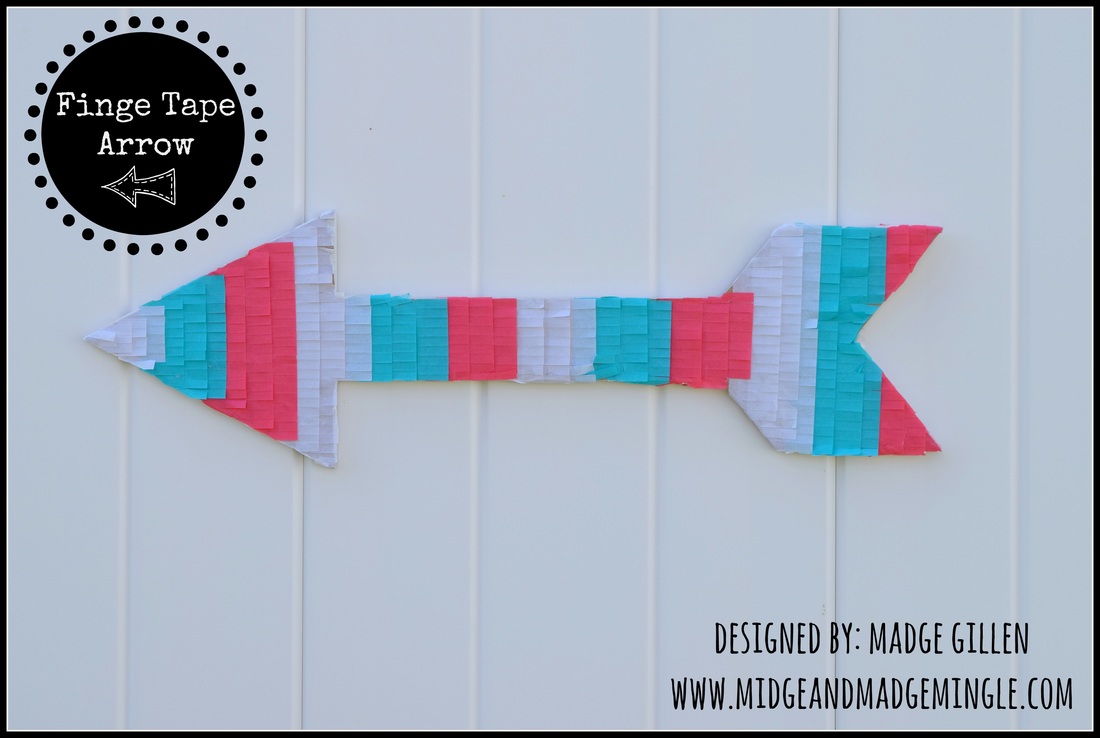
Fringe Tape- This is a super fun technique. I painted my arrow first with white acrylic paint. I then took my fringe tape (I got it from We R Memory Keepers) I used three different colors and layered them as I went. The fringe tape is self adhering. - Madge
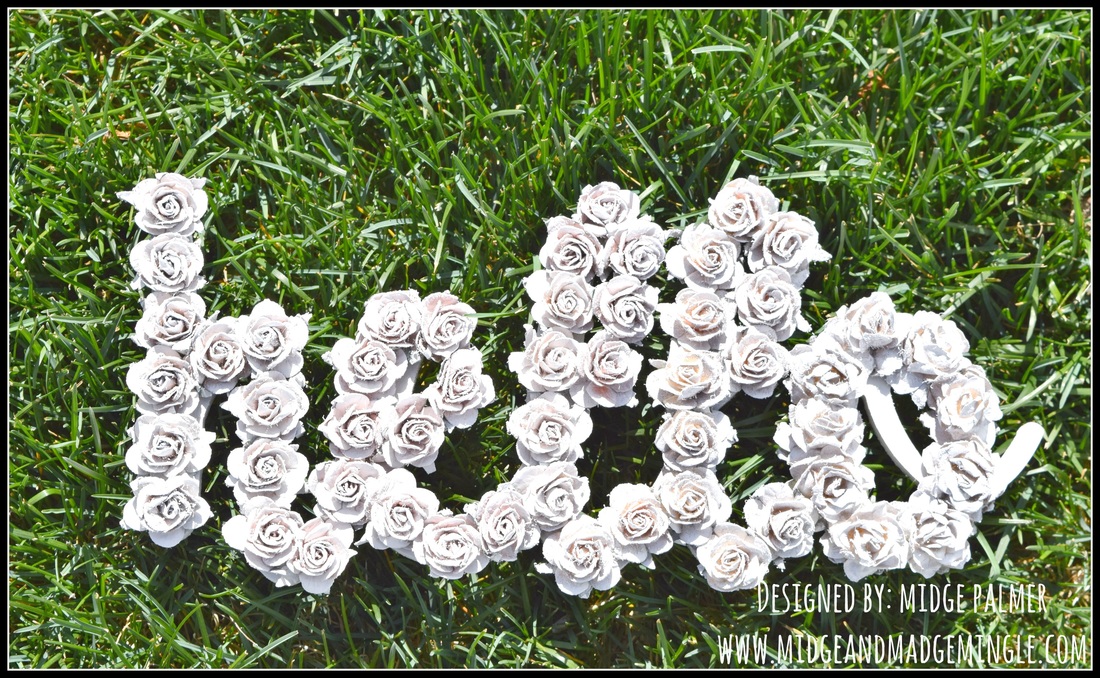
Hello...can you hear me? LOL--This little word was super simple. I found some paper flowers from my craft stash and glued them to the word. (I didn’t have enough to do all the same color, so I used what I had.) After they were glued on, I sprayed a light coat of brown spray paint over the entire thing. When that was dry, I did a heavy coat of white spray paint, making sure to get the edges of the wood. That’s it! - Midge
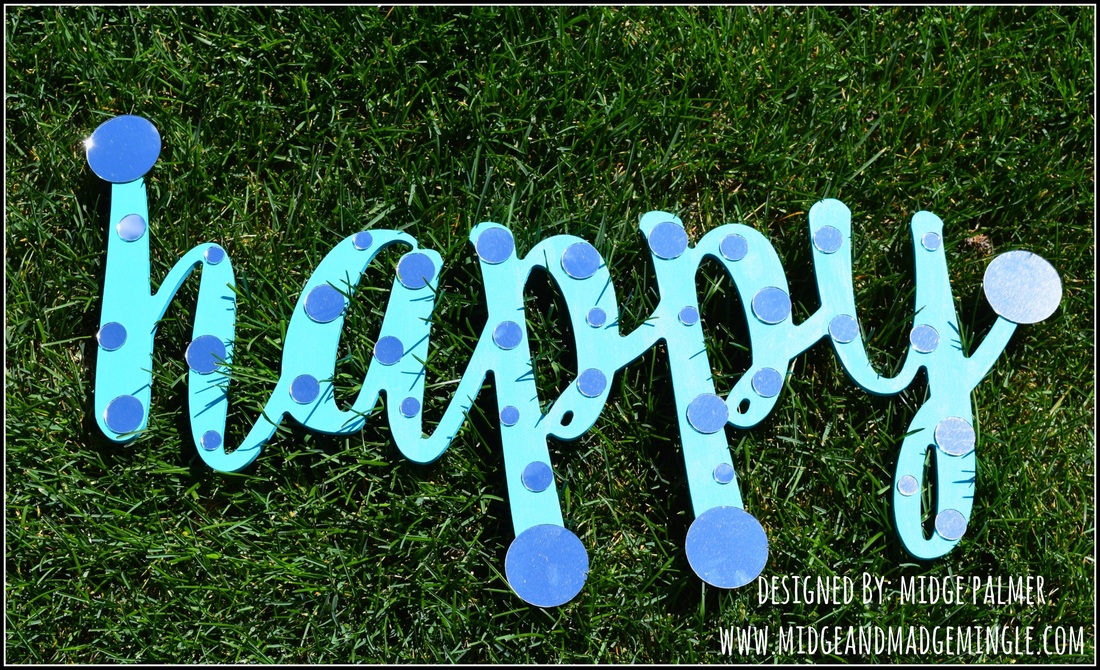
Happy- 2 steps to “Happy” 1-Paint the word (of course I chose something in the turquoise family) 2-Hot glue different sized mirror circles all of the word! (They can be found at about any craft store.) Easy Peasy right!!! I’m sure there are lots of ways to polka dot your words, but this is one of my faves!!! - Midge
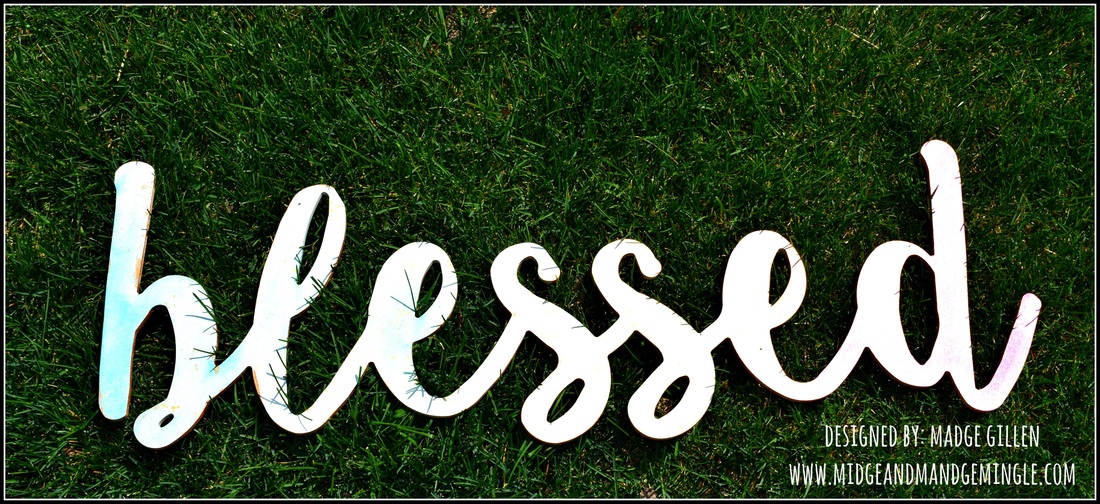
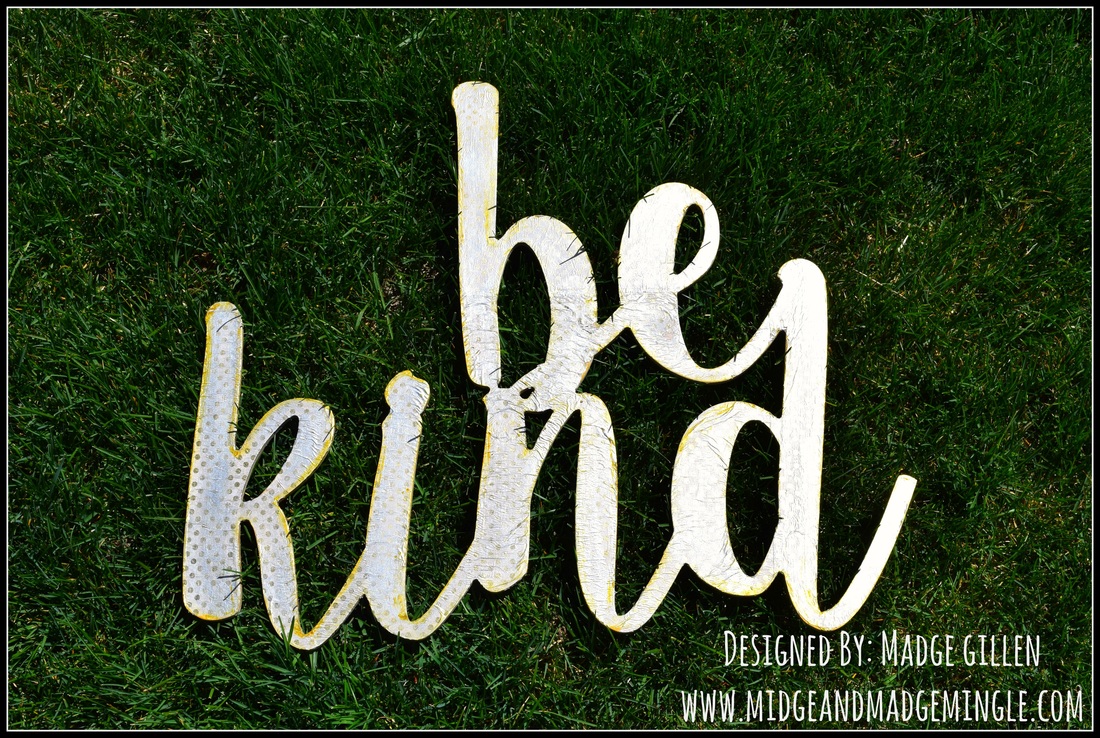
Blessed- I painted this with gesso and allowed it to dry. I then took my watercolors and created this fun watercolor technique. The more water the more the watercolor effect, the less water the less watercolor effect. After it was dry, I painted the edges with some bronze acrylic paint. - Madge
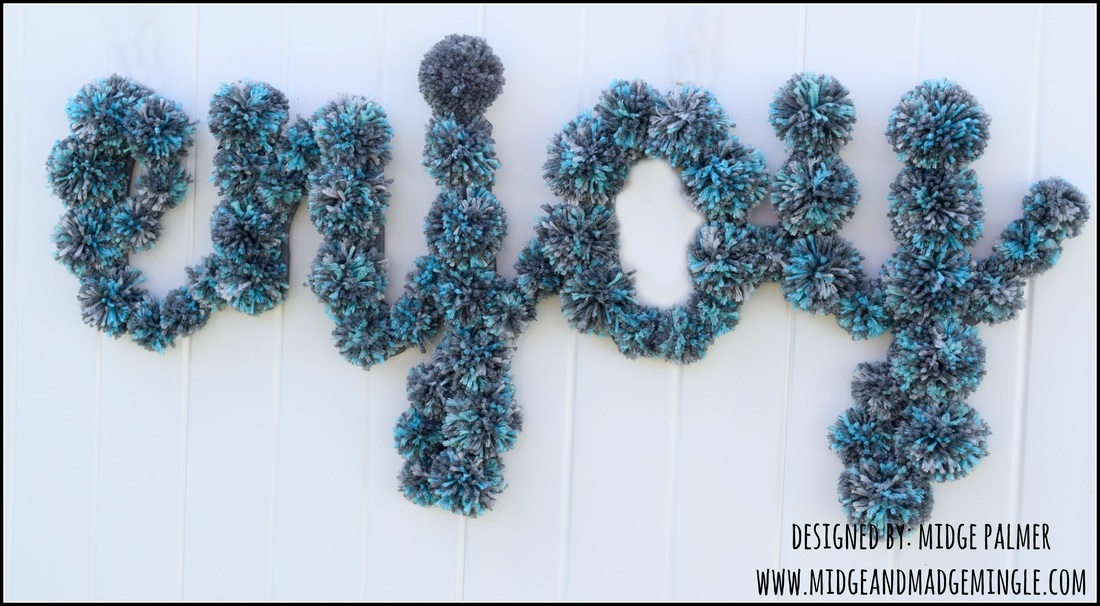
Enjoy- For this word, I simply painted the entire thing with gray spray paint. Using the We R Memory Keepers pompom makers, I made LOADS of pompoms! I used the large and small sized pompom makers. For each pompom I used both variegated and solid gray yarn. I arranged the pompoms on top of the painted “enjoy” how I wanted them and simply hot glued them on. Wah-Lah! - Midge
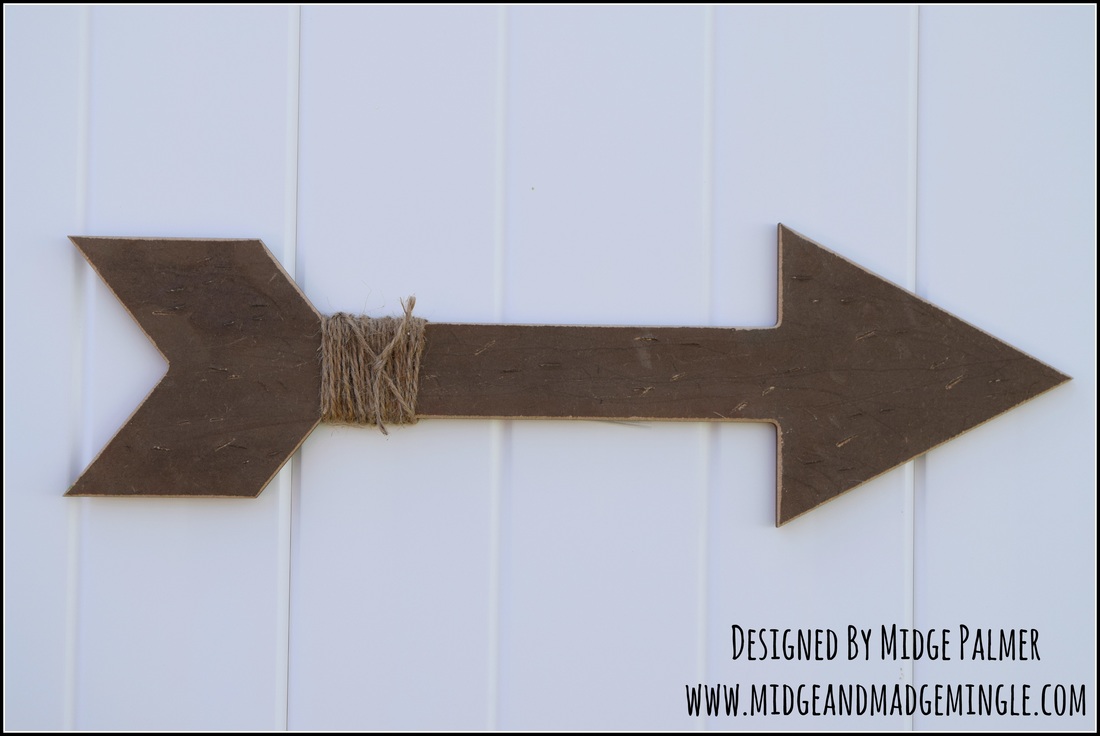
Old Fashioned Stained Arrow- Beat it! Hit the arrow multiple times with a hammer, pliers, rocks, whatever gets the aggression out! Using scissors, I also scratched long lines into the wood. (I wish I would have done more of these) Then Using your favorite stain, (I used a mixture of white vinegar and steel wool, which gives the wood an aged look) cover wood. Allow to dry and embellish to your hearts content. I wanted to keep it simple, so I just wrapped a little jute around the base and tied a knot. - Midge
GIVEAWAY TIME!!!!!!
Go our our Pinterest page Midge and Madge Mingle, follow us and Re-pin your favorite project from the show to be entered to win a $25 gift card to Impressions Shop!
Be sure to check out all of our adventures at #midgeandmadgeadventures
Go our our Pinterest page Midge and Madge Mingle, follow us and Re-pin your favorite project from the show to be entered to win a $25 gift card to Impressions Shop!
Be sure to check out all of our adventures at #midgeandmadgeadventures
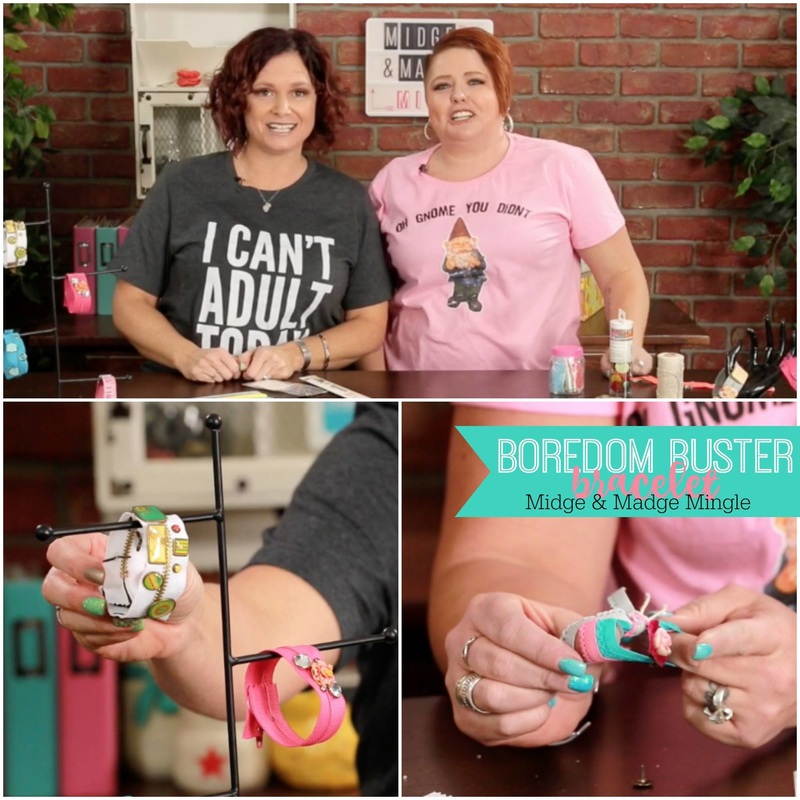
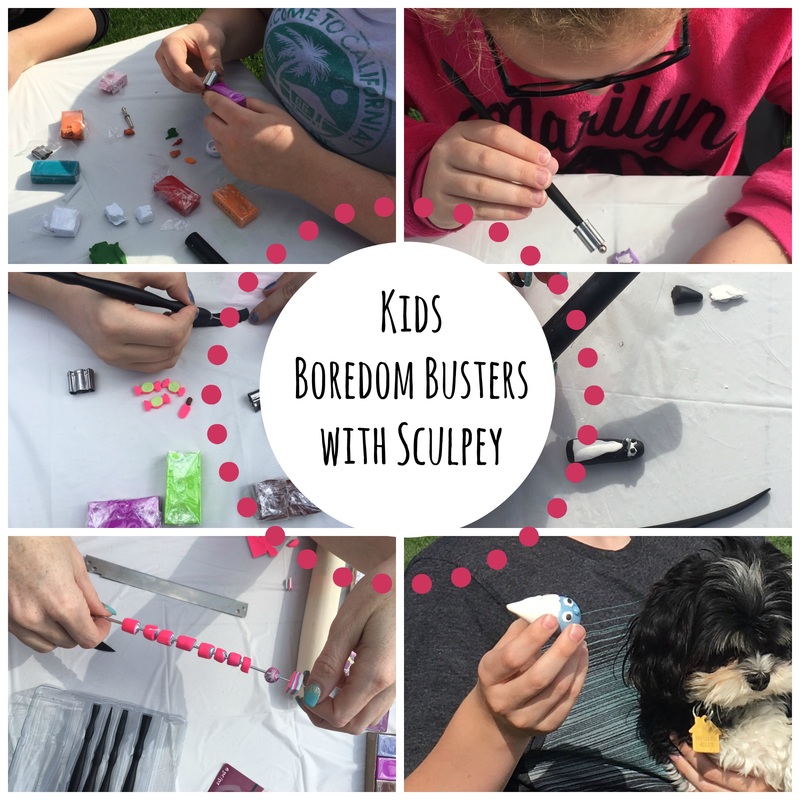
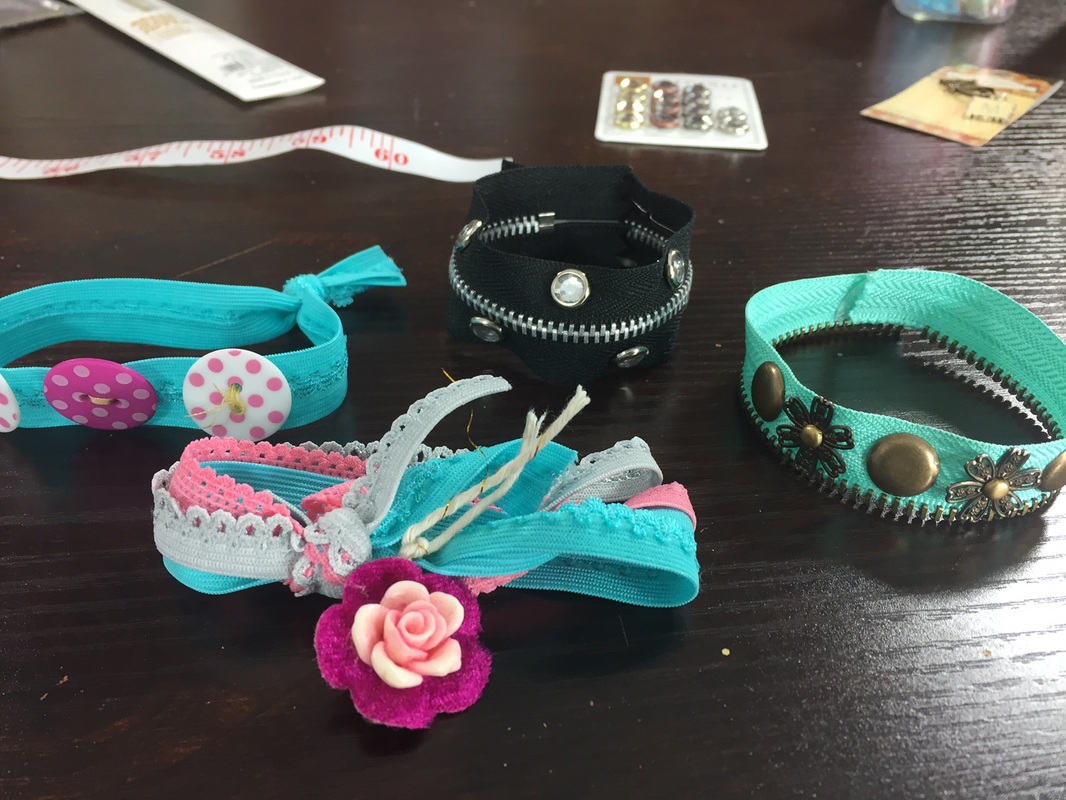
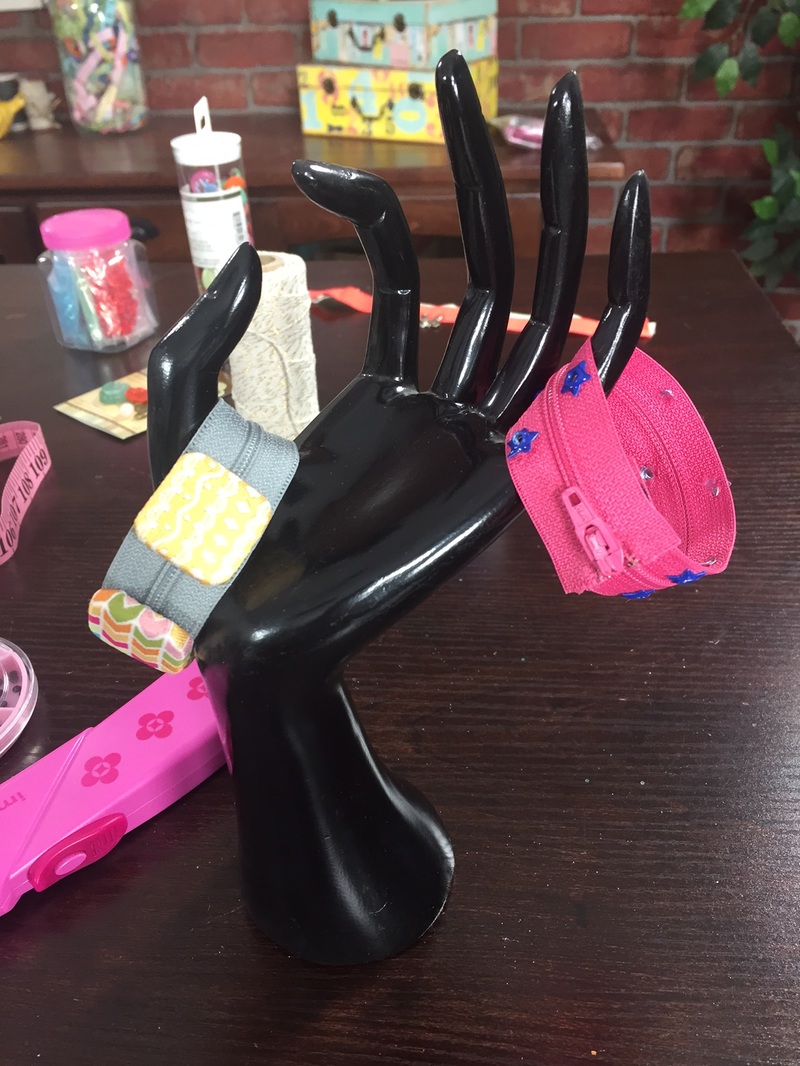
Are you tired of hearing your kids say, “I’m bored”? Well now you can tell them to “zip it”! Today we are sharing some unique bracelets using items from your sewing stash like, zippers, elastic, buttons, and more. Be sure to check them out!
Do you see why we say Boredom Buster? These bracelets are awesome! What a fun way to teach your kids how to sew on a button, use their hands, and to get crafty!
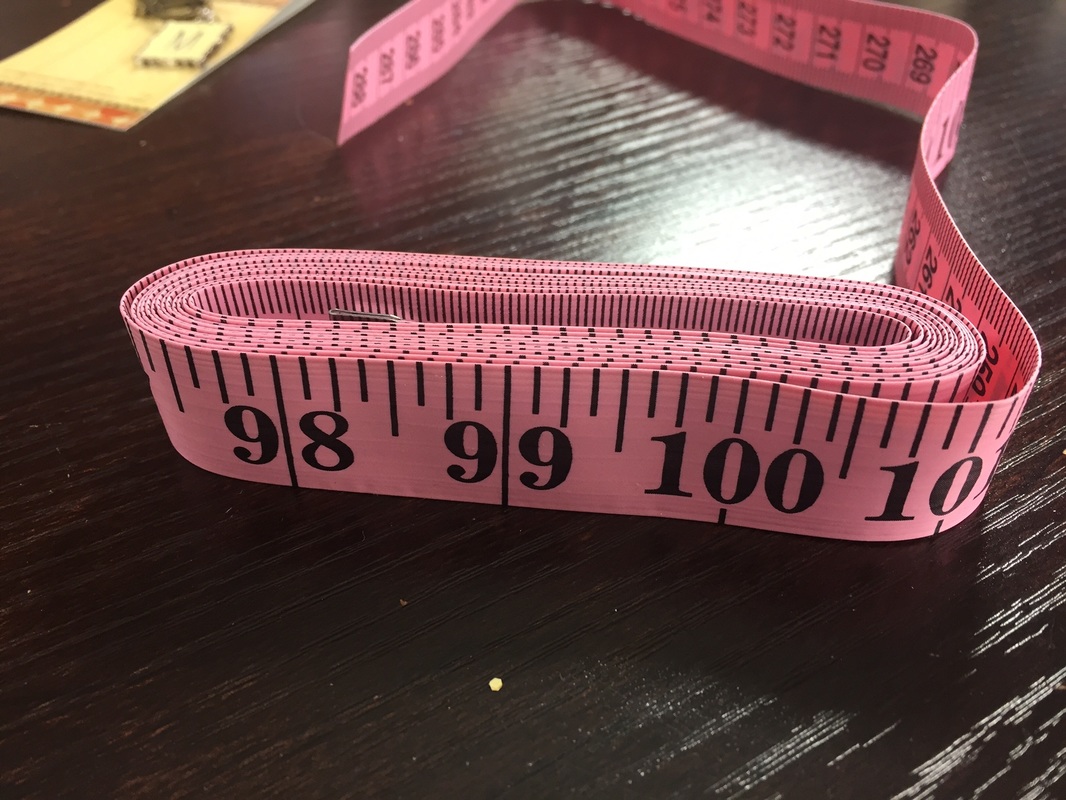
I just love how Midge uses this tape measure to create a fun and unique bracelet! Be sure to go through your stash, see what odds and ends you have laying around. Let the kids get creative!
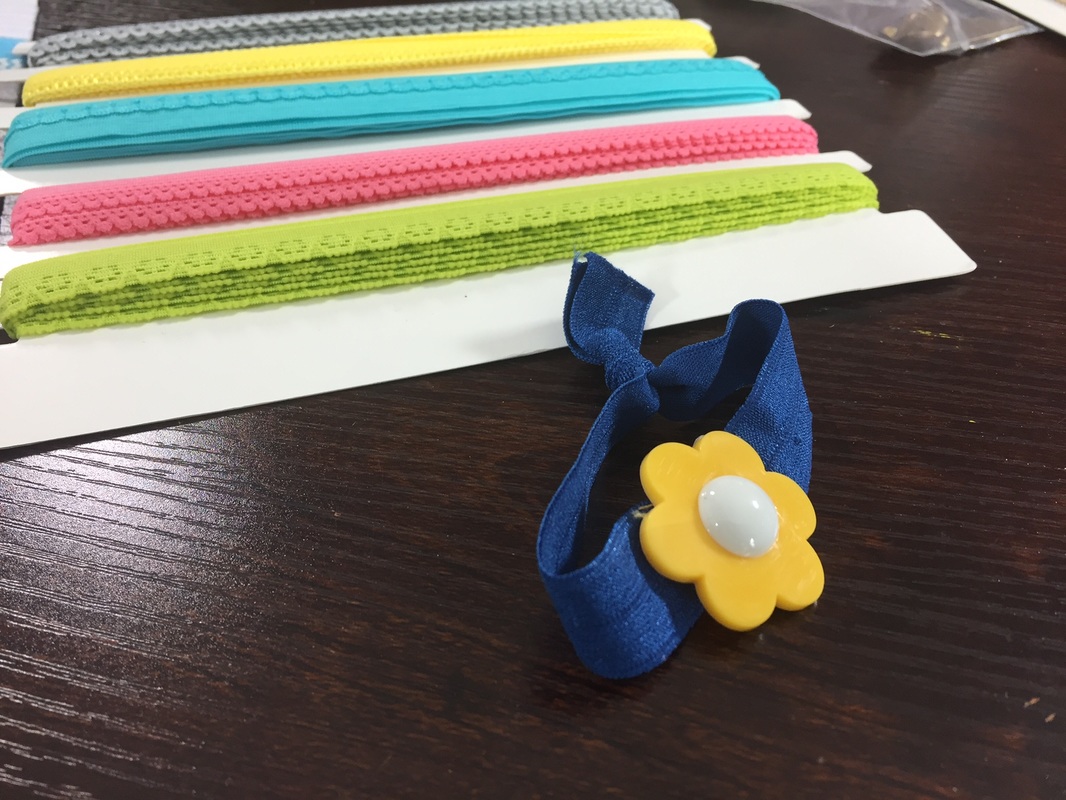
You may think, I don't have fun colors of elastic what else can I use? I have to say, check out the grocery store, Wal-Mart or anywhere that may carry hair elastics. They now have different colors that come in a bundle that are already tied into knots so your kids could just decorate them if you wanted!!
By the raise of hands who has eyelets in their stash that are gathering a little bit of dust? Now is the perfect time to get our your Crop-a-dile and create a fun unique bracelet!
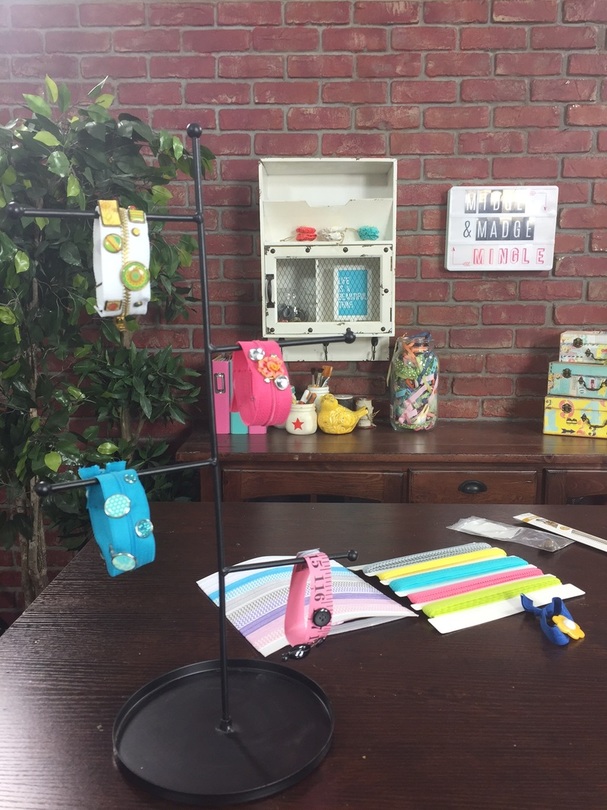
I am in love with the different ways Midge used Brads and different embellishments on her bracelets!!
We hope that you enjoyed todays show, and our Kids Craft- Boredom Buster Bracelets. Be sure to leave a comment, which enters you into our weekly giveaway!!! EEK!!! Until next time friends!!
We hope that you enjoyed todays show, and our Kids Craft- Boredom Buster Bracelets. Be sure to leave a comment, which enters you into our weekly giveaway!!! EEK!!! Until next time friends!!
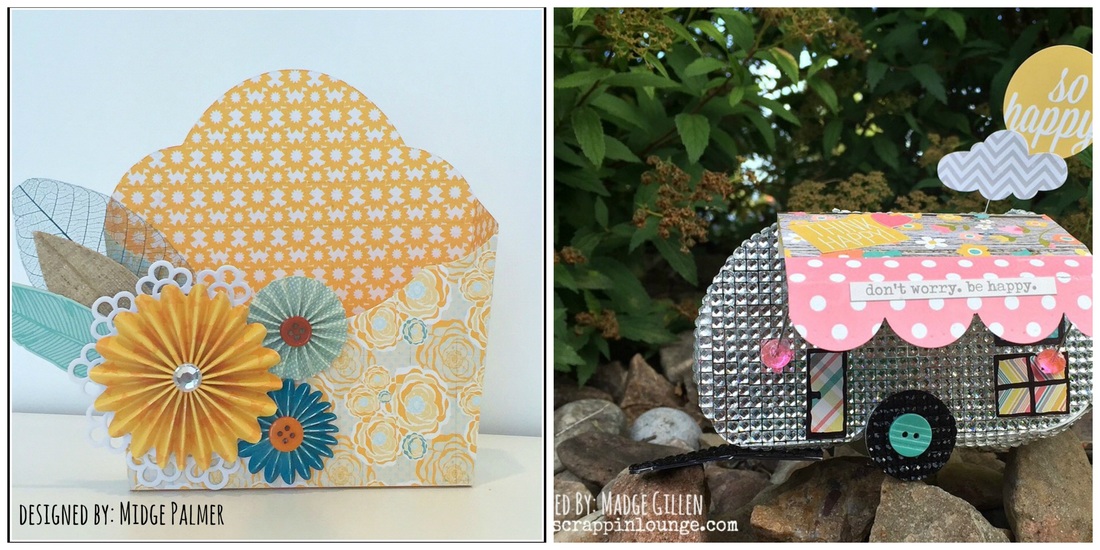
Who loves Bling??? Well today's fun project includes some fabulous bling and an amazing 3-d die. Eileen Hull has created an amazing Scoreboards XL Die by Sizzix! If you don't know what die I am talking about this is it!
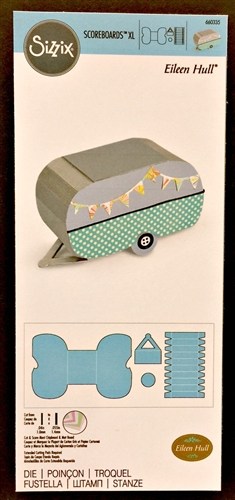
I met Eileen Hull for the first time, it was at the SNAP conference in April of 2015. Midge and I met up with Eileen again at CHA 2016 where we taught a make and take at the Scotty trailer. Eileen is such a gem, she is super sweet and so full of talent we loved listening to her talk about her very own trailer Scotty. You can read all about Eileen and her awesome travels HERE. Eileen has always had a love for Chipboard and she created the amazing Scoreboard Dies, which is what this awesome trailer die is. Be sure to stop by Eileen's blog and read more about her and her awesome journey HERE. We love Eileen's dies and are thrilled and honored to receive this awesome package! What better time to pull out these cute dies and create awesome projects!
Here is the fun Trailer:
Here is the fun Trailer:
Let me show you how I created this fun little guy….
Step ONE
Step ONE
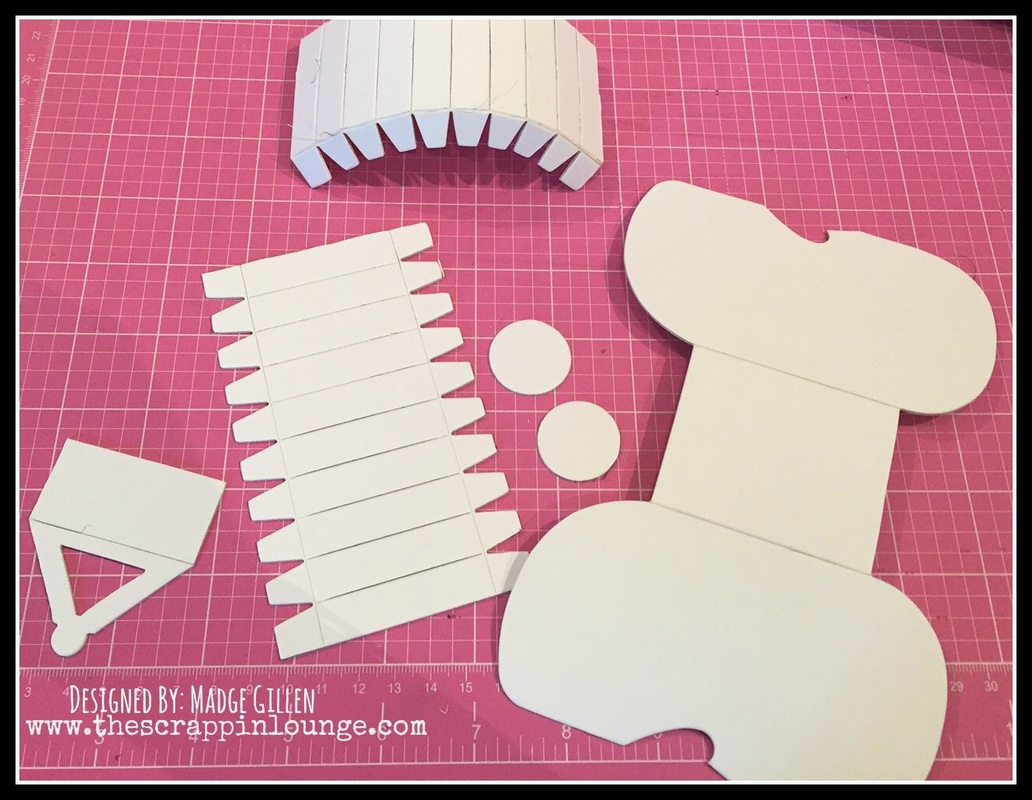
Be sure to take your Scoreboard and cut all of the pieces on the die. You will then want to cut out one more piece that looks like a fence (LOL) and one more tire.
Step TWO
Step TWO
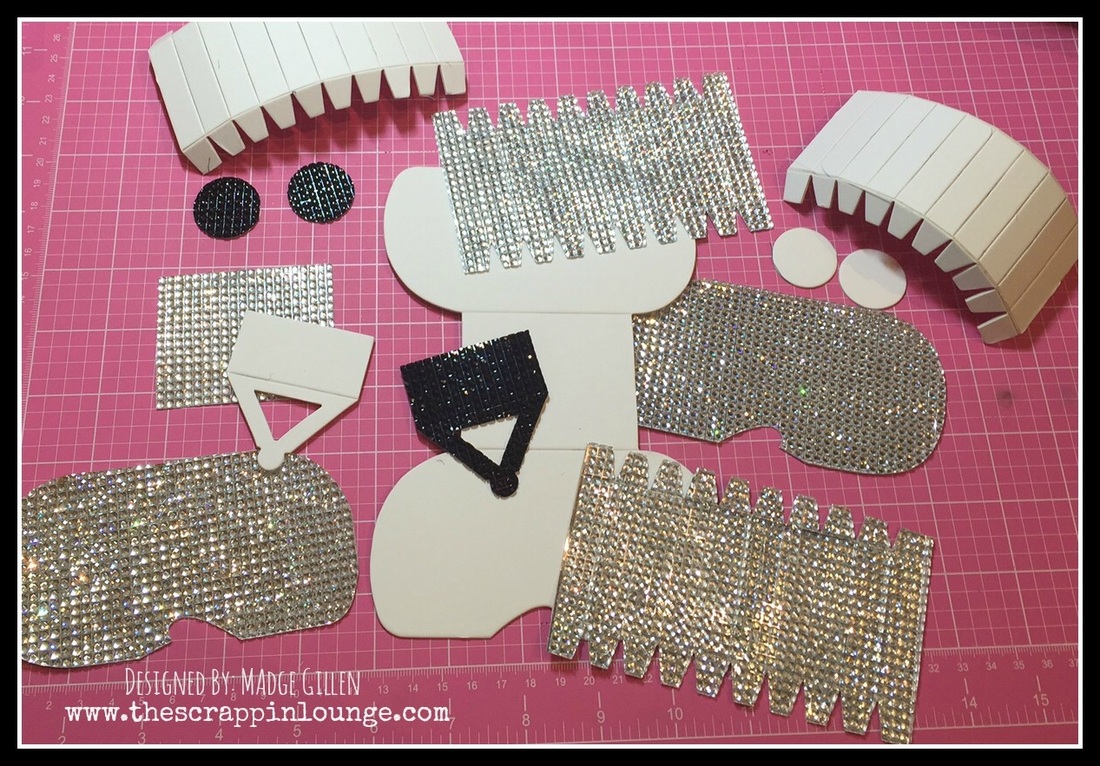
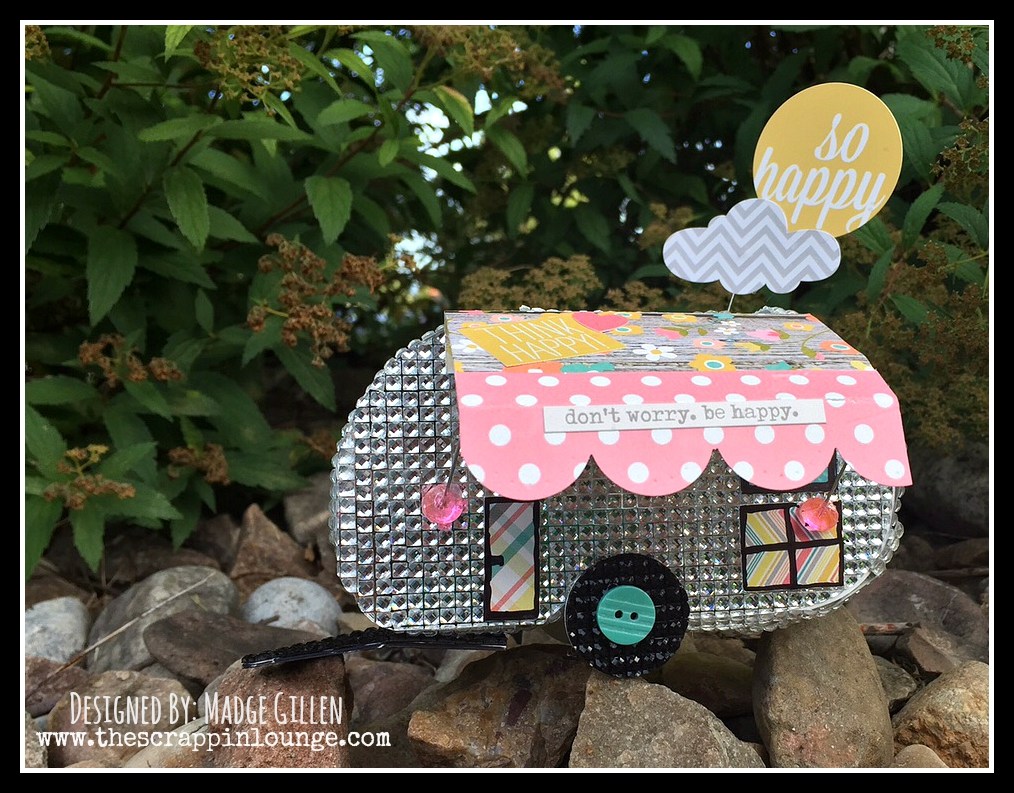
I used a Clear Dazzling Diamond Bling sheet. I took the bling and placed it face down onto the die, and ran it through my Big Shot Machine. I cut three small pieces out of black bling and placed them onto the die with the silver bling. This is for the tires and the hitch. Be sure to repeat the process twice for the side of the trailer. (for the sides of the trailer I cut the bling off along the sides of the large pieces that make up the sides of the trailer)
Take the adhesive off of the bling and adhere to the scoreboard.
Step THREE
Take the adhesive off of the bling and adhere to the scoreboard.
Step THREE
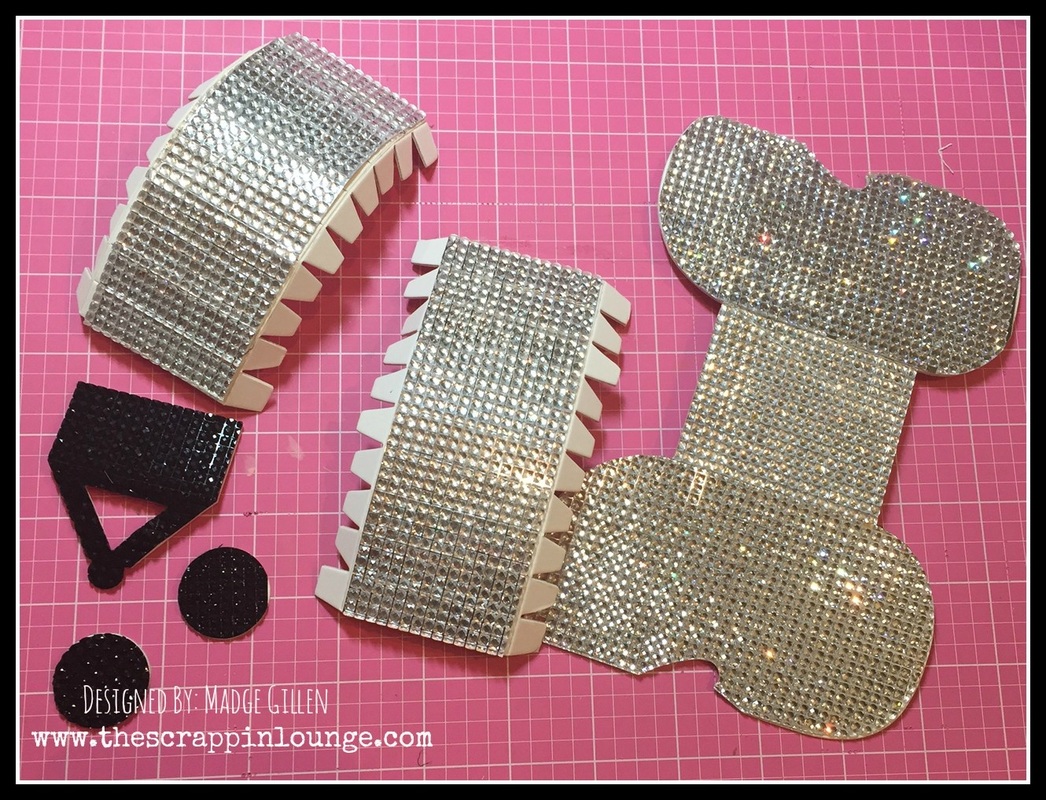
Step FOUR
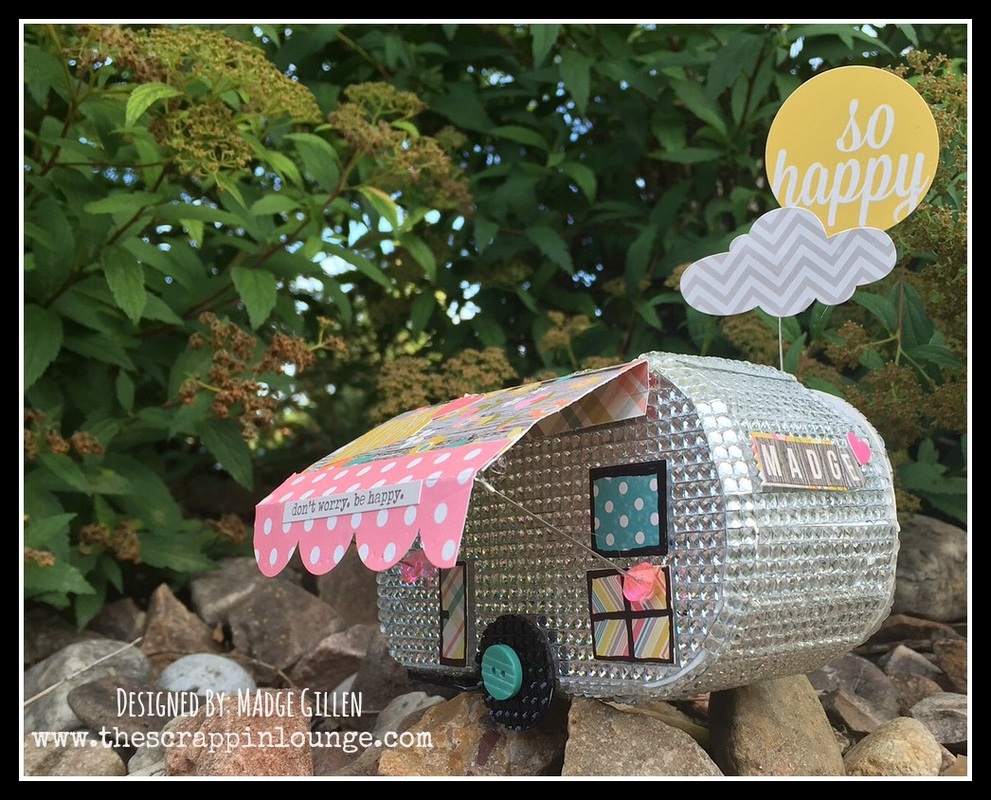
I then took my hot glue gun and adhered the trailer together. Then I added some fun embellishments. I used buttons on the trailer wheels and used Simple Stories Stickers to create the windows and the door, the awning, and the license plate. I took two straight pins to act as the awning poles. Scoring with my score board the awning so it would stand up. I also used another straight pin to adhere the cloud and the sun to, so it looked like the sun and a cloud above the trailer. Taking a black marker to the window and to door to give a little more dimension, and adding the “MADGE” license plate.
This trailer was so fun to make! Bling Out your own trailer! Here is one more look at this cute little guy!!!
Midge used the Flower Pocket Die, and created this cute pocket gift box. There are so many different possibilities that Midge had a hard time deciding which direction to go. The pocket box was a perfect fit for a gift that she was delivering.
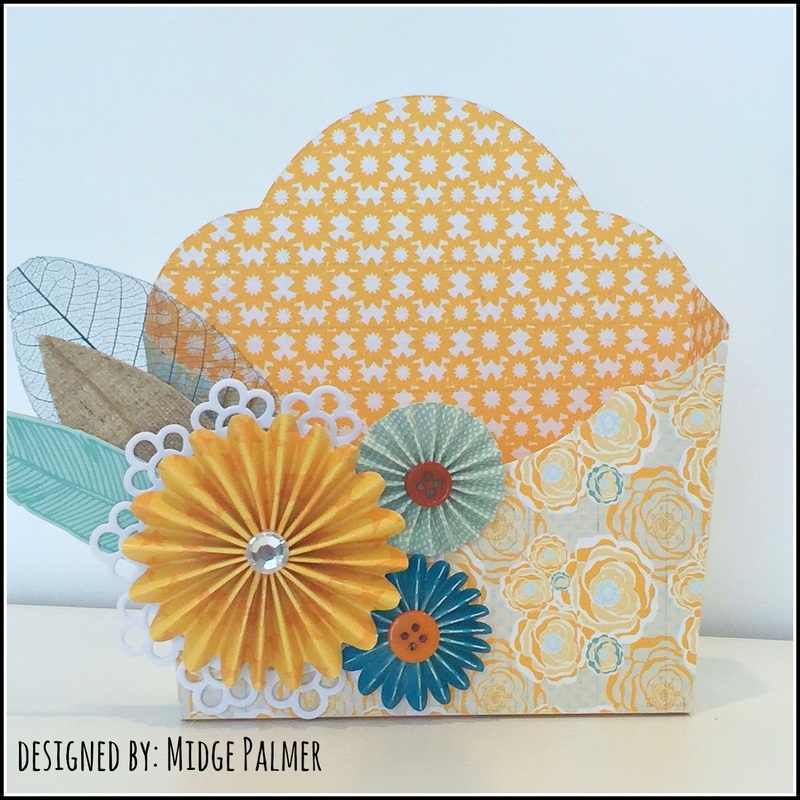
Midge used a double sided piece of pattern paper, three rosettes, mini doily, and three feathers. Putting the box together is a snap! Eileen's dies come with not only the cut the scoring. Assembling this pocket box is a breeze.
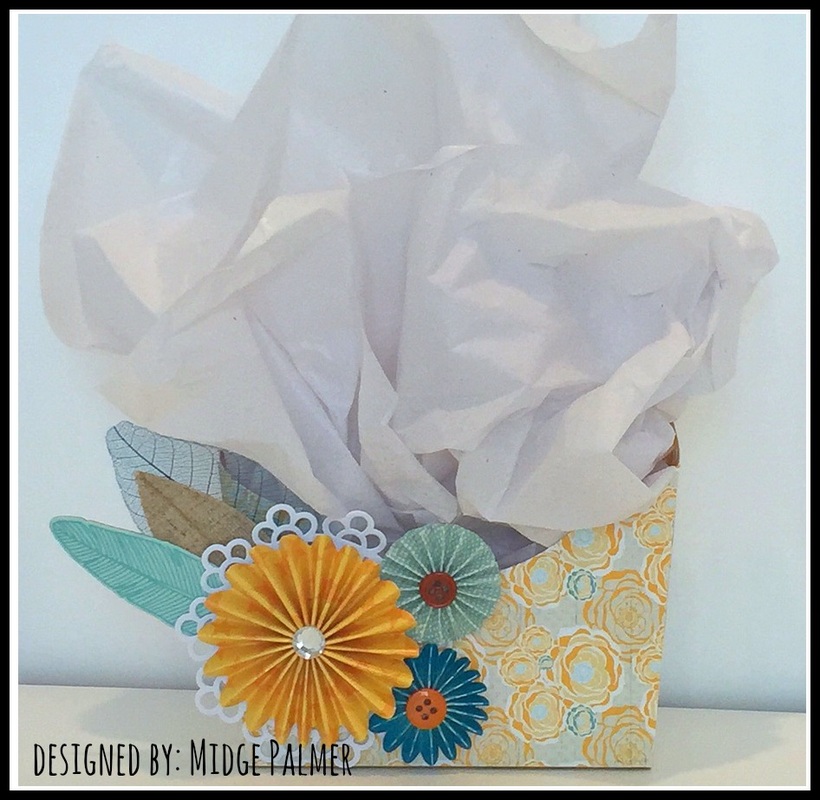
All wrapped up and ready to gift. You can get this die and all of the other Eileen dies HERE
We would like to Thank Eileen for having us as guest designers on her blog today. Be sue to join us every Monday on My Craft Channel "Midge and Madge Mingle"!
We would like to Thank Eileen for having us as guest designers on her blog today. Be sue to join us every Monday on My Craft Channel "Midge and Madge Mingle"!
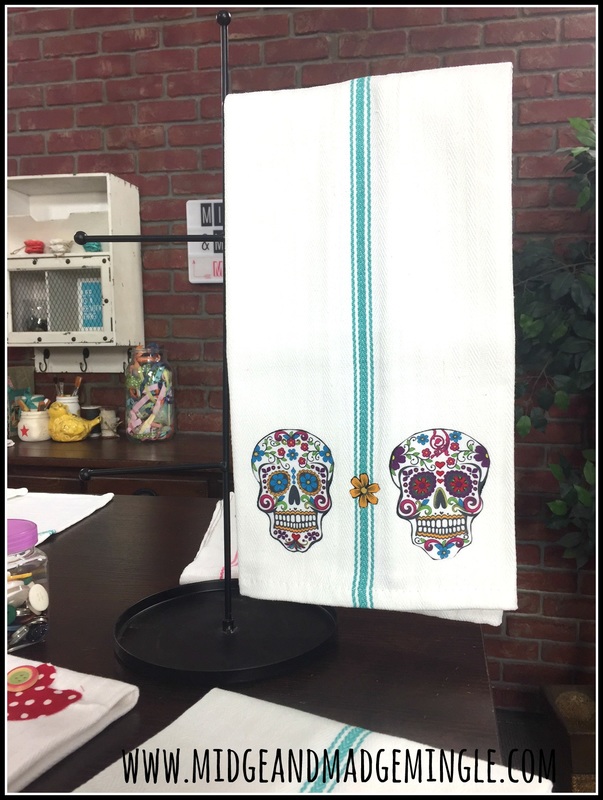
Hello friends!!! We are super excited for this weeks episode of Midge and Madge Mingle on My Craft Channel!!! This week we are showing you how to make your very own DIY Designer Dishtowels!! Yes, I said designer dishtowels for half of the cost.
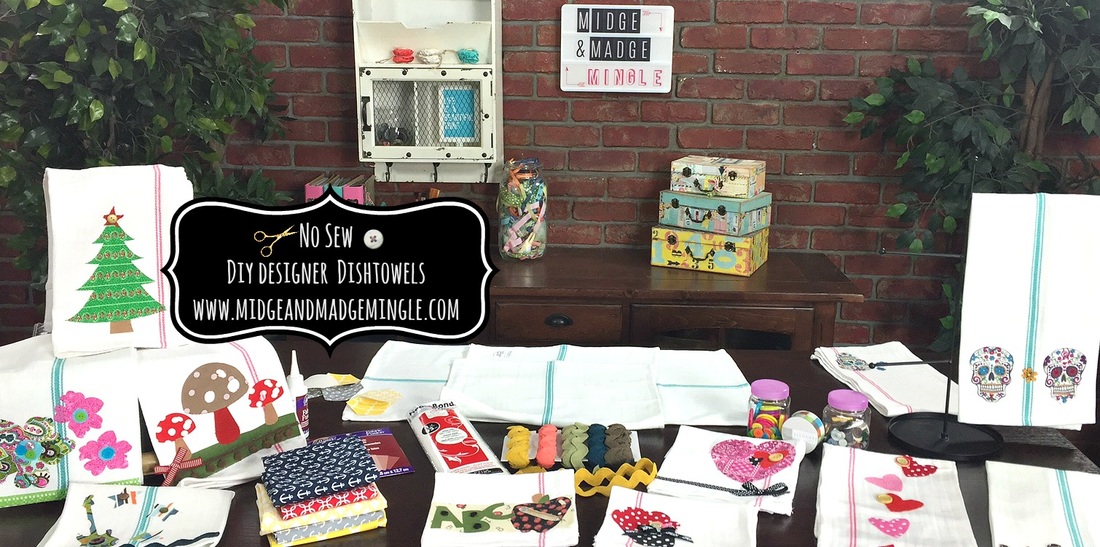
Friends do you like what you see? Watch as we show you what you need to make and complete your very own Designer Dishtowels.
See, we told you that they were No Sew, and that they were as easy as pie! Pull out your fabric stash, order you some tea towels, grab some fun embellishments and get to work!!
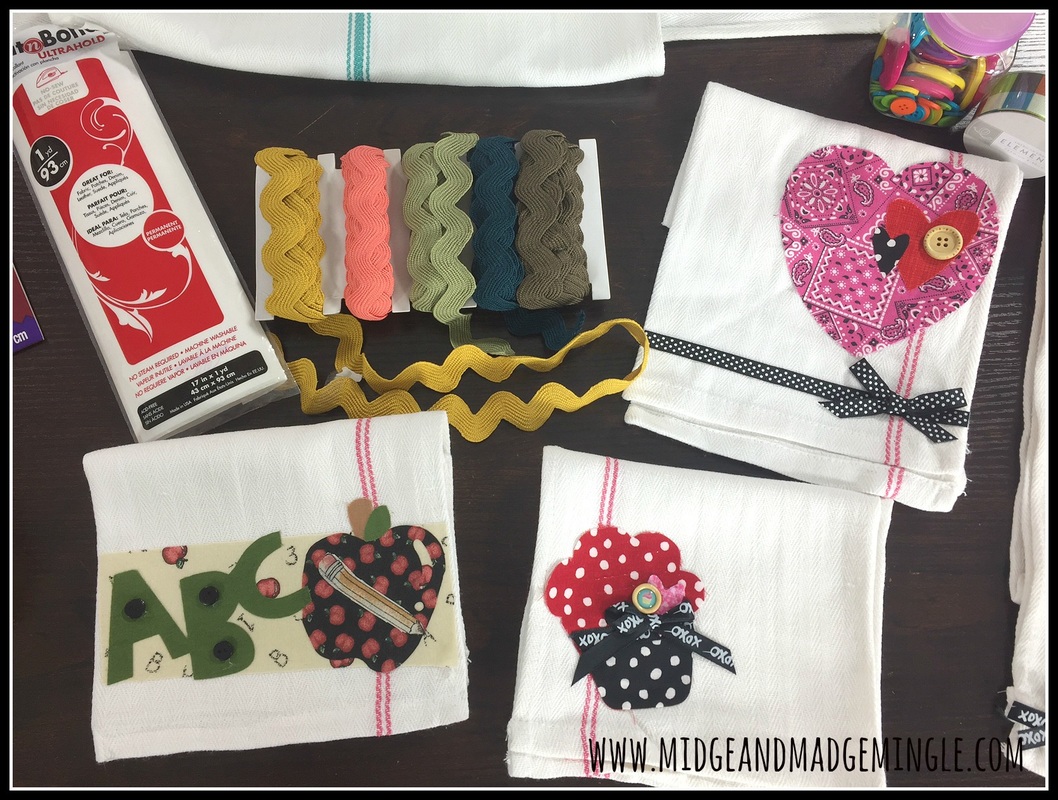
Top Tip: Be sure to get the ULTRAHOLD Heat-n-Bond to make it easy!!!
Let's go over the items that you will need in order to complete your designer towel.
*Tea Towel
*Fabric- either a die cut, or fussy cut your image that you want on your towel.
*Heat-n-Bond Ultrahold
*Iron
*Embellishments
*Sharp Scissors
That list is a short list! I had to go over it several times to make sure that is ALL that you need to complete your fun towels!!!
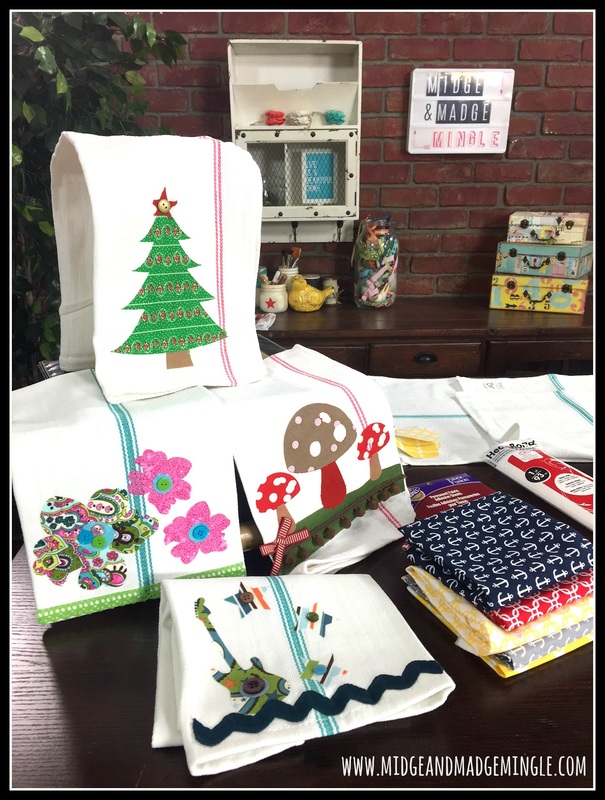
These Designer DIY Dishtowels are perfect for any special occasion, holiday, season or just because! Oh and wait! They are also great to give as gifts! Think Christmas neighbor gifts! Hmmmmm.... That just gave me a fun idea! LOL
Remember when I said fussy cut? Check out this fun towel that Midge made!!! Isn't it the cutest thing ever?? YAY!!!
Be sure to leave a comment, share and pin if you like this fun Mingle!!!
Hugs- Madge
Be sure to leave a comment, share and pin if you like this fun Mingle!!!
Hugs- Madge
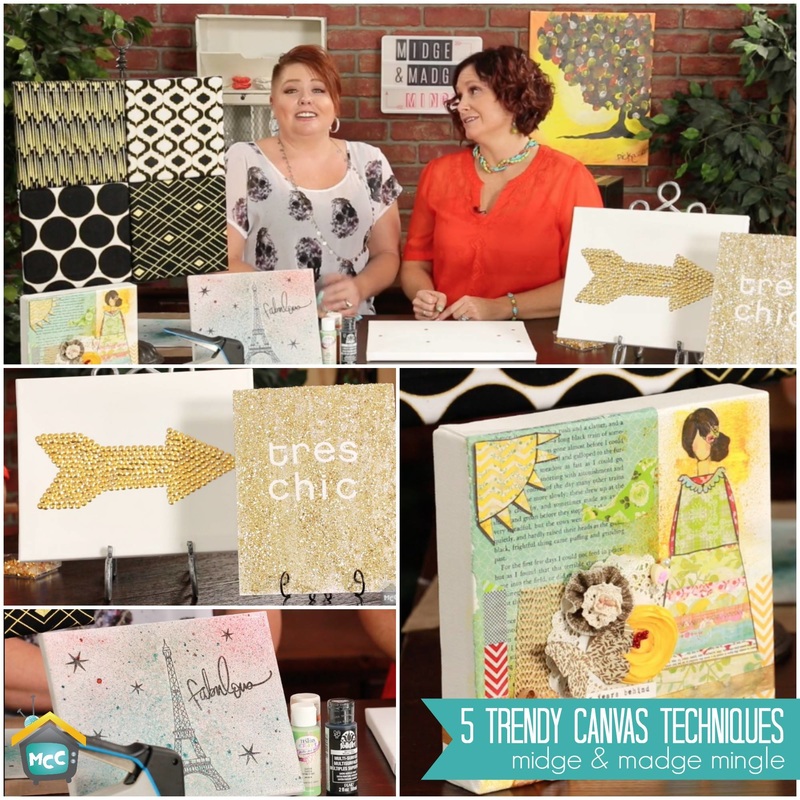
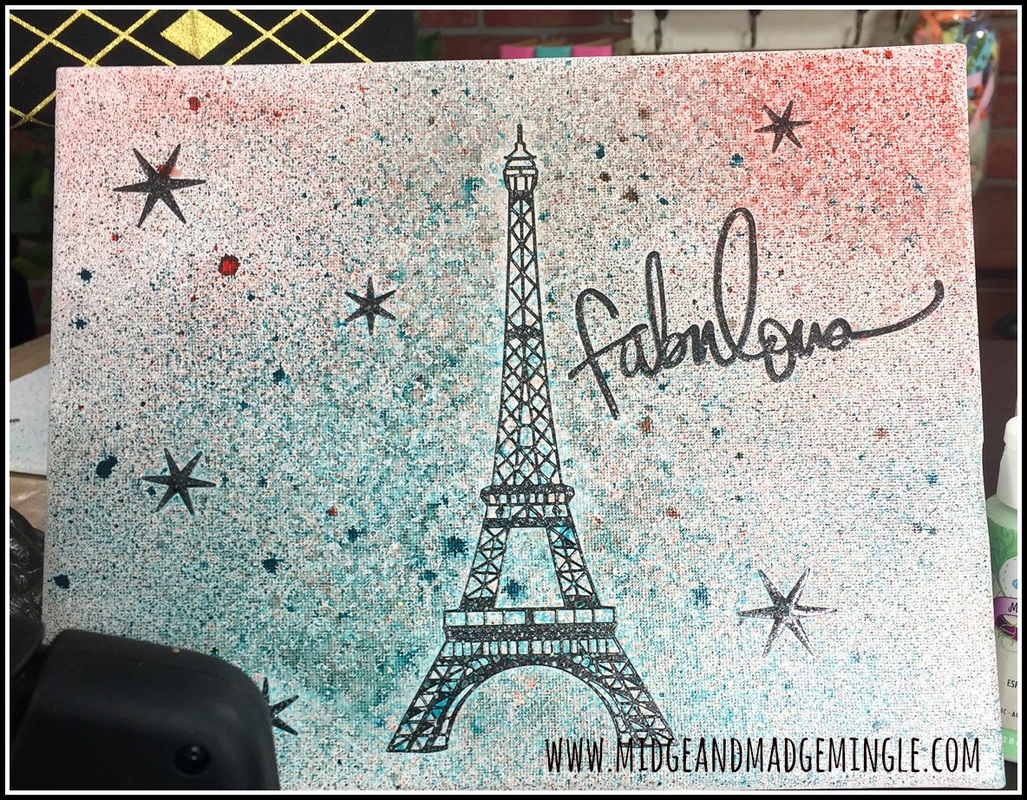
Hello friends! We hope that you are having a great week so far! Welcome back to another fun Mingle. This week we show you 5 different ways to create a trendy canvas. Now these are NOT your mamma’s canvas! J Watch now to learn tons of trendy canvas techniques to liven up your home.
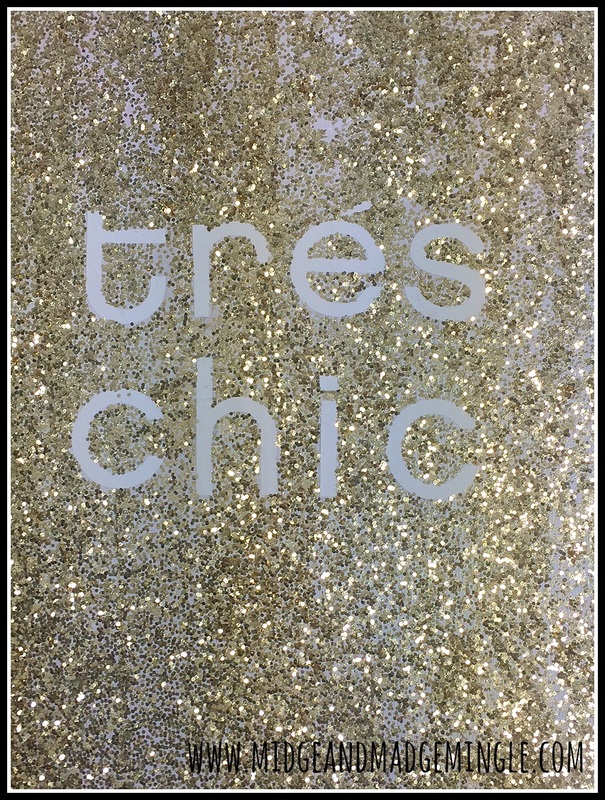
We all love to have Canvas in our homes, offices and craft rooms right? Check out how Midge does this awesome Glittered Canvas using stickers, white paint and gold glitter.
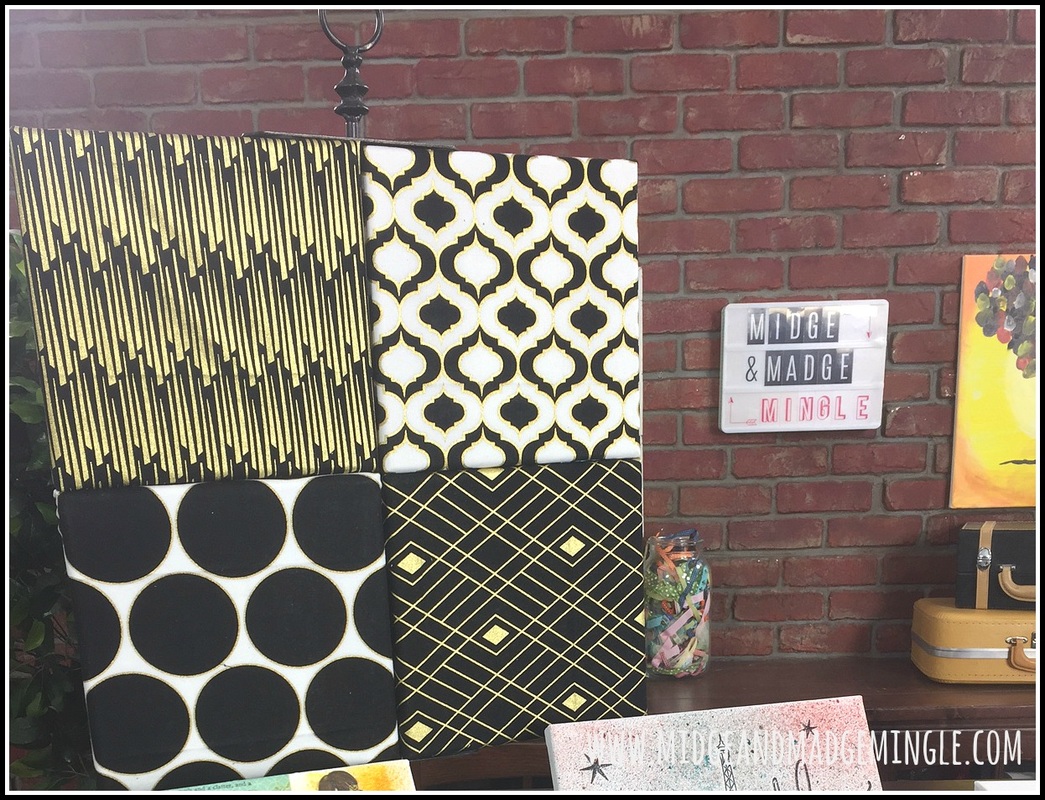
I am sure many of you have seen this before! Wrap a canvas or four (snicker snicker) in fun trendy fabric! It is easy as 1. 2. 3... Iron Fabric, lay canvas face down on fabric and wrap like you are wrapping a present. Be sure to use a staple gun for a nice tight wrap! Don't you just love the Classic colors Black, Gold and White?
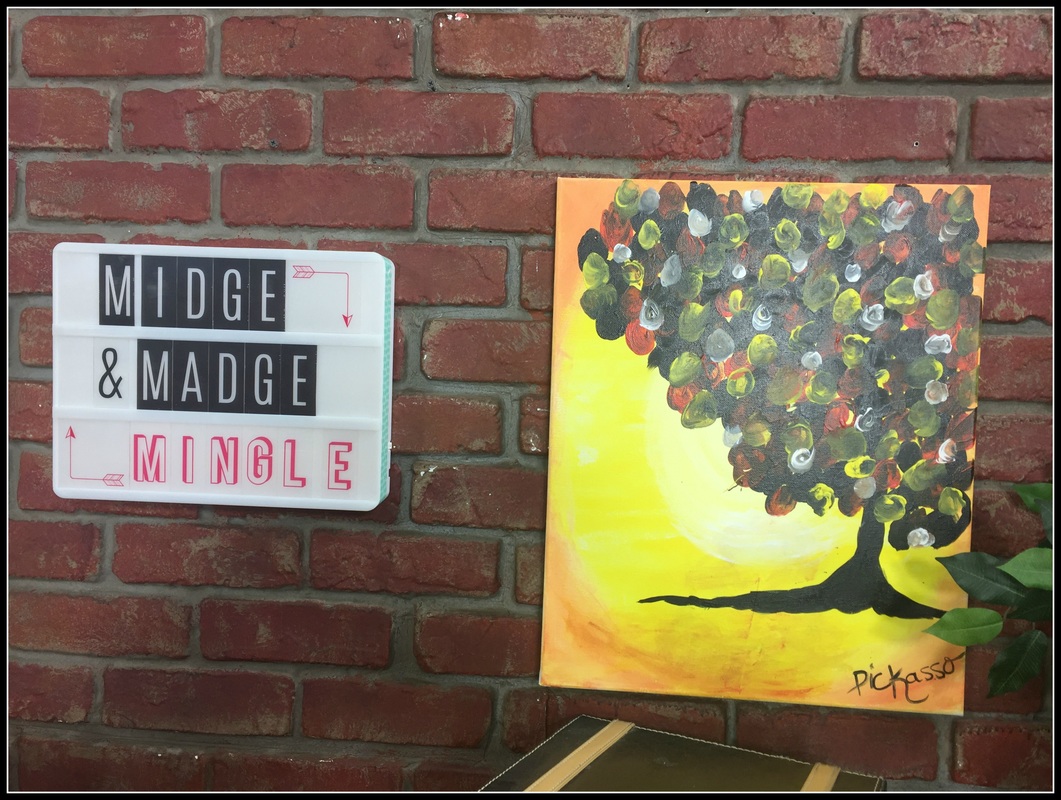
We all love Girls night right? Who has been to "Paint Night"? So fun laughing until your cheeks hurt and watching your canvas come to life! We love to paint with acrylic paints! Check out the Painting on the wall behind us!! So fun!
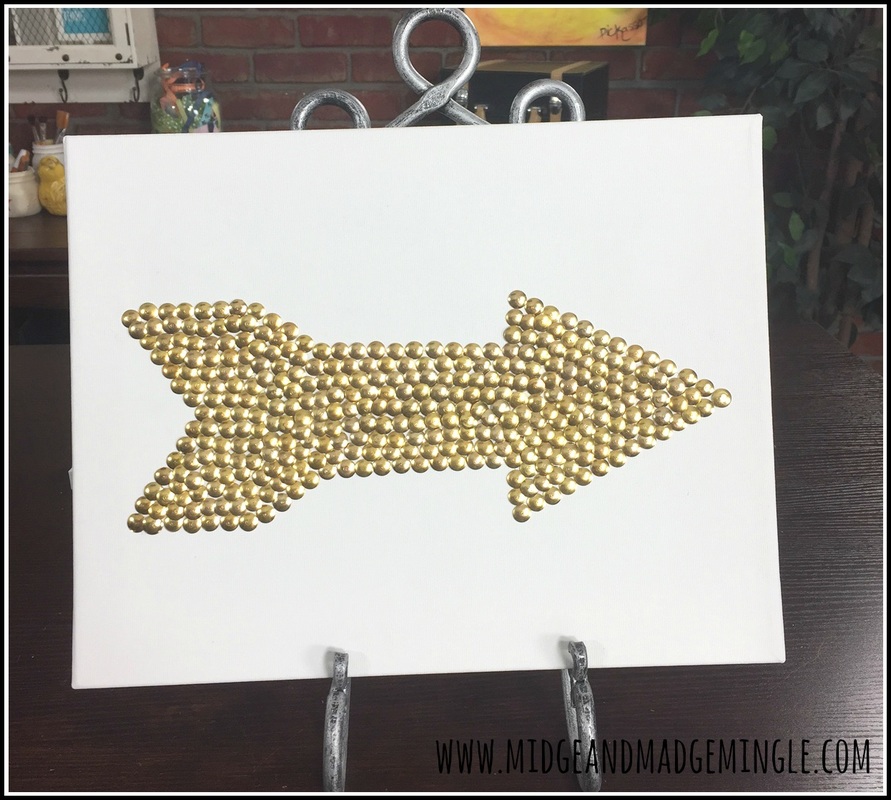
Thumb Tacks! What in the world!! Check out the awesome Arrow that Midge created out of thumb tacks! She explains that is is super easy to create this masterpiece! You can even get your thumbtacks at the dollar store! BOOM! Isn't that awesome??
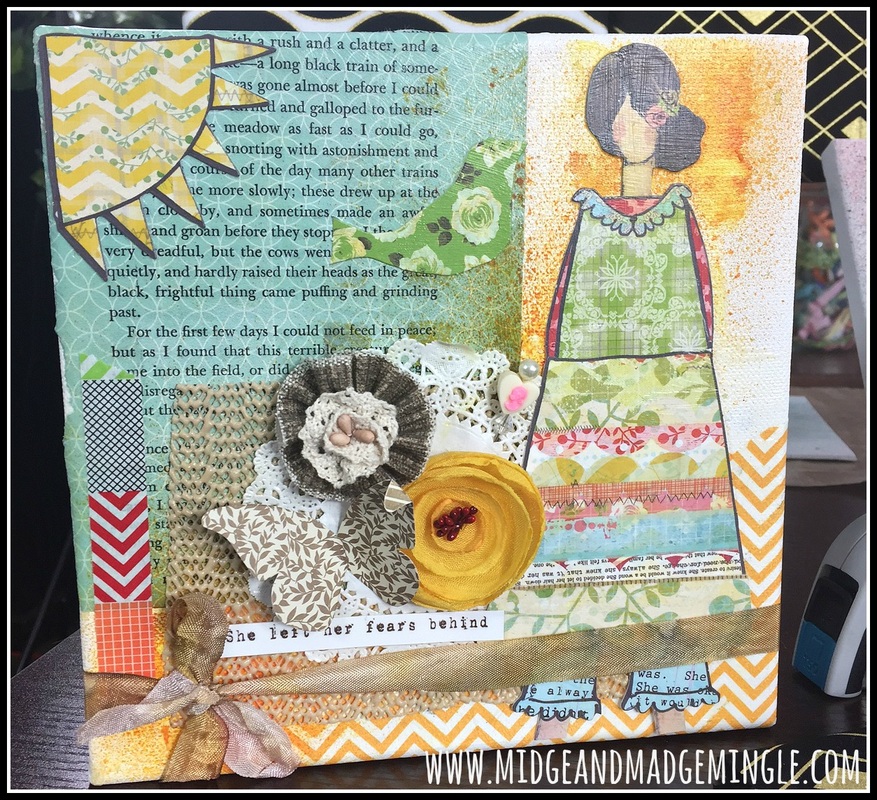
This fun Mixed Media project is one of my all time favorite projects that I have made. Using a fun square canvas, I used the amazing Christy Thomlinson's stickers (I got these in a kit when I subscribed to her kit club) the bird, the girl and the sun are all her stickers that made this canvas come together super fast. I used washi tape, flowers, butterfly, mesh, straight pin and ribbon to add dimension. But my favorite part is that I printed chevron onto a sheet of tissue paper and used mod podge to adhere it to the canvas. I then used Heidi Swapp Color Shine on a book page and also used the mod podge. So fun but so cute! The possibilities are endless with canvas and mixed media!
Last but not least the super fun canvas just using spritz! You can layer and layer your spritz until you get the look that you want. Hang it alone or with some friends on a wall or on a plate stand! You decide! Super fun all the way around!
Be sure to Pin it to Win it!!! Whoop Whoop!!! Hope you have a super crafty day!! Hugs- Midge and Madge
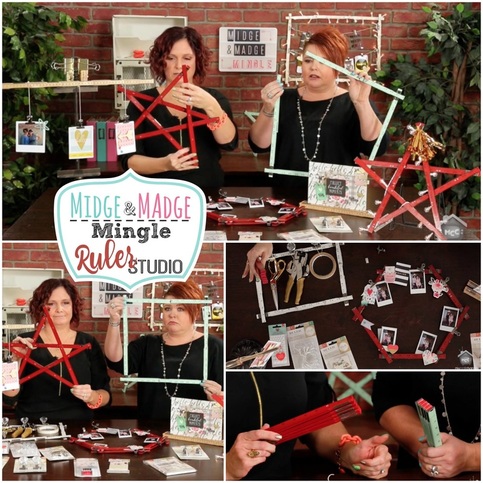
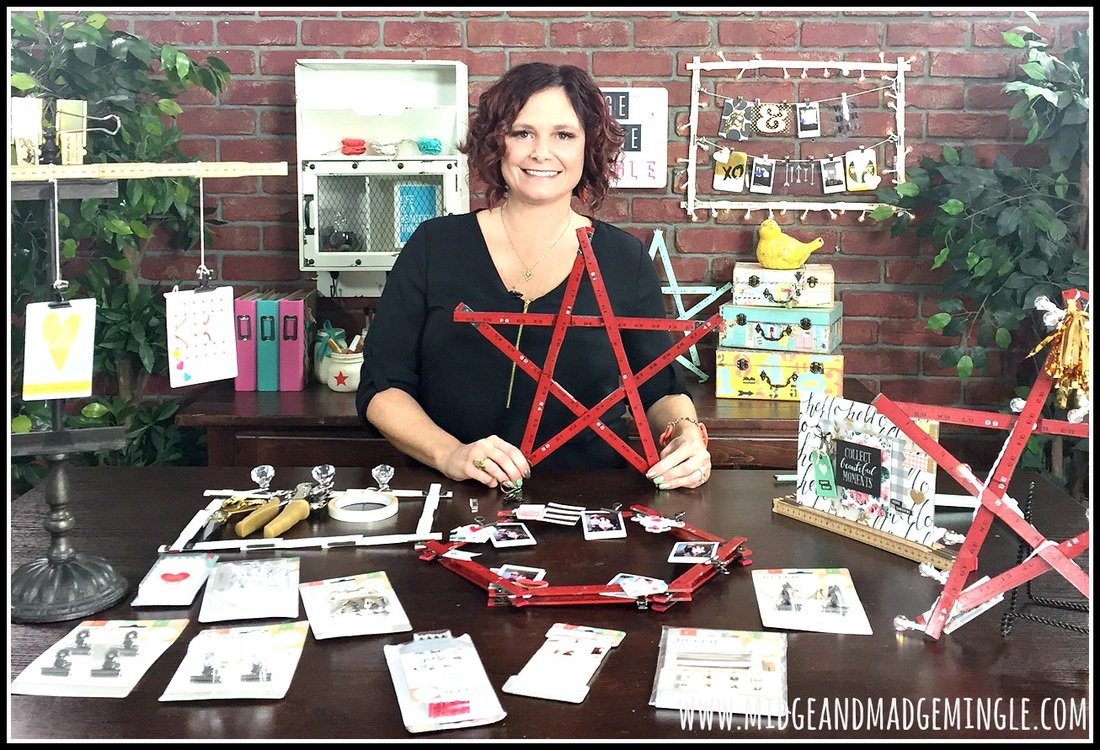
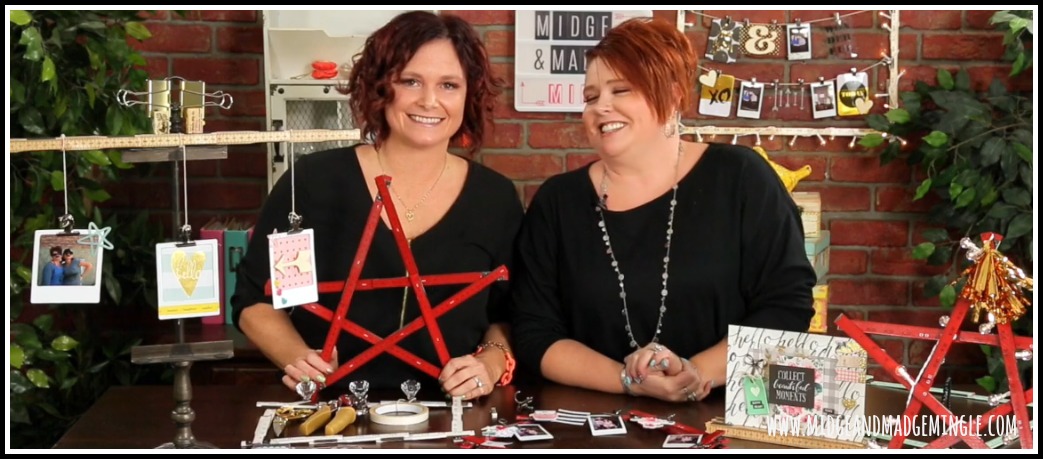
We R Memory Keepers has done it again folks!!! Ruler Studio products were hot, hot HOT at CHA. And we couldn’t wait to get their hands on them. Be sure to see the multiple ways these vintage inspired items can be used. Oh SNAP!
Aren't those rulers awesome?! We couldn't get enough! Playing with them is fun, making different shapes and thinking of fun new uses for home decor! EEK!! As you can see Midge and I were in deep concentration in the opening thumbnail of this "Mingle". (Snicker, Snicker) Check out the different photos below for an up close and personal look!
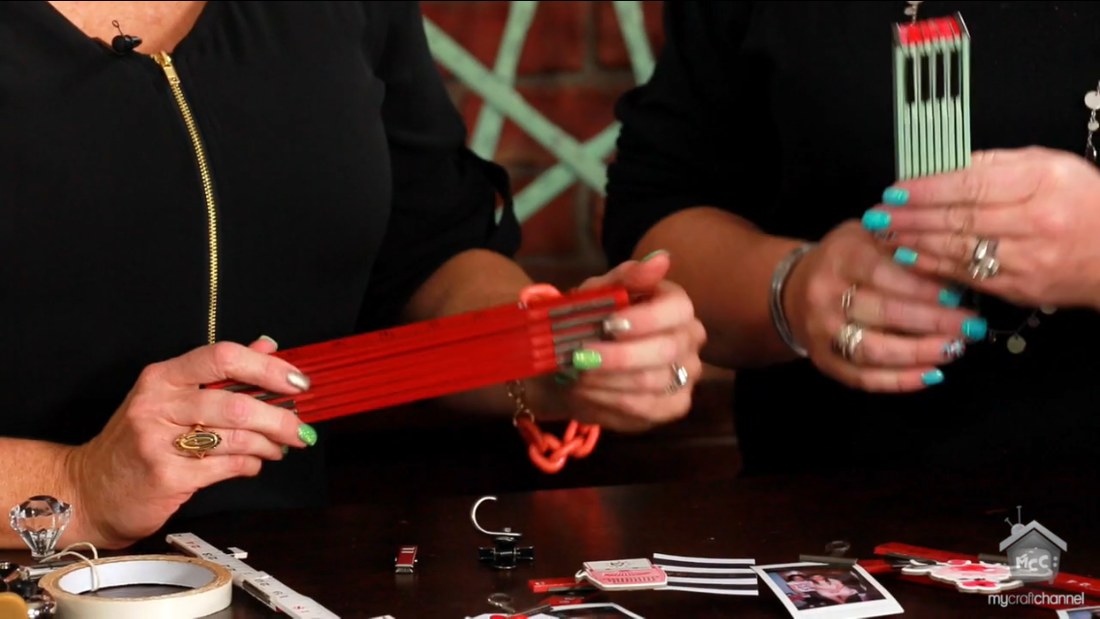
We are in love with the variety of colors that these rulers come in !!
Did you find this pic on our FB page? We have a awesome contest happening, so be sure to check out the details on our FB Page HERE!!!
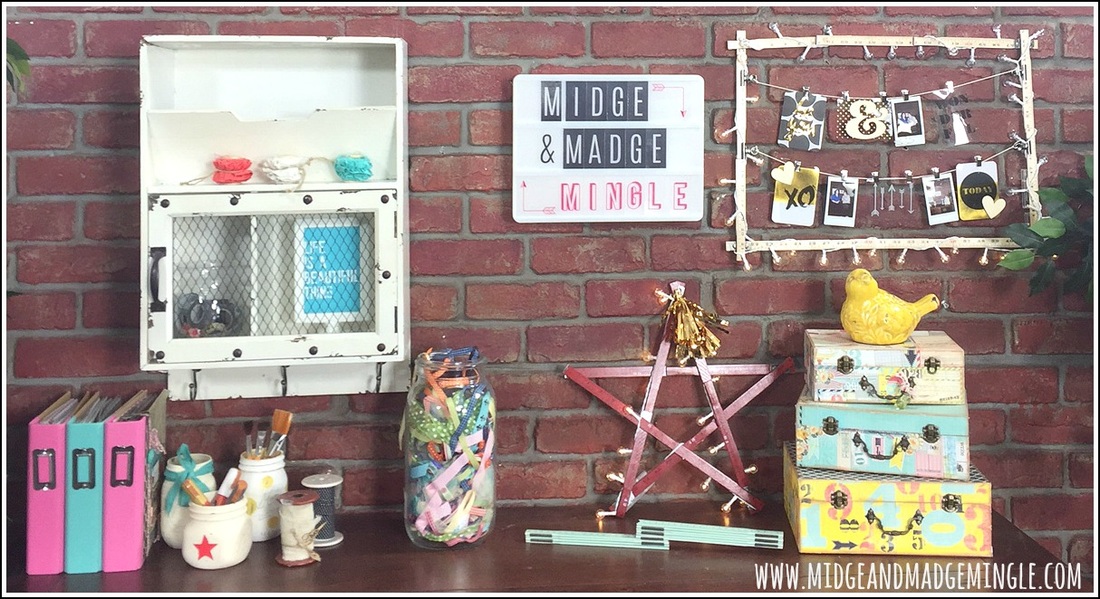
Check out the rectangle with the lights on it! Simply adorable!!
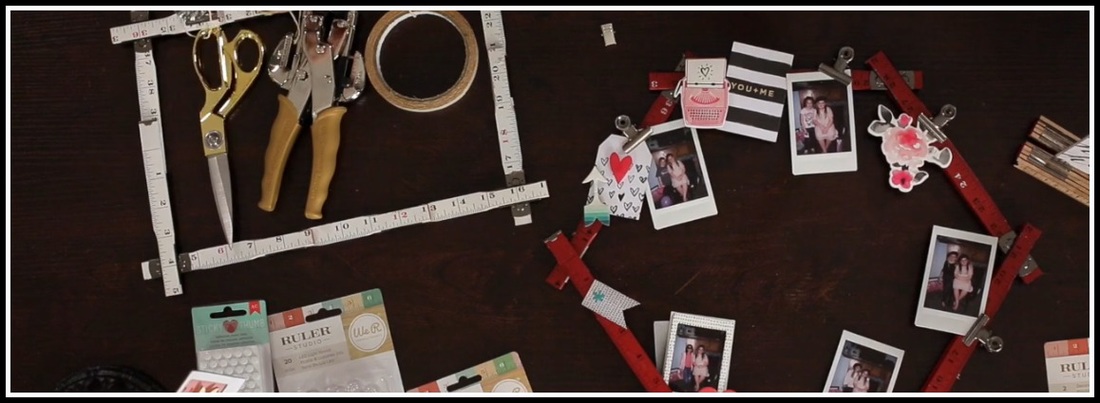
The possibilities are endless with these rulers! There are so many different fun things that you can use them for!!
Order your Ruler Studio Products at We R Memory Keepers. Be sure to join us next Tuesday for another Midge & Madge Mingle!!!
Midge & Madge
Two Best Friends doing what they love and loving what they do. Learn more about us in the About Us tab above.

Archives
October 2019
September 2019
March 2019
November 2018
October 2018
July 2018
April 2018
March 2018
November 2017
October 2017
August 2017
July 2017
June 2017
May 2017
April 2017
March 2017
February 2017
January 2017
October 2016
September 2016
August 2016
July 2016
June 2016
May 2016
April 2016
March 2016
February 2016
December 2015
November 2015
October 2015
September 2015
 RSS Feed
